Branch Setup
A "branch" is a store, location, or warehouse with an independent inventory. Branches usually represent a physical locations, but they might also be useful for financial reasons. To a limited degree, reporting and data is possible by branch; however, branches are not considered separate companies and there should be no assumption that all data and information is recorded by branch. Branches do provide a lot of capability especially with regard to customer accounts and inventory; however, they aren't ideal for all situations.
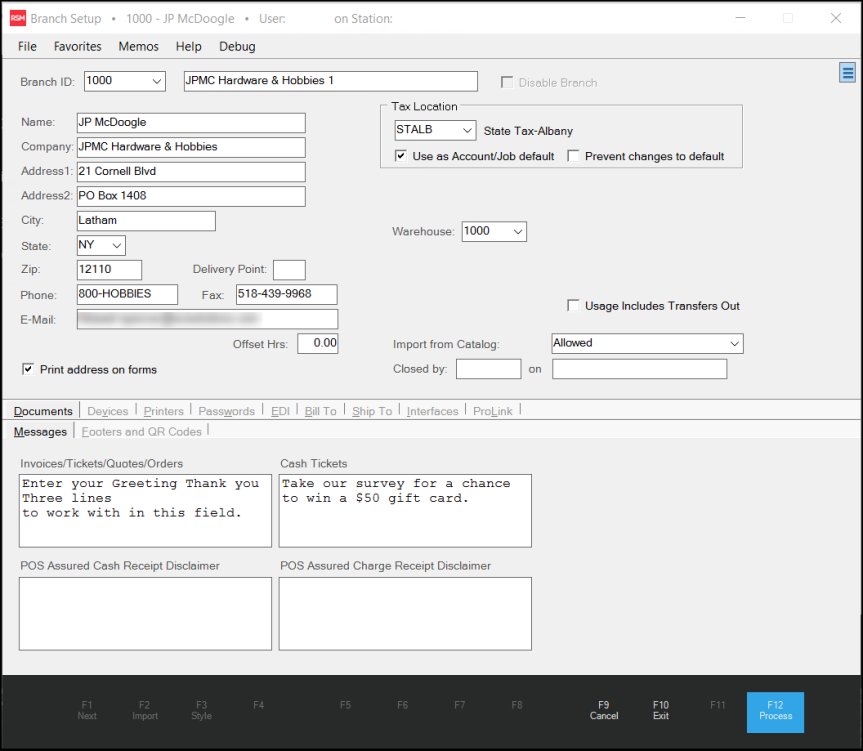
If complete separation is required, you should install separate instances of the software each with its own independent database. This Branch Setup form is used for adding or modifying information related to the branches your company maintains and is accessed from the "Branches" option located on the Maintenance area's Database menu. New branch locations cannot be added without support assistance. Once a branch is defined, and any data is associated with the branch, they can be difficult to remove; however, branches can be disabled.
Branch ID
Use this field to specify specific branches in the application. This can be an up to four character entry, but typically this entry is four digits.
Branch Name
In the field beside the Branch ID, you can enter the name the branch location is known as.
Disable Branch
Select this check box to prevent access to the selected branch and to re-assign all users and devices to another branch you specify. Use this option when you are closing a branch location permanently; this is not for a temporary closure, such as during physical inventory, etc.
Address Fields
The address layout is slightly different depending upon the regional settings of your servers. The same address format is used in a wide range of transactions and forms; however, each area may use the address differently. Branches, customers, contacts, jobs, and vendors all have associated address data.

Name
Use this field to enter the name associated with the address. This is typically the first (top) line when the application displays or prints the address. This entry can be up to 50-characters in length.
In some cases, the Name address field performs additional functions that might not be obvious. For example, when you add a new customer, the Name becomes the default for the "sort name" field and the primary contact for the account. You can change the sort name so that it is different from the address name, however, the application automatically updates the Name entry in the Address field and the Contact 0 Name to keep both fields the same.
Company
Use this field to add the company name associated with the address. The company name displays and prints below the Name entry and above the Address 1 and 2 entries. The Company entry can be up to 30-characters in length.
|
Note: If the Company and Name field entries match exactly, the documents the application produces only prints one entry to avoid unnecessary repetition. |
Address 1
Use this field to add the first of two lines provided for the address. The Address 1 entry can be up to 30-characters in length.
Address 2
Use this field to add the second of two lines provided for the address. The Address 2 entry can be up to 30-characters in length.
Note: Both Address 1 and Address 2 fields are optional, but if these fields do not contain text, they do not display for the record. This is done to avoid unnecessary blank spacing between address lines in documents.
City
Use this field to specify the municipality (city, town, village, etc.) of the address. The City entry can be up to 30-characters in length.
State or Province (Code)
This portion of the mailing address varies based on your software region setting located under the Parameters database (United States vs. Canada) or your computer's globalization setting. When shown, it is a postal abbreviation used for the state, province, or territory where the address is located. When using a zip code database, entry of a zip code ("postal code" in Canada) can result in this field automatically completing. Listings of state and province codes also include territories. This part of the address can be up to 2-characters in length. In some cases, the printed address will only show the state/province if the "city" part of the address is also present.
Upon request, support can enable a parameter that would include country codes in addition to the state or province code.
States, provinces, and country codes are grouped together. If your company is located in Canada, province codes are listed first in the drop down followed by states and then countries (if enabled). In the United States, state codes are listed first followed by Canadian provinces and then country codes (if enabled). If your company is located in the United Kingdom (UK), this field is not shown nor is it typically printed. There is no "UK" parameter setting. If you are located in the United Kingdom, the software uses the region and language settings of your computer as well as the database region (in certain cases).
Postal Code (ZIP Code or Postcode)
In certain cases, postal (ZIP) code changes can trigger other changes such as setting the sales tax location. This part of the address can be up to 10-characters in length. In North America, the zip code is numeric and is listed to the right of the city and state/province. In the United Kingdom, the postcode is printed as a separate line (the last or bottom line of the address).
Delivery Point
The USPS (United States Postal Service) assigns delivery points in addition to the zip + 4 codes as a way of designating multiple delivery points at the same address (4 offices in the same building -- or -- 2 apartments in the same house, for example). Delivery points are not typically printed (except for Canadian users in certain cases) but are included when POSTNET bar-coded mailing labels are printed. Usually, this is a single digit added to the end of the ZIP code, ZIP+4 code, or a combination of both codes when printing a barcode. Typically, a check digit is also added after the delivery point (if included). This part of the address can be up to 4-characters in length.
For Canadian users, the delivery point field has an alternate use (see below):
 Settings for Canada
If your company is located in Canada (and assigned to the Canada regional parameter), you can use the delivery point to add a country notation to addresses on documents. If the delivery point is US, USA, or CAN, these are printed with most document addresses. This is only for Canadian systems (using the "Canada" system parameter).
Phone/Fax
Use these fields to enter the phone and fax phone numbers for the branch.
Use this field to enter the branch's default email address.
Offset Hours
This may be used when branch locations are in time zones that differ from the application server. Enter the number of hours difference (+ or -) from the application server. Otherwise, the offset hours should be zero. ECI cloud hosted servers are all set to Eastern US time. This setting ensures that the date and time settings on your branch documents are accurate for your customers.
Choose this option to specify that the branch name and address should be printed on forms. Leave this check box unselected if your company uses a branch-specific logo that contains the branch address in the image. When your business does not use a logo or there is a shared logo for the entire company, printing the branch address on forms may be a good idea.
Tax Location
These are the branch's default tax location settings used for sales, orders, or any transaction where sales tax is involved. This will be the tax setting used at Point of Sale unless:
-
Another tax rate is manually specified during the Point of Sale process,
-
The transaction materials are being delivered to a location that uses a different tax rate (this may be regionally-specific), or
-
The customer has special sales tax considerations (such as when a business is tax exempt or is located in a development zone where different tax rates apply).
Note: For companies in Canada, the default tax location for a branch should never be the default "system" GST tax location. Select either a PST or HST tax location for the branch instead.
Use as Account/Job default
Select this check box to apply this tax setting to account and job transactions processed in this branch.
Prevent changes to default
Select this check box to prevent users from changing the tax location settings for an account or job. This option is only available when the Use as Account/Job default check box is enabled.
Item Tax Entry Method
If you are in a VAT/GST tax region, this entry allows you to specify whether the branch is a Tax Excluded (Default) or a Tax Included branch. This determines whether the unit price amounts that display at Point of Sale include tax amounts or specifically exclude tax amounts. Typically, this applies only in Australia and may not display in your form.
Warehouse
"Warehouse" designates the default warehouse branch assigned to be used by this location (if any). The warehouse branch designation only sets the default inventory provided by branchif a user chooses the "warehouse" check box on the Branch tab of a Process (F12) form in applicable Point of Sale transactions. If your company doesn't operate a warehouse or this location doesn't use it, leave this field blank. If you want to always and automatically set the check box for "warehouse" on Point of Sale transactions, see the "Enable Warehouse @ POS" setting (below).
Usage Includes Transfers Out
This check box only appears if the branch being modified is assigned as another branch's warehouse branch (the branch is a "warehouse," in other words). If enabled (checked) for the warehouse branch, transfers out (from the warehouse branch) will append the warehouse branch's usage. Usually, usage is only updated by sales and manufacturing, not transfers (which in most cases would double-count the usage, once for the transfer, once for the sale). The selling branch's usage will still be updated when the transferred goods are sold. Transfers into the warehouse branch will not update usage.
Import from Catalog
If allowed, users can add items from a vendor catalog to the data grid when no matching inventory item is found. For additional information about using this feature, please click here.
Options include the following selections:
-
Not Allowed - Add from catalog is not enabled. This is the default selection.
-
Allowed through Item Maintenance - the Item Maintenance form is shown allowing changes by the user before saving.
-
Allowed - Item Maintenance is not shown, the item is added using template settings.
Saving Branch Parameter Settings
Once changes or additions are saved, re-start the application on each client to ensure all changes are made.
See Also:
Documents
Messages
Footers and QR Codes
Devices
Printers
Passwords
EDI
Bill To
Ship To
Interfaces
ProLink
Ecommerce