Ecommerce (Alt O)
Use the Ecommerce tab to enable the ecommerce options for this branch. See instructions below.
Setting up Branches for E-Commerce and User Notification
To enable your branch to receive and process e-commerce business that is specific to their location, complete the following settings. You must have administrative permissions to access these settings. If you do not set branch-specific notification settings, the application uses the system settings described above.
1. From the Main Menu, choose Maintenance > Database > Branches to display the Branch Setup form.
2. In the Branch ID field, choose the branch you want to enable e-commerce processing for.
3. Choose the E-Commerce tab.
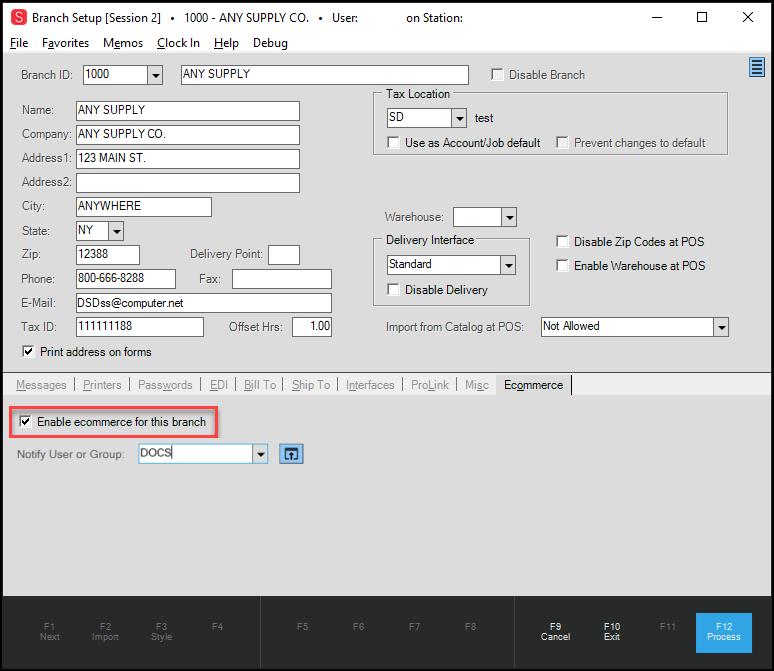
Branch Setup Form with E-Commerce Tab Options Displaying
4. Select the Enable e-commerce for this branch check box.
5. In the Notify User or Group list, choose the User ID of the person or group that you want to notify when the application receives e-commerce orders.
Note: The application will use the entry you have selected here when the incoming orders are specific to this branch. If you do not select this option for this branch, the application uses the parameter set in the Parameters > Point of Sale > Ecommerce API tab instead.
6. When you have completed these entries, choose Process (F12) to save the settings.
Note: There are two notification option for the users specified in these fields. The application can use the email address of the user and send an email when new online requests come in for the current branch or the user can use the Messages feature to review incoming notifications that are assigned to them. To learn more about the Messages feature, see Reviewing Messages in the Notification Queue.