Point of Sale > Orders
The Orders transaction is used when a customer commits to purchasing goods that are either not currently available or don't need to be provided immediately. Orders may involve one or more deposits which may be applied either to specific items or to the entire order. When goods are ordered, the item's committed quantities are increased. When orders are sold (invoiced), committed quantities decrease and on-hand is reduced. Credit orders are also allowed. Committed quantities are not affected by credit orders (because it is assumed that you don't have possession of the product at that time).
Orders create a PS Customer Orders document.
Most Point of Sale transactions share the same set of folders. For information regarding folders in the Point of Sale areas, click here.
Selecting an Account
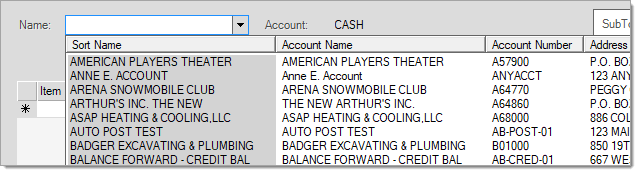
In the Point of Sale Name list, you can either enter the Sort Name (from the Account Maintenance form) or the account ID. Most Point of Sale transactions involve selecting an account and sometimes job (when applicable) first. For Sales, you can scan or enter the items into the data grid first, but for other transaction types (Orders, Quotes, Tickets, etc.), you choose an initial account first. If you know the customer participating in the transaction, there is usually no need to choose an alternate menu, just type either the sort name or the account number/ID.
When a customer has their own charge account, we recommend that you enter their name in the Name list. You can change it to a different account, if needed, before processing.
There are some additional search options you can use, based on other information you know at the time of your search. You can review these options here
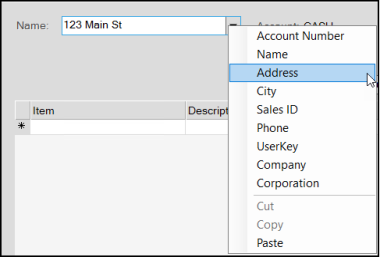
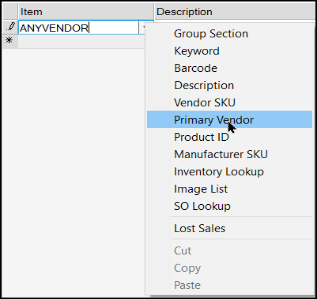
Other Account Search OptionsTo see additional search options, enter the text you know (address, phone number, etc.) in the Name field and right-click the down arrow beside the field to see additional search options.
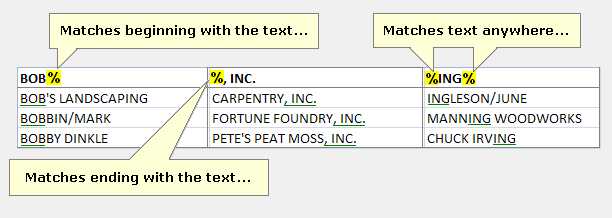
If you do not enter any text or you enter text that matches more than one account, the application sorts the list by the field (Address, City, etc.) you selected. You can click the column headings to sort the list in a different order. In some cases, only those account's with a value for the selected field(s) will be included. If the Enhanced Look Up option is not enabled, you can also use a "wildcard" (using a % character/symbol) to represent unknown characters to perform a search. A wildcard can represent any character or set of characters before and/or after the text you enter to find records that may match (see the examples below).
You can use wildcards to look for account matches using the alternate menu selections as well. Searching for an Account Using the Customer's Rewards or Loyalty CardIf your company participates with the Do it Best® Loyalty Rewards program, Best Rewards™, or other loyalty rewards programs, you can scan the customer's rewards card ID or enter the customer's card ID in the Name list and choose the UserKey option to perform the search. We should point out that as long as a Loyalty ID is assigned to the customer correctly and the customer's account is used for the transaction, there is no need to scan their card to associate a transaction with the program. All sales transactions will be associated with their rewards ID automatically regardless of whether or not a card was scanned or loyalty ID was used for selection. For ACE Rewards™, choose <CTRL-R> to scan or enter the customer's rewards ID unless it has been associated with the customer's account. In the latter case, the customer's rewards ID is automatically associated and displayed in a Point of Sale, Sales transaction. Other transactions (Orders, Quotes, *The customer's rewards ID must be associated with their account in a specific way. Please see the Database > Account documentation for further details. |
When the Enhanced Look Up feature is enabled, you have more selection options, but the account's Sort Name field entry is still the primary match field. The application only shows you account number matches if no sort name matches are found. If matches for both the sort name and account number exist, only the entries with the name display.
Using the Enhanced Account Look Up Feature to Find an Account
When enabled, the Enhanced Look Up feature searches using the account number, sort name, address (line 1), and company name automatically. For each row, the cell matching the look up text contains a gray background color. Even when more than one column for the same row (account) has a match, the application only highlights the column with the first look up match. Typically, the more text you enter, the shorter and more useful the list of matching results will be. With enhanced look up, there is a maximum number of matches (up to 70). There is no <<More>> option, which means that if more than 70 matches exist, you may have to either enter additional text to narrow the search or enter new search information instead.
Note: You cannot use the % character as a wild card when using the Enhanced Look Up feature.

The Enhanced Look Up feature can be enabled by Support upon request. The team sets up parameters and uses a Support Utility to populate tables with the data you have already entered into the application. If you decide you do not want to use this feature after it is enabled, Support needs to reset these tables and the application returns tothe original methods for search. You can request to re-enable this feature in the future if you choose. Key look up data is removed when account or items are modified if you disable the enhanced look-up feature.
After you select an account from the list, the account type displays beside the list. There are three types of accounts:
-
A Cash account is a customer-specific account that does not allow receivables charges.
-
A Charge account is also a customer-specific account that allow receivables charges to accumulate.
-
A System account is a general-use account that is not customer-specific. A System account does not have a credit limit or allow charges.
All companies must have a system account named CASH. Except in the case of Tickets* (Advice Notes) and Charge Returns, the default account, "CASH," is the default when no specific account is indicated.To select the System account, press TAB . In addition, this type of account requires the entry of a delivery name when used with non-sale type transactions (orders, quotes, etc.). more...
Understanding System Accounts vs. Cash AccountsSystem accounts are used for cash and carry transactions, where the customer doesn't have their own account. Your company can create more than one System account; however, most companies only have one. By contrast, Cash accounts require additional information, such as the customer's name (or other information), for certain payment types and in cases of delivery. When you begin a transaction using a system account, you can create a new "cash-only" account directly using the Delivery tab on the Process form (when applicable). Cash-only and System accounts are not the same. |
Selecting a Job
Accounts may be linked to one or more jobs; every account has at least one job, known as the master job (0). You can add additional jobs to any account to track account activity separately from the account. You are only prompted to select a job if the account has multiple jobs (more than the required job "zero"); otherwise, all activity is assumed to be for the master job. In Point of Sale, disabled and closed jobs are not included in selection list. You may be able to add new jobs during the transaction processing (on the Delivery tab of the Process (F12) form).*

*Your security settings may prevent you from adding jobs during processing.
Note: In other Point of Sale areas (such as Order or Sale Entry) you can also add a job in the Delivery tab. This option is not available in Tickets/Advice Notes.
If an existing order is modified that holds a deposit, any changes to the account will produce a task list warning (which may be increased to an "error" severity to prevent processing).
Customer Order Document Selection
Orders are assigned either a sequence number or alpha-numeric ID. The same format is used for orders as is used with other types of documents; however, order numbers can be assigned to a specific range and may be assigned a prefix character. A drop down style control is used for selecting an existing order document as well as creating a new order document. Orders are one of a few document types that allow the user to set the document identifier. Each order must have a unique identifier.
")
Order # (Document Selection)
Creating a New Order
When creating a new order document from the Orders transaction in Point of Sale, the easiest way to assign a new order ID is to press the TAB key while the "Order #" drop down control is the focus. This will assign the next sequential order number available for use.
Your company may assign a prefix character (or characters) to be used to help identify customer order documents (this is done from the Parameters form (Maintenance > Database > Parameters > Documents tab). If done, the sequence number will be preceded by the designated prefix character(s). Prefix characters decrease the size of the potential "pool" of available sequence numbers. In addition, when manually entering document numbers, if a prefix is used, you must type in the full sequence number including the prefix to find an exact match on an order.
As mentioned, you can also enter your own document identifier. The ID is limited to a maximum of six-characters in length and should be unique for each order. A date prefix (year-month) is still added when the ID is manually designated.
Choosing an Existing Order
There are three ways to choose an existing order document: manual entry, scanning, and selection (using the drop down). If known and available for the transaction, customer and job selection can help narrow down the number of possible matches and make selection simpler.
•Manual Entry
Manual entry involves entering a full or partial document identifier. Usually, it is only necessary to enter the second half of the document identifier known as the "sequence ID" (to the right of the dash). When a partial sequence is entered and multiple matches are located, a selection listing will be produced. Matching is done alpha-numerically in reading order (from left-to-right).

Document Identifier Format
When prefix characters are not being used (and the sequence number is numeric), you can type just the sequence number without any leading zeros to find an exact match.

The current year-month (two-digit year, two-digit month) is appended on the left-hand side of each document sequence automatically. This part of the document identifier cannot be set by the user.
•Scanning
If you have a copy of the document and a barcode scanner, you can scan the document's barcode.1 In order to scan bar-coded documents and products, your station must be assigned a scanner which is enabled in the station's Device Maintenance form (Maintenance > Database > Devices).
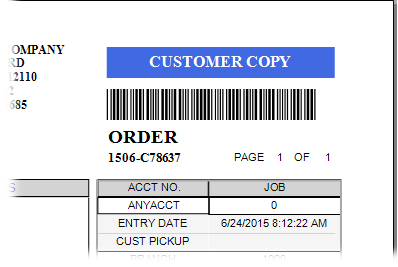
1Document barcodes use the "39 Extended" format.
•Selection
Due to the nature of customer orders, a large number of fields are included for reference in the drop down. These include the following (from left to right): order document, type, account, job number, customer name,
Entering a partial document sequence* produces a listing of orders beginning with those characters.

Order Selection List
*The sequence portion are the last 6-characters of the document after the year-month digits and dash (-).
The "%" wild card character may be used to designate a match in the middle or end of the sequence instead. For example, if you enter %123% then orders with the digits "123" anywhere in the document sequence will be listed as matches.
Although users can specify a "custom" order sequence (orders are not limited to system generated or sequential numbers), it's suggested that users only assign order sequences that are six-characters in length. This is especially important when the order sequence begins with a number. This is due to differences in how numeric order numbers are treated as opposed to those beginning with alpha characters (code is in place for handling branch prefix characters and in some cases attempts to adjust numeric values that are shorter than the expected document sequence length).
It's also suggested that users not repeatedly reuse the same order sequences. Special order item numbering uses the order sequence as part of the generated SKU. Using the same sequence for multiple orders can make identifying the items for a particular order more difficult.
For information about alternate selection methods for orders, click here.
Alternate Selection MethodsWhen choosing an existing order document, a number of selection options are offered. Except in the case of the "Select" option, which uses a separate form, enter the text you want to match against in the Order # field before making a selection. 
This option matches against the Customer PO# This is useful when a customer, job, or existing order was assigned to a specific customer PO#. Enter the full or partial PO identifier or use the wildcards to produce a listing or matching orders.
This option can be used to search all of the Select This option opens a form with additional selection options. Selection options can be used individually or in combination. Use the radio buttons to change the selection settings for that option. A check box means the selection has been assigned values. 
|


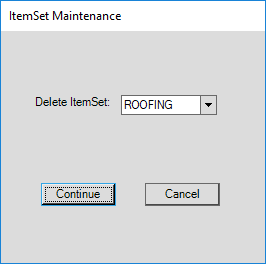
Closing or Voiding an Order
The menu marker ![]() to the right of the order # field can be used to either (1) mark an order as closed or (2) void an existing order. "Closing" an order leaves the order in the database for reference, but prevents further modification or sale. A "voided" order is permanently removed. There are cases where other documents have dependencies (links, etc.) on the order and "voiding" won't be permitted. Orders with a deposit cannot be closed or voided until any deposit has been refunded (using Payouts). A message is provided in these cases or the "void order" selection will be disabled.
to the right of the order # field can be used to either (1) mark an order as closed or (2) void an existing order. "Closing" an order leaves the order in the database for reference, but prevents further modification or sale. A "voided" order is permanently removed. There are cases where other documents have dependencies (links, etc.) on the order and "voiding" won't be permitted. Orders with a deposit cannot be closed or voided until any deposit has been refunded (using Payouts). A message is provided in these cases or the "void order" selection will be disabled.

Close or Void an Order
An additional dialog is provided when closing or voiding an order. If a previously saved customer order is selected at the time you choose either "close order" or "void order," it will be the default selection when the dialog is shown; otherwise, you will need to scan, enter, or select the order document.

PS Customer Orders (Select)
Just as with the Order # drop down, you can use the context menu to help locate an order document. Alternate selections include
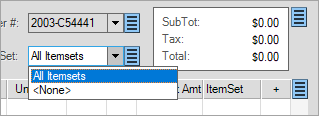
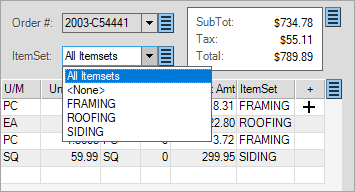
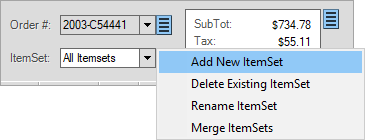
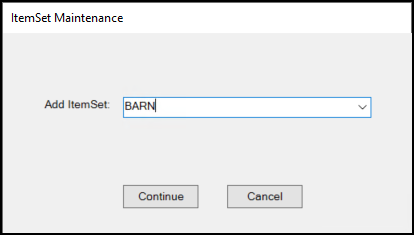
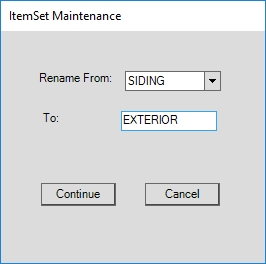
Working with ItemSets
An ItemSet is a classification tool used for Sales, Orders, and Quotes where you can assign items to groups, or "sets" so you can sort, invoice, and/or deliver them separately.
For example, if you are adding a large order, and the customer wants specific goods delivered at different times, ItemSets are an excellent way of keeping track of the customer's delivery needs while maintaining a single order at the same time.


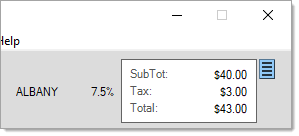
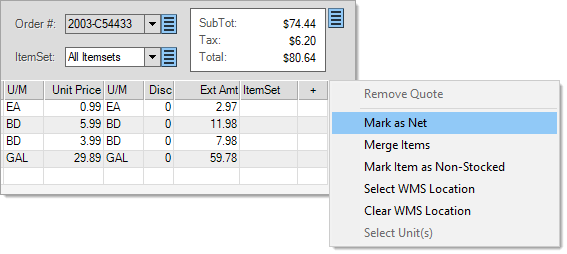
Totals Panel
The upper right-hand area of the form includes a display-only panel showing the transaction's current sub-total, sales tax, and total. The tax location and rate (percentage) are displayed to the left of the panel when enough room is available (the tax location and rate can be viewed in the Process (F12) form otherwise). These figures will automatically update as changes are made. Figures also update to reflect any adjustments (adders/discounts, etc.) applied on the Process (F12) form.
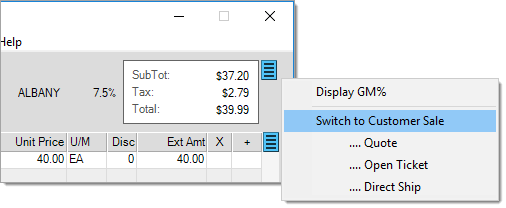
The menu marker (to the right of the totals panel) offers additional options allowing the user to switch to a different transaction type (sale, quote, ticket) or display the current GM% (gross margin percentage) for the entire transaction.
|
|
|
Users in Canada can double click on the tax amount to display the split provincial (PST) and GST tax dollar amounts. For Canadian provinces with both PST and GST taxes, both locations (and rates) are displayed to the left of the totals panel. HST (Harmonized Sales Tax) locations (used for the Maritime provinces) combine the GST and any local amounts together into one tax rate, so no split is provided in those cases. 
Tax Details (Canada Only) |
Changing the Transaction Type
You can convert a transaction from one type to another and retain much of the information from the original. When you switch to a new transaction type, the items (and item comments), pricing, account-job selections, PO#, and delivery information move to the new transaction. The application does not maintain other information unless it is permanently associated with the account or job. This includes a number of fields located on the Process form such as Print and Transmit options, Adjustments, and any manually entered information (such as a tax exempt ID or purchase agent).
Note: Making a transaction type change requires specific user permissions that may not be available to all sales personnel. Check your security settings if these menu options are blocked from your view.
To "switch" the current transaction to a new transaction type, click the Menu Marker  to the right of the Totals box to display the context menu and select the new transaction type from the list.
Restrictions and Special Cases that can Prevent this Switch
There are a few restrictions that can prevent you from changing transactions. You cannot change a transaction that includes a rental item. If you enable and apply promotion pricing, to a transaction, the promotion pricing is removed when you make the switch and when you invoice an order or quote, these converted promotions are disabled).
Grid & Item Entry
The grid area is used for specifying the items that are being ordered or returned. The "discountable" column (Disc) can be used to view or set the discountable status of the item or to specify a line-item discount (if the item is discountable).
Primary entry fields include all columns except description, extended amount, and additional information. Primary columns are accessible by TAB navigation in the form. For more detailed information regarding item selection, ![]() click here.
click here.

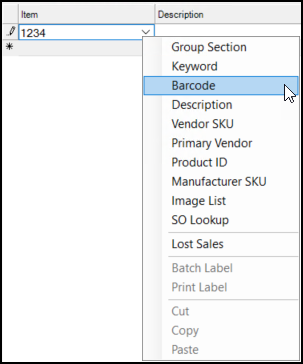

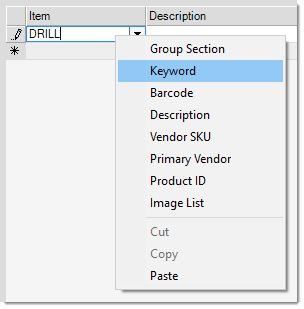
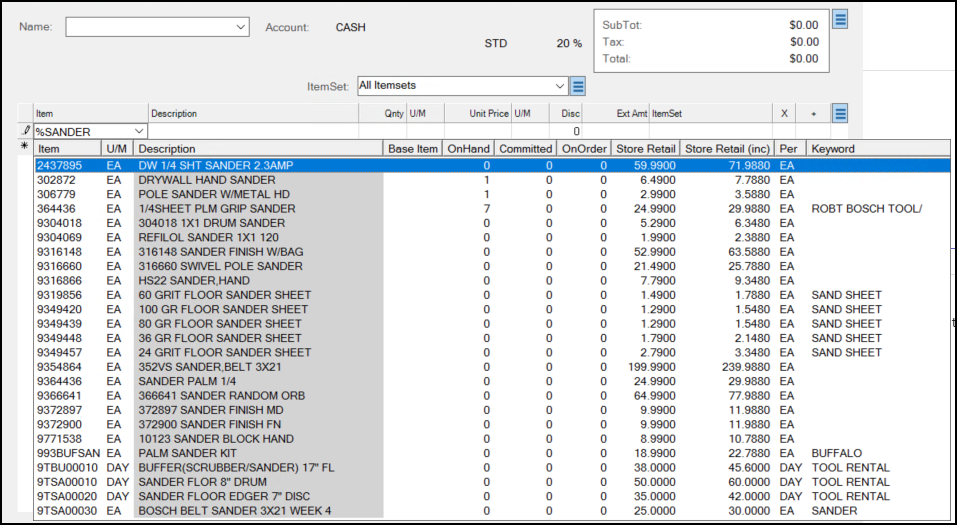
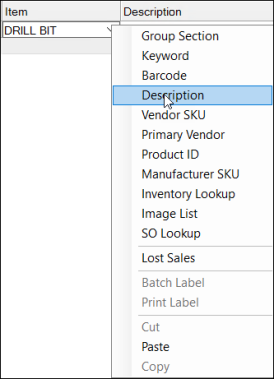
Selecting Items using Group Section

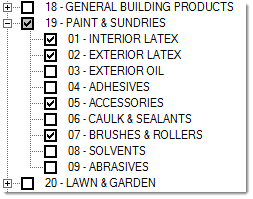
 . If you select some but not all sections within the same group, the group's check box background is changed to gray
  . Use the Select All button to select all groups and sections. Use the Clear All button to clear all check boxes. Choose Accept to build a selection list based upon the groups and/or sections you have chosen (checked). Or, click Cancel to close the window and
 Selecting Items using a Keyword
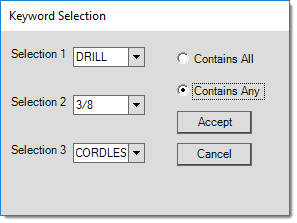
Selecting Items using a Barcode
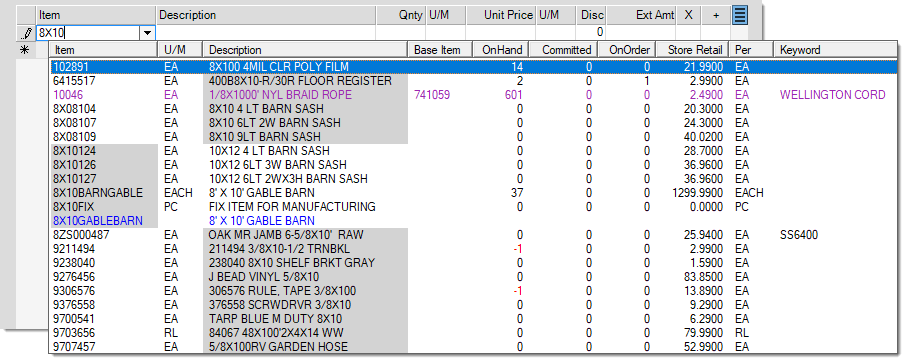
Selecting the Item using the Description
Selecting Items using a Vendor SKU
Selecting Items using the Primary Vendor
Selecting the Item using the Product ID

Selecting the Item using the Manufacturer SKU

Selecting the Item using Inventory Look up
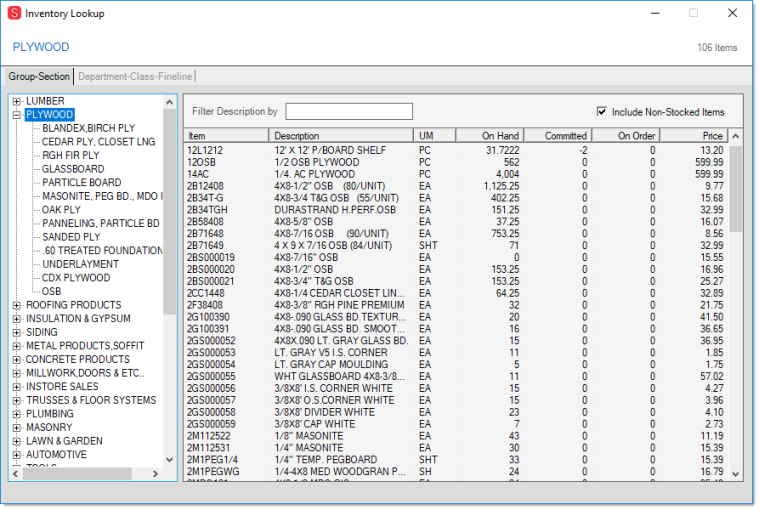
Inventory Lookup : Group-Section
Inventory Lookup : Department - Class - Fineline
Selecting Items using the Image List Selection

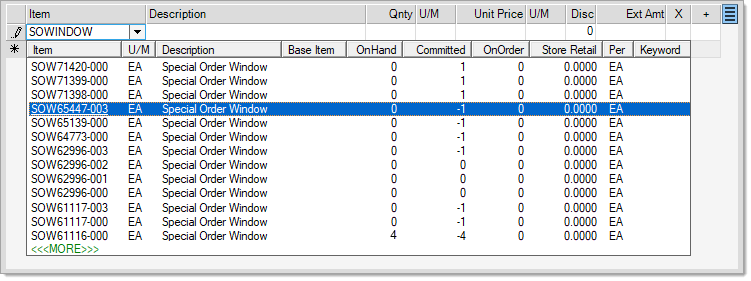
Selecting Items using SO Lookup
Selecting Items using Lost Sales
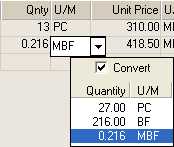
Quantities and pricing reflect the unit of measure displayed. Changing the unit of measure (U/M) to a measure with some other value (other than 1:1) can optionally modify the related quantity or price. If the "convert" box is checked ![]() , the existing quantity or price will be converted to a value equal to the current value (displayed in the drop down). The "convert" option will not change existing extended amounts. If the "convert" option is not checked, the existing quantity or price will not change, and will be used to re-calculate extended amounts.
, the existing quantity or price will be converted to a value equal to the current value (displayed in the drop down). The "convert" option will not change existing extended amounts. If the "convert" option is not checked, the existing quantity or price will not change, and will be used to re-calculate extended amounts.
There are a number of ways to affect pricing. Users can modify the price by typing another in, select a reprice option (F6), type a discount, or select an alternate price from the input drop-down. Typed keyboard shortcuts are also available. For example, type L2 in the unit price field to use the level 2 price, or D20 to do a 20% discount.
The "Disc" or "discount" column has two (2) purposes. If an item allows discounts, the column can be used to specify a line item discount by entering a percentage. For items which are not discountable, the column will display the letter "N" (net) and won't allow changes. To mark all items on the transaction as "net," you can use the "Mark as Net" option available from the menu marker ![]() found on the right-hand side of the grid (user security can limit your ability to view or utilize menu marker functions).
found on the right-hand side of the grid (user security can limit your ability to view or utilize menu marker functions).
Context Menu (Grid)
Ext Amt
This is the resulting total for the item row considering the quantity, price, and unit of measure relationships as well as price rounding. The extended amounts sum up to the subtotal. They don't include tax.
ItemSet
This columns reflects the ItemSet assigned to the item row, if any. Item sets can be used to group parts of an order together. The ItemSet groups may then be selected for invoicing, delivery, etc. independently from the entire order.
+ (Attachments)
The plus (![]() ) column is used for indicating which item rows have attachments. If so, the plus icon will be displayed. No icon means that there are no item level attachments for that item (row). Attachments can be viewed using the Folders (F4), Entry tab which will also display a "plus" icon (
) column is used for indicating which item rows have attachments. If so, the plus icon will be displayed. No icon means that there are no item level attachments for that item (row). Attachments can be viewed using the Folders (F4), Entry tab which will also display a "plus" icon (![]() ).
).

Data Grid Context Menu Options
The context menu offers additional options for items being ordered.
If a Quote document was associated with the current order using the Ordering (F5) function, this menu item will be enabled and can be used to remove the quote (including the items referencing the quote) from the data grid. If done, no linkage will exist between the resulting Order document and the Quote. Note: using the Import (F2) function to copy items from a Quote document creates no link between the transactions.
This feature marks all items currently associated with the order as "net," and can also be used to clear the "net" (N) discount code from all discountable items on the order if selected again. Items with a default discount code of "net" are not affected in either case. Please note: this does not update individual rows you may select. ALL rows are either set as "net" or cleared.
This option allows you to merge ALL multiple occurrences of the same item within the transaction IF the units of measure and pricing also correspond (match). Any differences in measures or pricing will prevent the merge. Please note: this does not update individual rows you may select. ALL rows are merged if eligible.
This selection allows you to treat a normally stocked item like a non-stocked (renumbered) SKU. When the order is processed, a unique tracking SKU will be generated for the item in question. From this point forward, the flow will be the same as other non-stocked generated items would use. The benefit to this is that it easily allows you to use the price structure, vendor, and description from the original item while also permitting the handling of the new renumbered item independently.
This can be used to prevent abnormalities in purchases from affecting the "base" stocked SKU. For example, you might have a customer who has a one-time need to purchase a large quantity of a particular item your company stocks. You don't want the item to affect your purchase history and ordering in the future, so this feature permits you to separate it from the normal stocked item.
To use this feature, select the item row and choose the "Mark Item as Non-stocked" option from the context menu. The non-stock order form will open. Populate the form as you would any other non-stocked product. Since you may not want the "stocked" item's history and sales figures affected later when the item is merged, it's a good idea to specify another non-stocked item as the "Item for Sale Mapping" in the "Order Non-stock Item" form. When the customer's order is saved, a unique tracking SKU is created prefixed with the letters "SO" followed by the Order's document number (less the year-month), and a sequence number will be added ("SOC123456-001" for example).
The tracking SKU is treated like a temporary "stocked" item and will track quantities (on-hand). Once the item is sold fully, the "item type" will change from "renumbered" to "resale" in case of any possible return of the item. Eventually, the item will be merged back into either the original SKU or a different non-stocked SKU specified during ordering. The origin item SKU you specify is saved in the InventoryStore database table in the column named "SOItemNumber."
Select WMS Location*
This feature is currently under development.
Select Units*
Used for selection of units when a Unit Item Tally SKU has been selected in the data grid.
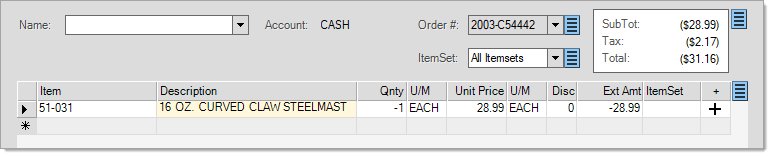
Returns (Credit Orders)
When a customer is returning an item, specify a negative quantity for the item. With orders, this is sometimes done when your company will be picking up returned materials from a job site, for example. Security preferences can prevent or limit a user's ability to process returns. Mixing returns with items being sold on the same order is never permitted and doing the same during a sale (invoice) can be optionally prohibited or allowed by your company.
*When looking at a customer's account or searching documents, it is far easier to locate and identify returns when the entire transaction is a credit. Mixing positive and negative quantity items together on the same transaction can also make statement discounts more confusing for Receivables customers.
Some items don't allow returns, if this is the case, a warning message appears and the item's quantity will change back to a positive number.

In some or all cases, you may be required to specify additional information during each item's return. Minimally, this is required on non-stocked products and may be optionally required for stocked returns. Returns on a customer order do not immediately affect on-hand quantities and have no effect on the committed quantity. On-hand will be increased once the order is invoiced.
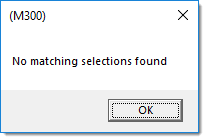
Inventory being sold may be either manually entered or scanned at any time. When scanning, if an item that matches the barcode scanned is not found, you will be prompted to enter the SKU of the item to associate with it. ![]() more...
more...

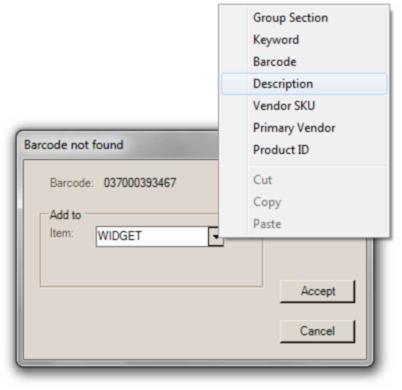
Orders commonly involve non-stocked products. These types of items require additional information, so a special pop-up form is used.
Non-Stocked Ordering
This form is used when a non-stocked item is added to an Order in Point of Sale. The easiest way to access information regarding goods you don't stock is to use the Catalog feature in the application. Catalog data provides a way of having a vendor's product information immediately available but still separate from your regular inventory. Catalog information can contain ordering data (multiples, availability, etc.) and even product images.* If you have catalog data for the vendor, use the Catalog drop down to find the item.
*Options and availability depend upon the vendor. In some cases, catalog data can be kept up-to-date via EDI (Electronic Data Interchange) processing. In others, this data must be requested from the vendor and loaded from a file by Support. Support charges a fee for loading vendor catalog data independently of EDI processing. Catalog data can be manually entered as well.
A catalog isn't required, so this field can be skipped when needed. Specify the manufacturer's (aka. vendor's) SKU (item identifier) for the goods you want to order and the vendor from whom the goods will be ordered. The vendor's item (SKU) is appended to the beginning of the item description automatically.
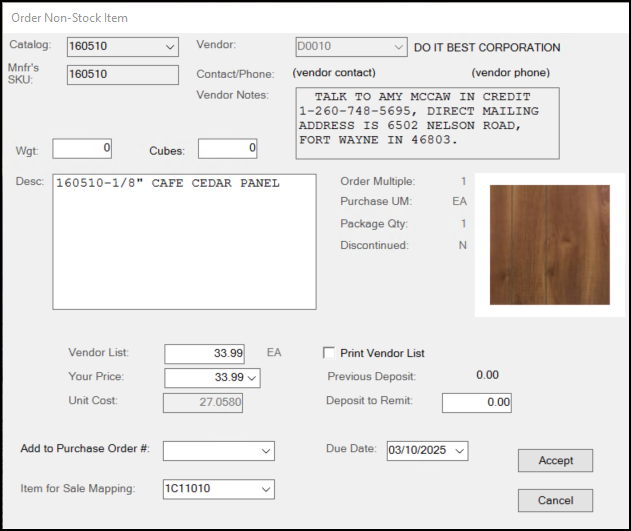
If pricing is known, it can be entered. Pricing from a catalog may change if the catalog data hasn't been updated recently (again, this depends upon the vendor and whether or not the catalog is being updated automatically via EDI). Here are some more detailed explanations for fields found on this form.
Catalog
This drop down selection contains catalog items. If a vendor was previously selected, only catalog items matching that vendor will be shown. Otherwise, all catalog items are included. Partial entry of an item SKU brings up any catalog items matching the partial entry. In addition, alternate search options include: vendor, description, and bar code.
Mnfr's SKU
This is the vendor's SKU (item identifier) and is the code that the vendor assigns to the item for ordering purposes, etc. Depending upon the structure of your company's inventory, this may or may not match your item codes.
Vendor
This is the vendor from whom the item will be ordered. We allow multiple vendors to be associated with one order. A different Purchase Order must be used for each vendor, however. Vendors with a status of "hold" are no longer included in the listing.
Contact Phone
Displays the contact name and phone number for the selected vendor, if any.
Vendor Notes
Displays notes for the selected vendor, if any. This might be used to pass important information about ordering from the vendor to the user entering the order.
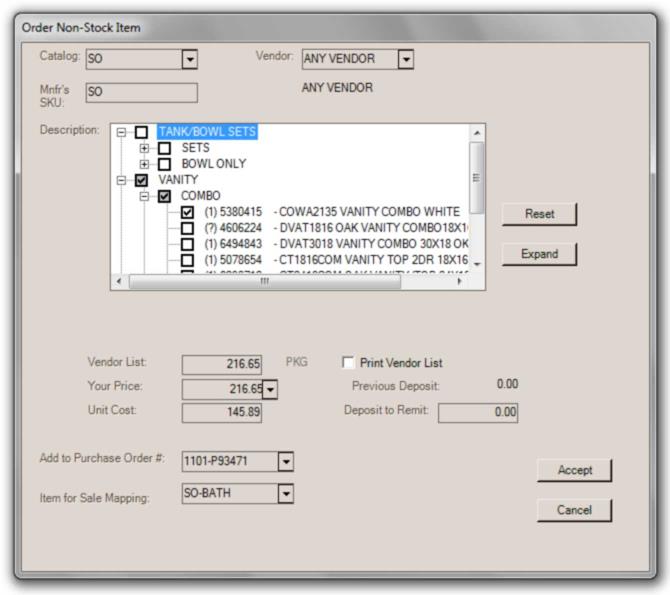
Description
With non-stocked goods, a description is important for identifying the item being ordered because each non-stocked item is assigned a temporary SKU for tracking purposes. If a catalog item is selected, the description defaults to the Catalog SKU and the vendor's default description for the item. It's ok to add more to this description or to change the description as needed, but it's a good idea to keep the vendor SKU for reference.
If the non-stocked item is linked with a comment or catalog list, the description area is replaced by a "tree" list. The non-stocked product's description is automatically generated by your selections in this case. Comment and catalog material lists must be set up prior to use and assigned to the non-stocked product in Item Maintenance (using the CMT/Catalog List field).
Vendor List
This is the price the vendor recommends for the item, but it is not necessarily what the customer would pay for it. The "your price" field (below) is the price the customer would be charged for the item. The Vendor List price can be modified by the user.
Your Price
The "your price" is the default price that the selected customer would pay for the item. In some cases, it may match the vendor list. Unit price is determined by the pricing assigned to the base item, the customer's default pricing, and the vendor list price from the catalog.
|
Tip: It's possible to automatically calculate a "your price" based upon either the entered vendor list or unit cost. Use the drop down to select a pricing option or type the corresponding letter code (shown in the drop down) prior to the percentage (D - discount, G - margin, or M - markup). For example, typing M33 would result in a 33% markup using the entered unit cost. |
Unit Cost
Unit cost is the amount the vendor charges to purchase the item wholesale. Unit cost may be used as a basis for calculating pricing. In some cases, the cost itself may be calculated as a percentage of the vendor's list price; however, this should be used with caution and involves using a feature that was not originally intended for use with non-stocked ordering. Pricing functionality depends upon the base item's configuration in maintenance.
If you use a cost percentage to calculate the cost, manual cost changes are not allowed. In this case, the cost will only initially be calculated from the "vendor list," not the "your price" value. If a "vendor list" price is not specified, the item's cost will be zero. When the item is received, if there is still no "vendor list" price, the "your price" will be used to calculate a cost for the item. If the cost is modified or adjustments are applied during receiving, the new cost will update the order; however, any modifications to the order after this point can revert the order back to either the original cost or a zero cost (depending on the changes and original state of the item). Orders involving non-stocked products that calculate a cost as a percentage of the list price should not be modified (reprocessed) between the time of receiving and invoicing.
Some pricing formats may potentially conflict with the cost percentage feature and cause unexpected consequences when used in combination. Mixing together pricing that calculates based on cost along with costs that calculate based on pricing can cause conflicts.
Print Vendor List
The check box allows users to designate that the "vendor list" be printed in addition to the customer's (your) price. If enabled, the vendor list will appear below the item's description on the order document. Again, this doesn't provide a method for replacing "your" price, it's done so that a customer can see the difference between what they're paying and the list price.
Previous Deposit
Orders may include a deposit. If a previous deposit was placed on this item or the entire order, an amount will be displayed here. Deposits that were not specifically made to a particular item are pro-rated among all non-stocked items for the order. Stocked items don't retain any deposits. This information is provided for reference only and cannot be changed directly.
Deposit to Remit
This is where a new deposit for the item can be specified. The amount applies to the extended total for the item (the deposit amount is not applied to each unit ordered). For this reason, the item deposit amount can exceed the unit price of the item. The total order deposit cannot exceed the total amount of the order, however.
Item level deposits are retained separately and are linked to the specific item. Any deposit applied to the order from the Process (F12) form is divided among all non-stocked goods upon processing.
|
Tip A percentage may be typed in place of a dollar amount to automatically calculate a deposit amount based upon the "your" price and the transaction's current sales tax location (can be modified/specified in the Process (F12) form). For example, if the item's price is $200 and you type "25%" in the deposit text area, the deposit amount would be set to $50 (or 1/4 of $200). One important point is that the deposit percentage shortcut always assumes a quantity of one (1) for the item. If the quantity for the item will be greater than one, this option does not calculate a deposit matching the extended amount; therefore, specifying a percentage may not be ideal for this situation. Percentages may be used to calculate a dollar amount for deposit on the Orders process form as well. Modifying the sales tax after the non-stocked item form is completed does not automatically recalculate any item level deposits, so the sales tax location should be adjusted as needed prior to entering the items. |
Add to Purchase Order #
This drop down can be used to specify either an existing purchase order or new purchase order for ordering this item from the vendor. When "NEW" is selected, a new purchase order document will be created during processing. In addition, once a purchase order is selected, that vendor becomes the default for any other items linked to the same vendor on this customer order. If needed, you can create different purchase orders for different products on the order (usually this would only be done if goods are being ordered from different vendors). Purchase orders generated in this fashion are not considered "ordered" until a purchaser reviews and updates the status of the purchase order.
Item for Sale Mapping
This defaults to the base item that initiated this non-stock entry. Once the renumbered tracking item is no longer needed, the generated item can be merged back into this base SKU. For merging to occur, the item's on-hand, on-order, and committed quantities must be zero and must have a last sale date. Parameters affect how long after an item is sold.
Additional Information
Once a transaction involving the "base"' item is processed, a unique generated (renumbered) SKU is created. This item differs from the parent SKU used to create it in a few aspects. The new item will track on-hand and receipts, for example. We now add the generated SKU as a barcode for the item to make printing a barcode on special order labels easier.
For more information on how non-stocked ordering works, please see the Nonstock Ordering section under Special Topics.
Restricted Changes to Existing Orders
It's not unusual to need to make changes to an existing order; however, some changes are restricted. As one example, if a customer order has a deposit linked with it, users are not allowed to modify the customer associated with the order. Orders without deposits, do allow changes to the customer account. If you really do need to modify the customer, refund the deposit first before changing the account.