Folders
Expandable folders are found in most, but not all, transactions available from the application areas (Point of Sale, Purchasing, etc.). Each application area has a default selection of folders shared with the transactions available in that area. There are a few cases where the folders displayed vary from transaction to transaction. For example, all of the transactions in Point of Sale (Sales, Orders, Quotes, etc.), that offer folders, have the same folder tabs and display essentially the same information. Because folders are not transaction specific, there are cases where particular folder tabs, or information on the tabs, won't apply due to the nature of that transaction. For example, a Vendor Quote, which may involve up to three (3) vendors at the same time, would not populate the "vendor" tab for this reason. In a few transactions, folders are not used and aren't shown.
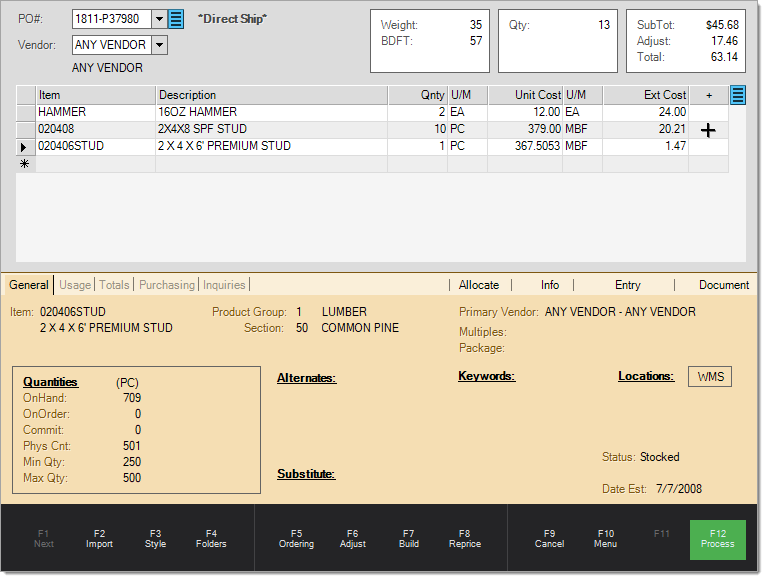
When available, folders can be maximized (or minimized) either by pressing/clicking the Folders (F4) function key or on-screen button. When minimized, folders can also be maximized by clicking on the minimized folder tabs at the bottom of the main form panel.

Keyboard Navigation
Keyboard navigation with folders is accomplished by holding the SHIFT key and pressing either the Page Down or Page Up keys. "Page Down" moves the current (selected) tab from left-to-right. "Page Up" reverses this order (from right-to-left).
Info, Entry, and Document Tabs
Standard application tabs are located on the right-hand side of the folders may include: info, entry, and documents tabs (depending upon the application area). One exception is the "Allocate" tab. This tab only appears in the Order Entry (Purchasing) folders and is explained under that section of the documentation. The info tab lists either vendor or customer (and job) record attachments. The entry tab displays item record attachments (if any) and allows entry of notes regarding the current item. Notes will only print if the "Print Notes" check box is selected on the "print" tab of the process form (F12). The "document" tab is used for document notes and attachments.
Info Tab
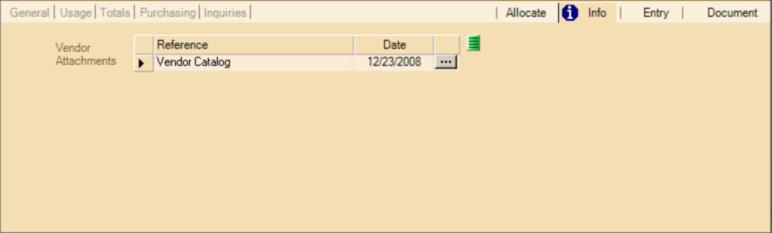
The Info tab lists either customer/job or vendor attachments. New permanent attachments cannot be added from this tab, but attachments can be printed and viewed. Vendor and customer based attachments may be added from the Vendor, Account, and Job maintenance areas or from the Maintenance Utilities menu option, Attachment Maintenance. This tab is provided in most areas where customer/job or vendor entry/selection is applicable.
When vendor or customer (and job) attachments are present, an icon (![]() ) appears on the Info folder tab.
) appears on the Info folder tab.
Entry Tab
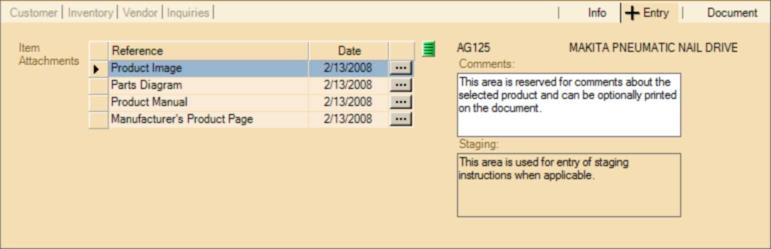
The Entry tab is used for listing Item based attachments and for comments and staging notes. New permanent item-based attachments cannot be added from a transaction's folder area. These types of attachments must be added either from Item Maintenance or the Attachment Maintenance utility (located in the Maintenance application area). This tab is provided in most areas where item entry/selection is applicable.
When attachments are associated with a particular item, a plus ( ) icon appears both on the folder tab and in the attachment (+) column in the item grid.
Where applicable and if user security permits, the Entry tab can be used to override the taxable status of the selected item.
In Point of Sale, Item Comments, designated on the Entry tab of the Folders (F4), may be suppressed (hidden) if they begin with an asterisk (*) as the first character. This is only done on those PS Invoice and PS Order document styles intended for customers. Additionally, this rule is applied to the entire comment, and not to individual lines within a comment. Many document styles, specifically any that are intended for your company’s use (Dispatch, File, Store, etc.), will still print comments regardless of the presence of the asterisk. This same rule is not applied to document notes, comment type items, miscellaneous description items, or staging descriptions, however.
Document Tab
The Document tab is used for document-based attachments and notes. With new transactions, there would not be any existing document attachments. This type of attachment is the only type that may be added from the folders area during a transaction (others must be associated with a customer, vendor, item, etc. in the corresponding maintenance forms). Possible uses for document attachments include a scanned copy a customer's purchase order for attachment to a Point of Sale document or a scanned copy of a written purchase order from a trade show on a new Purchase Order, for example. In cases where a "document" doesn't yet exist, new attachments won't be saved until after processing creates the document. Depending upon the transaction, "processing" may mean something different. Not all forms have a Process (F12) option and even some that do work differently from a processing standpoint. There are a few cases of transactions that don't create documents but may use folders. In these cases, document attachments won't be available or function even if the tab is shown. Attachments can also be associated with any document from the Documents form.
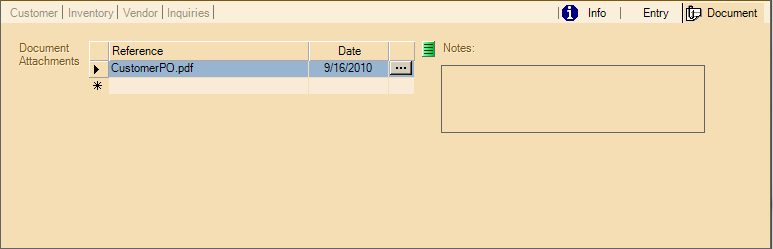
When a document has attachments, an icon (![]() ) appears on the tab. New document attachments may be added in two (2) ways: drag & drop or file browsing.
) appears on the tab. New document attachments may be added in two (2) ways: drag & drop or file browsing.
Drag & Drop
To use "Drag & Drop," both the file's location and the document tab must be visible on your desktop at the same time. Files may be located either on a visible area of the desktop or with a visible area of an open folder. Drag the file from it's location and drop it into the Document tab area.
How to "Drag & Drop"
•Click on the desired file using your mouse's select button (this is the left-hand side button on a right-hand configured mouse).
•While holding the select button down, move the mouse from the file's location to the Document folder area on your desktop. You should see a faint image of the file's icon move with the mouse as you do this (until you reach the folder area).
•Once the file is over the folder area, the cursor changes and displays either the "no" ![]() icon or an arrow cursor with a "plus" image (see below).
icon or an arrow cursor with a "plus" image (see below).
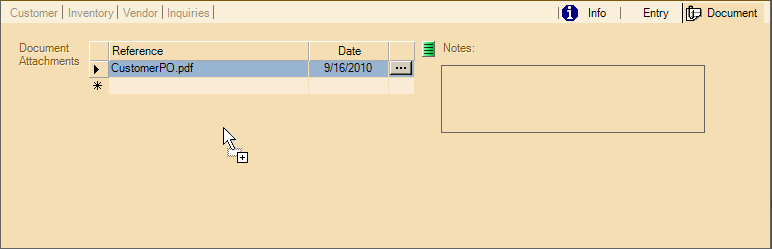
•When the arrow cursor (with the "![]() ") displays, release the mouse button and the Document form will change.
") displays, release the mouse button and the Document form will change.
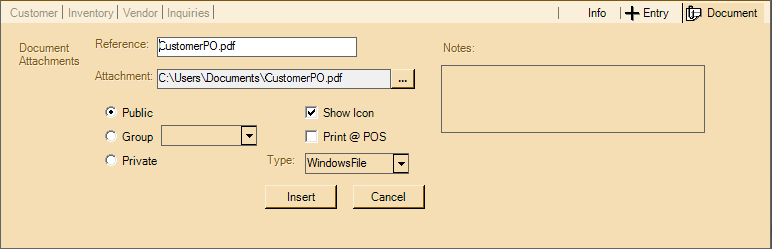
The "reference" will list the file's name and the "attachment" text box will list the file's current location on your station (PC, server, etc.). Drag & Drop can only be used to add file based attachments. Map Links, Web Address (URL) links, and documents must be manually specified.
File Browsing
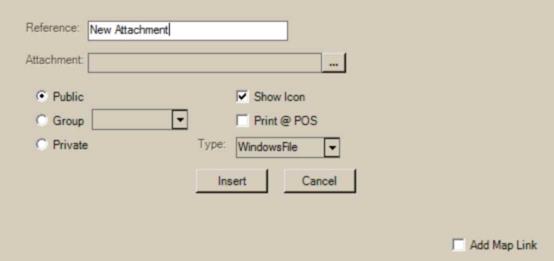
To specify an attachment without using "drag & drop," type any character(s) under the reference column in the attachments grid. Once the form changes to the complete the form (typing enter or tab won't activate the form). Use the browse button to locate the file you want to attach to the document.

Attachment Options
There are some choices that users can make when adding a new attachment. Here are some explanations.
Reference
The Reference may be manually designated and is intended to be used as a description of the attachment. References are also used for identifying an attachment, so they should be unique. When using a "drag and drop" method to add attachments, the reference defaults to the file name and extension of a file based attachment. If the same reference already exists, a message window will ask you whether or not you want to associate the existing attachment with the document instead of creating a new one.
Attachment and Doc #
Attachment is the current pathname (directory location) of the file on the user's computer or the URL address of the map link or a web site. For file based attachments, a copy of the attachment file will be made in a database table that is maintained by the server. Files are not kept individually, they are saved as image data within a SQL table.
URL addresses are saved as text. The "Add Map Link" check box will automatically create the URL for a 3rd party mapping service based upon the current customer or job address for you. You need to manually copy any web site address into the Attachment text box, however. We are unable to guarantee the availability or accuracy of any 3rd party mapping service. Internet access and browser software are required for any web based services or addresses.
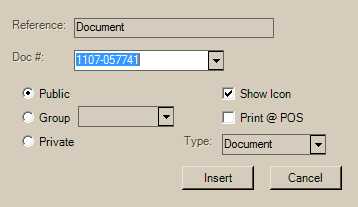
When choosing a type of "Document," the attachment field is replaced with a different control for selecting documents (labeled "Doc #").
Public, Group, and Private Selection
Attachments can be designated for access by all users (public), users in a specific user group, or just the current user (private). User groups may be created and maintained from the
File Types
Users can choose either windows file, map link, web site address, or document as the file type using the drop down:
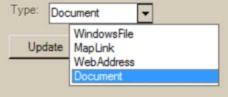
"WindowsFile" refers to any Microsoft® Windows®-compatible file type. Usually, these types of files require some other software that may or may not be provided with your Microsoft Windows operating system. These types of attachments are stored in a separate SQL database and table as "image" data, not as individual files in a directory. The same attachment may be used with many different records.
"MapLink" refers to a URL (web site address) that includes information that may be used to generate a map in your default browser using a 3rd party service. Users may use this site to generate a map to a specific address then click on "link to this page" to create a link address which may then be copied and used as an attachment to a document. Internet access and browser software is required to access any web services and sites.
"WebAddress" refers to a normal web site address which may be either typed in or copied from a web browser's address bar. This option requires Internet access.
"Document" refers to an application document ID. This allows you to enter/select any document ID and save it as an attachment. No data is saved with this attachment, just the document's
Show Icon
The "show icon" check box defaults to yes (checked) and determines whether or not the ![]() (document attachment),
(document attachment), ![]() (customer, job, or vendor attachment), or É(item attachment) \ icon is to be shown when this particular attachment is present. When multiple attachments are present, if any of the attachments are set to "show icon," the icon will display.
(customer, job, or vendor attachment), or É(item attachment) \ icon is to be shown when this particular attachment is present. When multiple attachments are present, if any of the attachments are set to "show icon," the icon will display.
Print @ POS
This check box is intended to be used to set whether a particular attachment should be made available for printing from the Attachments tab on a transaction's Process (F12) form. It does not cause an attachment to automatically print during processing. In addition, this setting does not prevent a user from being able to open and subsequently print any attachments listed on the Info or Entry folders during a Point of Sale transaction.
As stated, even with this setting enabled, printing attachments remains a somewhat manual process. On process forms with an "attachment" tab, you can select one or more attachments and then click the Print button. Only those attachments designated as "Print @ POS" are included.