Message
The Message feature allows users to add, modify, or delete a message alert that can be issued to a
|
Expectations and Limitations Messaging in the Spruce application is a one-way communication method and is not meant to provide the same capabilities as email. Recipients cannot respond (reply) to messages and there is no attachment capability. To transmit email via the software, companies must have access to an SMTP server. This same server should provide email accounts for employees. You can use free email applications, such as Google®'s Gmail.com or Windows Live™ Mail, or a paid licensed application, such as Microsoft® Office Outlook® to send and retrieve messages using your existing server. Even if your company does not have access to an SMTP (mail) server, you can consider using the many free on-line email resources; however, your company's control over such accounts would be limited in this case. Note: If you use a Gmail account, check out this Google App Password topic to learn how to make your communications more secure. |
Messages can be sent with a date/time range associated with them. This allows users to schedule a message for the future and to expire on a particular date. They can also be designated to repeat on a regular basis (the repeat feature only works when used with users and stations, not accounts).
Message Delivery
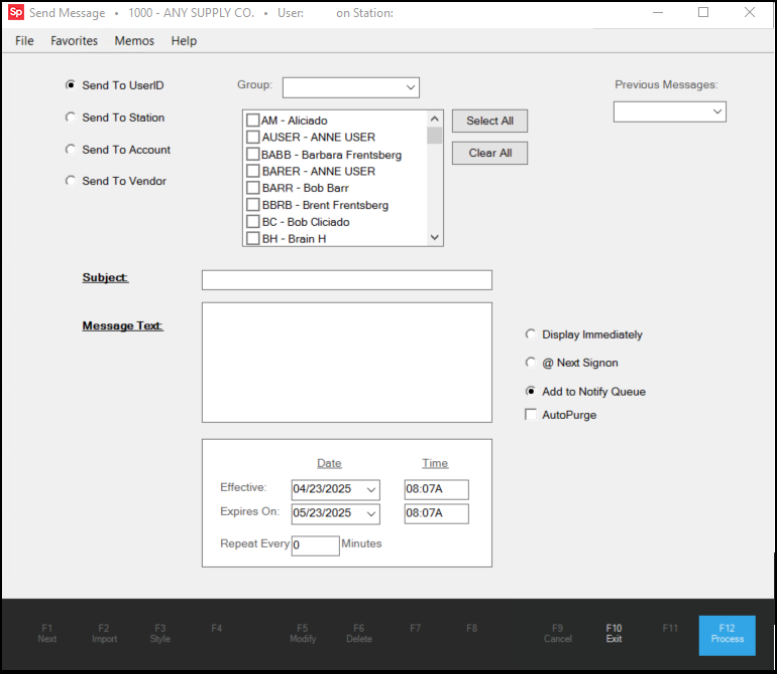
For user and station messages, several delivery choices are available. You can send messages to display at different times and different places. Certain types of messages do not offer all choices and may require a specific delivery method (such as vendor and account type messages).

-
Display Immediately - When you select this option, the application displays the message immediately at the user's PC or designated station when that user or station is logged in, and regardless of the user's/station's current activity. In most cases, message windows don't become the active window unless the user clicks on the message window using their mouse. This is done so messages won't interrupt a user's activity. System polling interval settings determine how often the application checks for messages, so there can be a delay before an "immediate" message appears. Immediate messages change function somewhat when the "Must Acknowledge" option is used (currently only available with messages to an account).
-
@ Next Signon - When you select this option, the application opens a message window at the time the user or station logs in, not while the user or station is being actively used.
-
Add to Notify Queue - When you select this option, the application adds the message to the Notify queue and increments the Messages
 number (below the Main Menu) for the user you send it to. This only works for "user" messages and not those you send to a station or an account. No Messages indicator displays when there are no messages.
-
Auto Purge - Use this check box to define whether the application should purge the message automatically. If set, this does not immediately purge messages after reading; however, it does make them eligible for automated purge processing (a service that runs daily to purge messages that have expired and are set to purge automatically). Administrators can set a parameter to define the number of days after expiration when messages are purged (Expired Messages Purge Days).
-
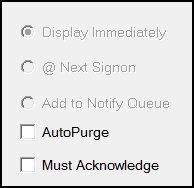
Must Acknowledge - When you send a message to an account, there is an additional Must Acknowledge option. These messages are always "Display Immediately" by nature. Must Acknowledge messages display before the user closes the Message popup window. If there are multiple "immediate" messages queued and any of the "must acknowledge" messages haven't yet been displayed, the user won't be able to close the form until all the user has seen all of the "acknowledge" messages. Attempts to close the window will result in the next message being displayed instead. A beep sound is also produced but is only audible if the computer has such sounds enabled.
When any of the "immediate" messages queued are "must acknowledge," some other aspects of the messages change as well. For example, the Message pop-up is usually semi-transparent, but in this case the form is not transparent at all. In addition, instead of appearing near the tray (lower right-hand corner usually), the messages display in the center of the form. This prevents use of the main form until the must acknowledge messages have all been viewed.
Making Changes or Deleting an Existing Message
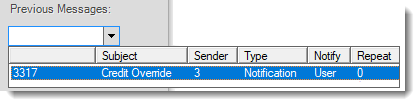
Use the "Previous Message" list button to choose an existing message for editing.
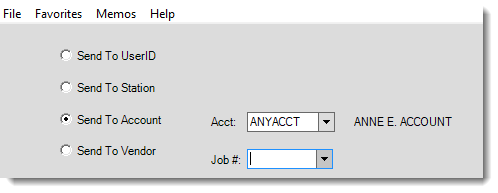
To just view Account messages, choose the "Send to Account" radio button first.
To view, modify, or delete a single customer's messages, enter the account prior to choosing the "Previous Messages" drop down. Unless you are an Administrator, you can only view and change previous messages if you were the sender.
Make changes if necessary and choose Modify (F5). To remove a message, select Delete (F6).
The alternate menu can also be used to select messages by subject or by account. To use these options, type in either the text or account (code, not name) to be searched for. don't press tab or enter. Instead, select the menu using your mouse's alternate menu button (the right-hand button on a right-hand configured mouse).
Sending a Message to a Customer via their Account
When you send messages to a customer's account, it will display during most Point of Sale activities (except Payments and Pay-outs) when the account is selected for use. To send a message to an account, choose the Send To Account radio button and select or enter the account you want to message. Messages cannot be sent to specific jobs.
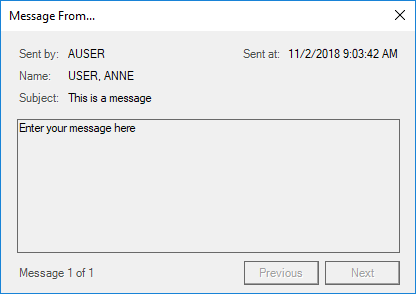
A message to an account appear as a separate window when the account is entered or selected. Message windows don't prevent or inhibit Point of Sale entry. A message window can be responded to or ignored indefinitely based on the user's preference. Message windows will appear semi-transparent until the user clicks on the message window. This prevents the message window from interfering too much with a recipient's current activity.
")
Message From... (to Account)
If an account has multiple messages, the user can choose the Next button to view them in order.
Sending Messages to a User or User Group
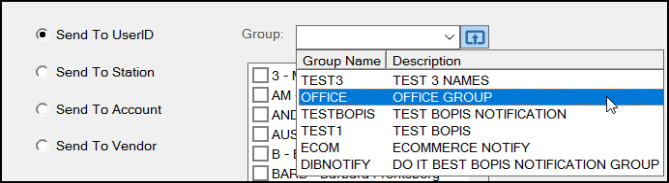
You can route messages to one or more individuals, a message group, or a combination of the two. When sending messages to users, the form includes an area listing all the users and check boxes that determine whether (or not) they are to receive the message. Placing a check next to a user id, designates that the user should receive a copy of the message. User groups are used to quickly mark users in the selection area. After group selection is done, the check box listing can be edited to add or remove users before processing the message.
Use the Select All or Clear All buttons to either check or clear all of the users selected for receiving a message.
After you enter the message heading and body text and select the recipients, choose Process (F12) to send the message.
Using and Defining Message GroupsSystem Administrators can create message groups right away using the Settings To add a new message group on the fly: 1. On the Send Message form, click the Settings 
User Group Maintenance 2. In the Group field, enter the name that identifies the new group. 3. In the Description field, enter an appropriate description for the group list. 4. Select the check box beside each user ID you want to add to the group list. 5. After you have selected all the users you want to add, click the Apply button. System Administrators can delete a message group by selecting it from the Group list, selecting the Menu Marker |
 , and choosing the Delete User Group menu option.
 Sending Messages to a Station
This allows a message to be set to either a specific station (device), all stations, or all stations assigned to a particular branch (only applies to companies with more than one location).
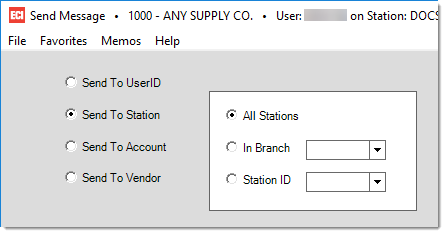
Messages sent to a station can either be delivered either immediately or when the next sign-on is done for the station. Your system's polling interval determines how often the software checks for messages, so there can be a delay, based upon this setting, before an "immediate" message actually appears to users.

Send Messages to Vendor
Currently, vendor messages are displayed immediately upon vendor selection in the Order Entry transaction found in the Purchasing area and the Direct Ship transaction in Point of Sale. Vendor messages can only be displayed in cases where vendor selection is required.
Messages / Notifications
Message notifications are found at the bottom of the Main Menu.
To review the messages in your queue, click the Messages  icon.
icon.
The Notification Queue displays the messages in User ID order (based on entries in in the From column) and then oldest to most recent. You can click the Date/Time column to re-order the list. Messages remain in the queue until they expire or you (or someone to whom they are addressed) deletes them.
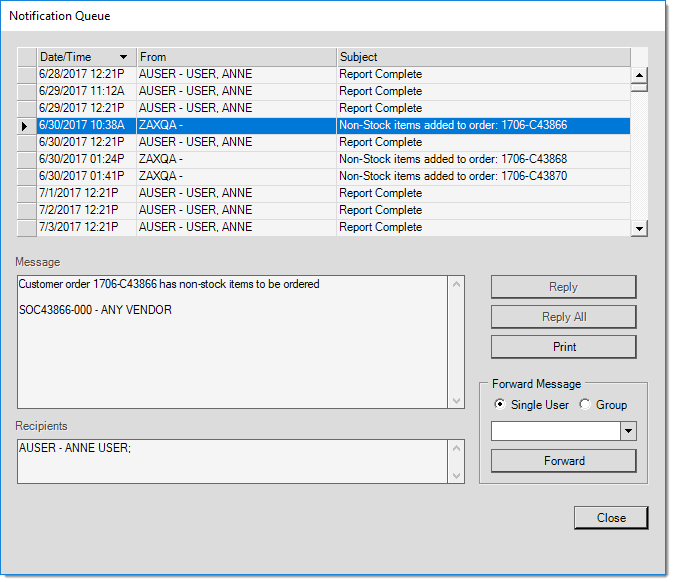
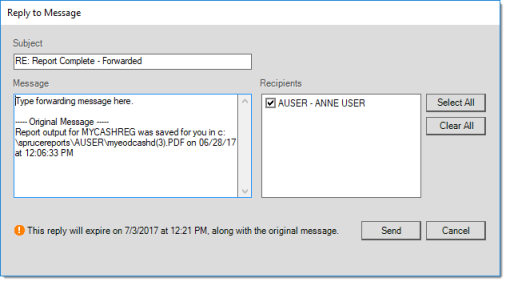
Reply / Reply All - It is possible to use the "Reply" or "Reply All" option to respond to messages by selecting a message and then clicking the "Reply" or "Reply All" button. The user cannot manually add addresses as the system automatically fills out the recipients list. If needed, you can type a message above the original message, select the recipients and click "Send".
Print - To print a message or messages, select the desired message(s) from the grid, and click on the "Print" button. You may also right right-click on the selected message(s) and select Print from the selection menu.
Forward - Messages can be forwarded by a user to another user or group. Select whether you will be forwarding to a single user or to a defined group. Using the drop-down list, select the desired recipient, and click the "Forward" button.
Delete Message(s) - Messages can be deleted directly from the grid after reading. Select the row in the grid containing the message and press the Delete key on your keyboard. You may also right-click on the selected message(s) and select Delete from the selection menu. For helpful tips on selecting multiple rows, please click here
Close - Click on the "Close" button to close the Notification Queue window.