Rent to Own (Hire Purchase) Contract
Rent to Own, also referred to as "Hire Purchase" in the UK (United Kingdom) and other areas, provides the ability to establish a payment plan for a customer's purchase for a specific period of time. The customer makes installment payments over the term of the agreement or contract. Some portion of their payment is applied toward principal unless no financing or interest is included. The amount applied to principal may be either a fixed amount each month or vary if a declining interest (amortized) method is used (at your company's discretion).
The actual transaction is located on the Point of Sale menu. The default name of the transaction for customers in the United States and Canada is "Rent to Own." The term "Hire Purchase" is the default in other areas. Customers can rename both the "system" default (the name of the transaction on the menu) as well as the program name for each branch location. For example, a company could use the feature for Rent to Own at one location, but for lay-away plans at another.
Rent to Own contracts must start with a Point of Sale > Order. You must use a Rent to Own account which you set up in Database > Accounts. You can view the status of an existing Rent to Own account at any time by navigating to Receivables > Inquiry > Status. Please contact your aftermarket sales representative to enable this feature.
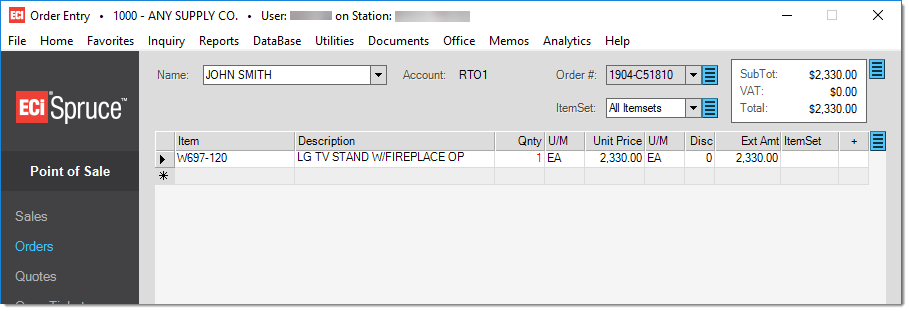
Once all the items have been entered, press F12 to process the transaction. From the Order tab on the "Process Order Document", you can enter a deposit, setup Delivery options, etc, and press Finish. After pressing the Finish button (F12 key), a prompt will appear asking if you wish to create the contract. Select Yes and the Rent to Own Contract dialog window will appear.
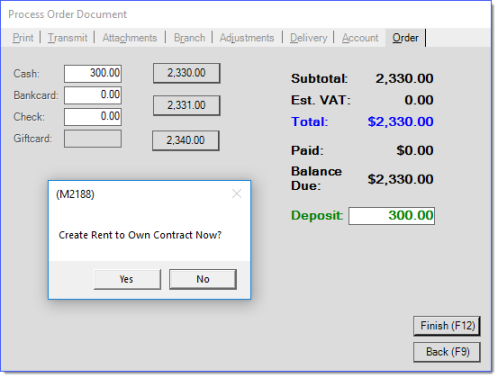
Contract
The Contract form is where all the pertinent information relevant to the contract is stored. This includes contact information, orders, invoices, Contract details, payment schedule, billing details, linked payment information, and log.
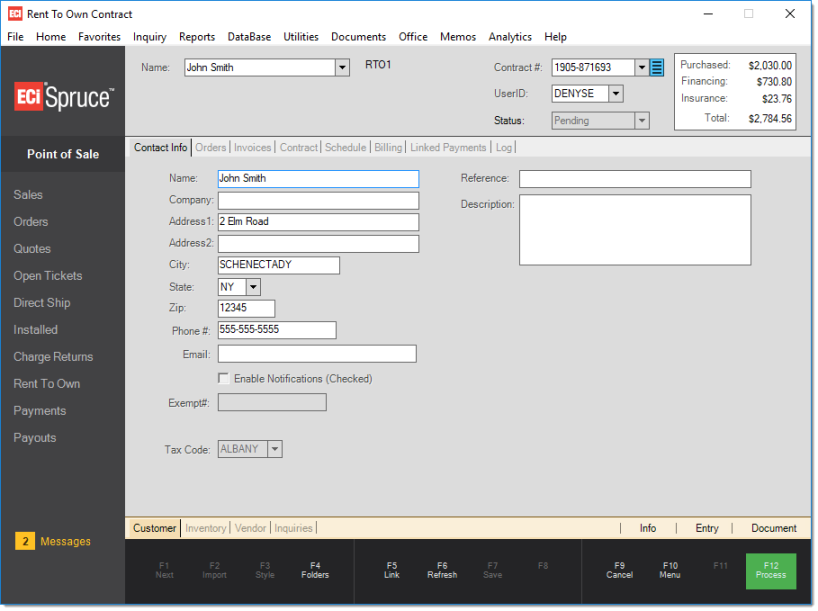
Contact Info Tab
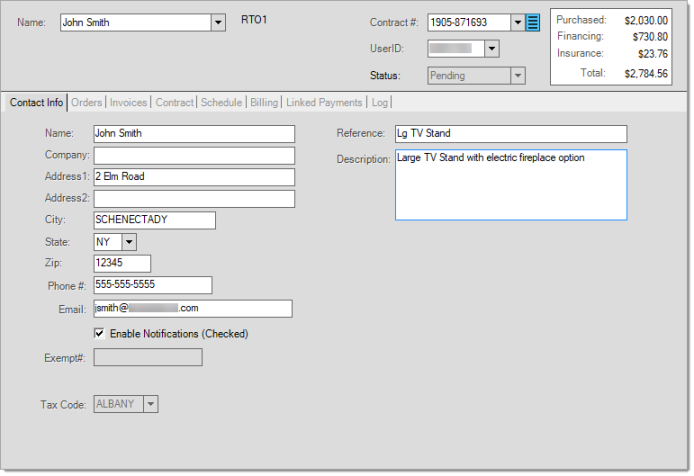
Enter the information for the applicant on the Contact Info tab. The contact information will automatically fill in with the Account information, but you can still make necessary changes if required. Changes made here will not affect the Account details. Select "Enable Notifications" if the applicant wants to receive notifications for billing, payment and past due information. The Reference and Description fields are user defined and could be used to give a description of the item(s) purchased.
Orders Tab
The Orders tab will automatically link to the order you created. The top grid will show the orders/quotes associated to the contract, and you can view all items within an order in the lower grid. You may also filter by itemsets by using the filter field.
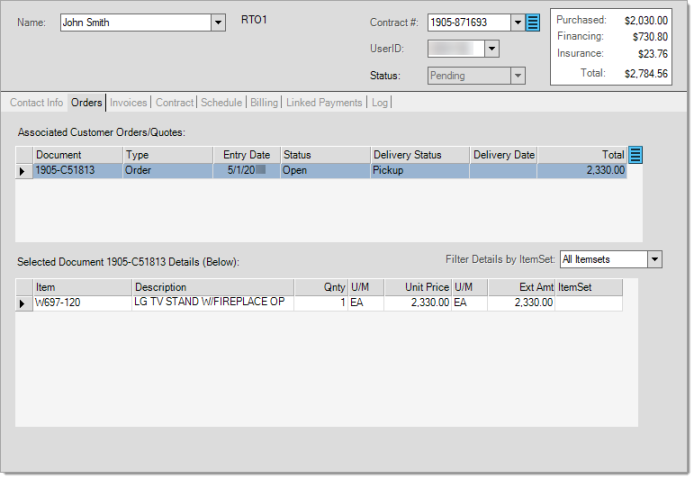
It is also possible to add an order or a quote to the contract, remove an order/quote or invoice an order/quote by clicking on the menu marker by the upper grid.

Invoices Tab
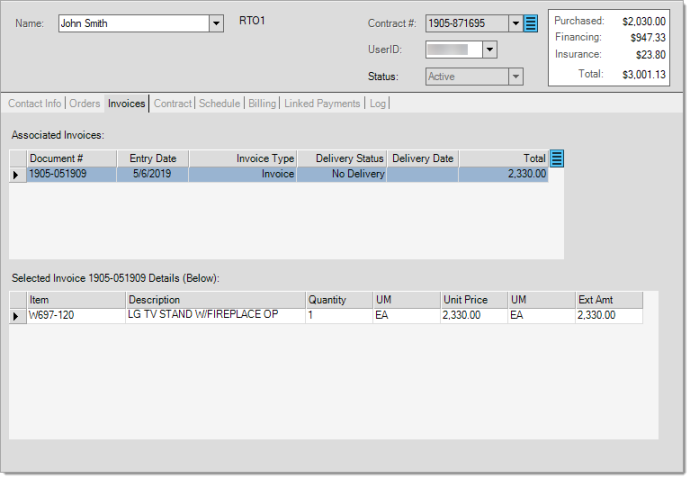
Once the contract is finalized and invoiced, the invoices will be visible on the Invoices tab. The upper grid lists all invoices associated to the contract, while the lower grid shows all items within the selected invoice.
Contract Tab
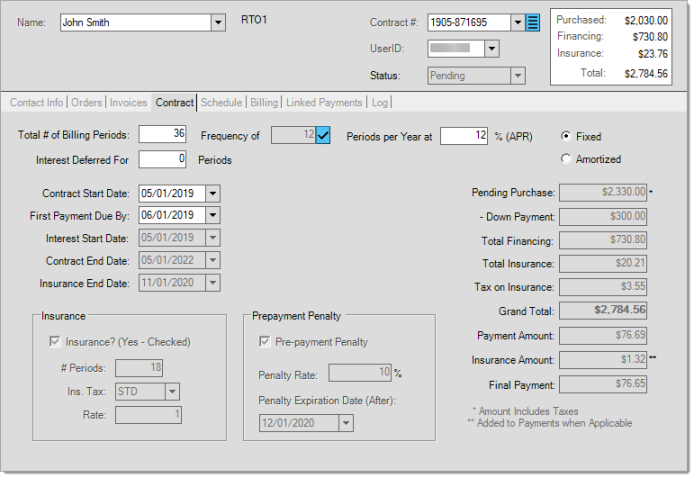
The Contract tab is where you will define the parameters of the contract. The information initially entered is based on the branch's Rent to Own Setup defaults. Based on the settings, the user may be able to edit some fields. As you edit the various fields, the payment calculations will update accordingly.
Total # of Billing Periods / Frequency / Periods
You can change the Total # of Billing Periods, Frequency, Periods per Year, and Interest Deferred by changing the value in the designated fields. The Frequency of payments can be modified by clicking on the blue check ![]() and selecting the desired value. You may also change whether this will be a Fixed Rate or Amortized payment plan.
and selecting the desired value. You may also change whether this will be a Fixed Rate or Amortized payment plan.

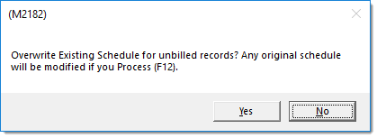
A prompt will appear when making modifications the contract defaults for the user to confirm the changes.
Dates
This is where you will enter the contract start date and when the first payment is due. The other dates are for informational and cannot be modified. If you are using Deferred Interest, the Interest Start Date will adjust accordingly. The Contract End Date is based on the number on billing periods. The Insurance End Date will be dependent on the Contract Insurance defaults set in Rent to Own Setup.
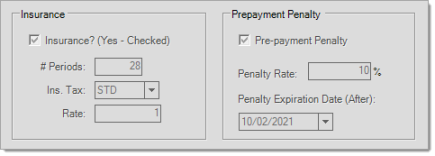
Insurance / Prepayment Penalty
The values in these fields are determined based on the defaults set in Rent to Own Setup.
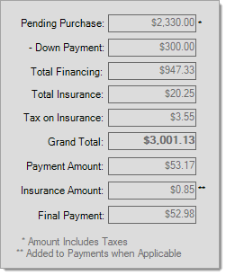
Payment Information
Basic payment information is broken down into easy to follow line items. This information is automatically updated as changes to the contract payment details are made. The Payment Amount is how much the customer will have to pay on payment due dates.
Schedule Tab
The Schedule tab is where all payment due dates and amounts are listed, as well as a breakdown of what amount goes toward taxes, principal, and insurance. The Billed and Paid check boxes will be selected automatically as the system bills and as the customer pays against his contract.
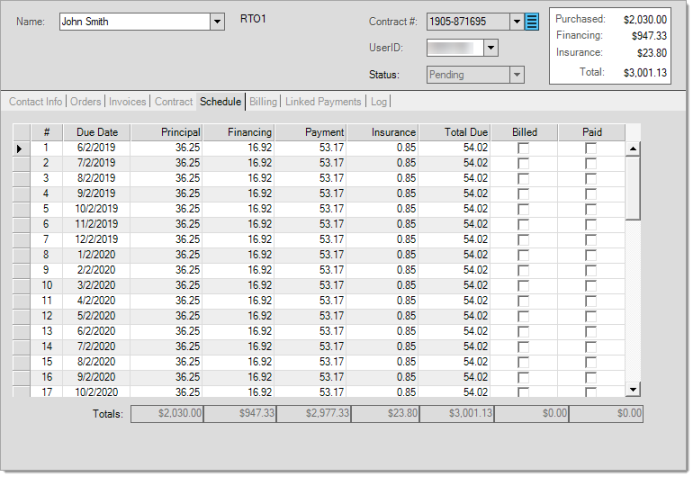
Alternate views of the Schedule tab are available by clicking the F3 Style button on the function key area. Available schedule views are: Schedule (default view), Payments, Payoff, and Deferred.
Billing Tab
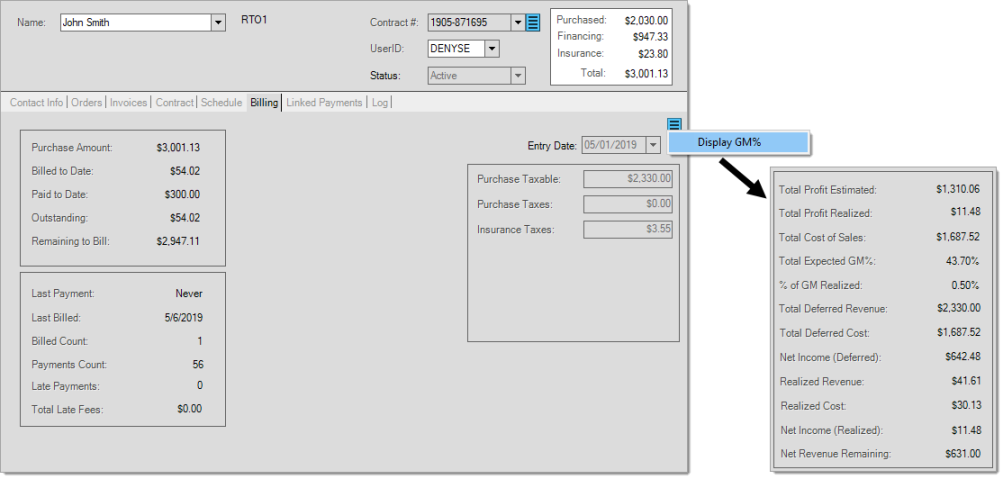
The Billing tab provides information on the current billing status, including how much has been billed/paid to date, outstanding balance, etc. You may view GM% (gross margin) by clicking on the menu marker ![]() and selecting Display GM%. The GM% will show in the middle portion of the Billing tab.
and selecting Display GM%. The GM% will show in the middle portion of the Billing tab.
Linked Payments Tab
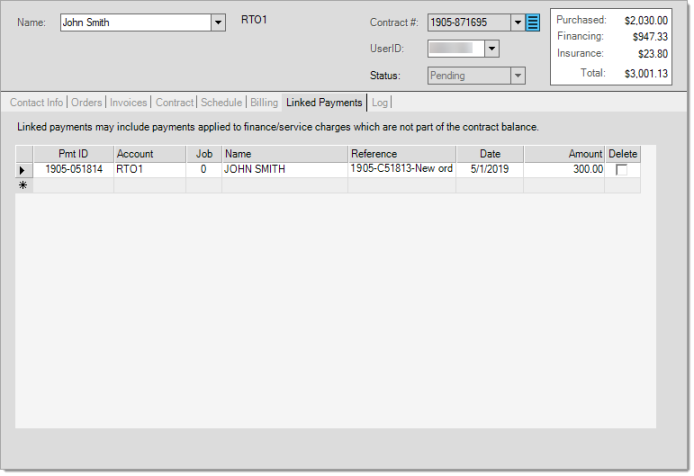
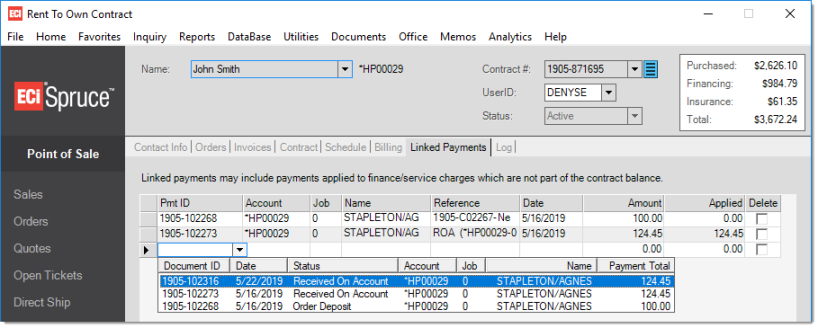
From the Linked Payments tab you can view any linked payments attached to the contract.
Log Tab
The Log tab displays notes added to the contract/account and allows users to add, modify, and delete existing notes. Future notes will be available until deleted. Notes can be added to the log in 2 ways: (1) from the Log tab on this form, (2) from the Account Maintenance form, (3) from Receivables\Inquiry\Status, and (4) from the Credit Override area. You can limit the log to only show notes added from this form, or uncheck the "Include Contract Notes Only" if you want to see all notes associated to this account.
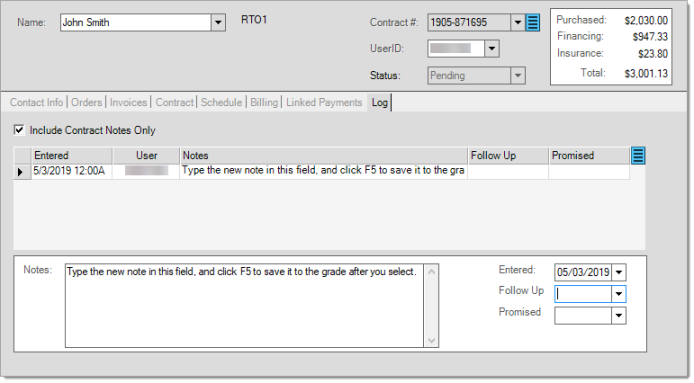
Existing notes can be deleted by selecting the desired row in the grid and pressing the Delete key or selecting "Delete" from the alternate menu (usually a right click). Edit a note by double-clicking on the row in the grid you want to make changes to. There are currently no restrictions regarding adding, editing, or deleting notes; however, the Status form is the only area that notes can be modified or deleted, so restricting access to this form can prevent changes. Notes are limited to 1024-characters of text.
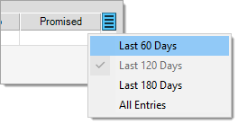
The last 60-days of notes are the default date range; however, users can modify this by choosing another preset (120 or 180 days) or "all entries" using the menu marker ![]() .
.
Use the Save (F5) function to save note additions or modifications from the Log tab. Deletions are processed immediately, so be careful when deleting notes.
Process Contract
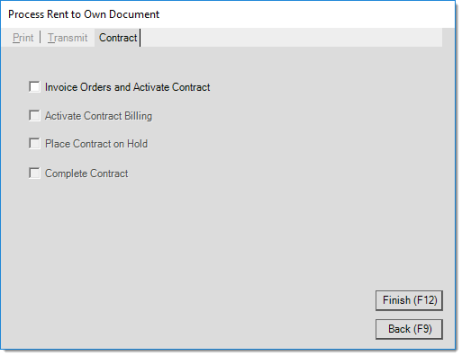
Once all the contract details have been entered, click the F12 Process button or press the F12 key on your keyboard in order to create the PS Installment Purchase document. The Process document form will pop up. Press the Finish button.
At this point, navigate to POS > Documents, and select the PS Installment Purchase document (Contract) from the drop-down list.
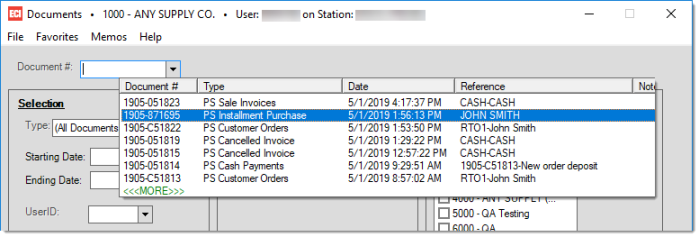
The contract contains the list of items, schedule of payments, contract terms, and a signature line for the customer. Click here for an example of the document.
Once the customer has reviewed and signed the contract, return to POS > Rent to Own, and select the Contract # from the Rent to Own Contract dialog window. Click F12 once again, and at this time, you will select "Invoice Orders and Activate Contract".
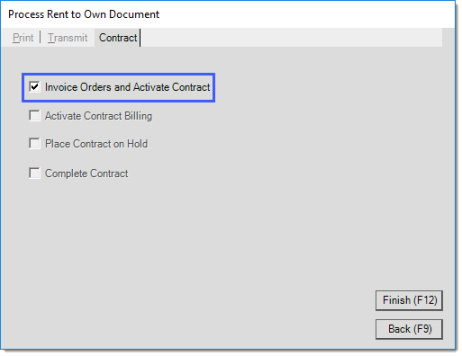
Select your desired Transmit and Print options, and click Finish (F12). Invoices are generated and the Contract is activated at this point. At this point, the Invoices & Billing tab will update with the order information.
Making Payments
Making a payment on a Rent to Own contract is similar to making a Receive on Account payment type. You will enter the Rent to Own Account Name in the designated field.
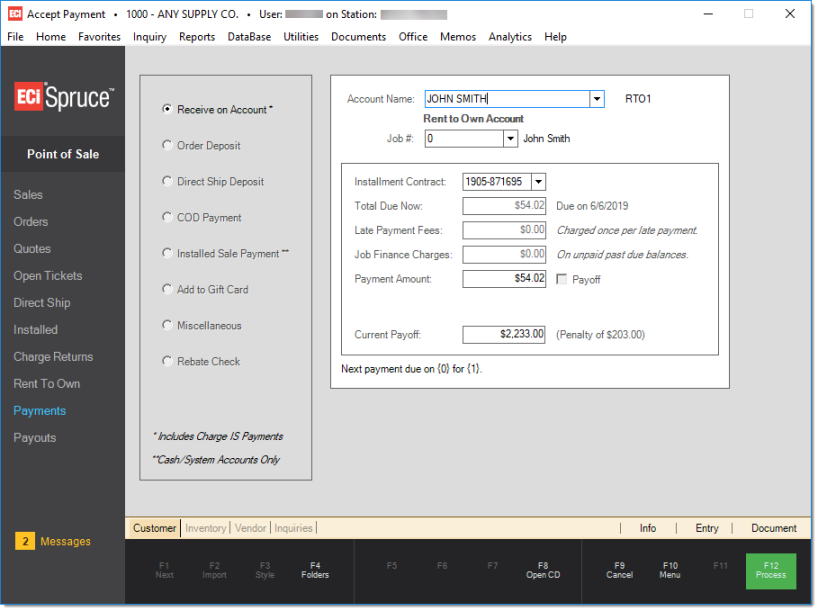
Account Name - Enter the Rent to Own account name in this field.
Job # - Enter the Job number.
Installment Contract - Select the contract to retrieve. A Rent to Own Account could have multiple accounts tied to it. Once the contract has been selected, the fields below will fill out with payment information.
Total Due Now - The current amount due as well as any past due amounts. The payment due date is shown next to the field.
Late Payment Fees - Any late payment fees will be tallied in this field.
Job Finance Charges - All finance charges are added in this field.
Payment Amount - The total of "Total Due Now", "Late Payment Fees", and "Finance Charges" add up to the payment amount due. The payment amount can be modified to reflect what the customer will be paying.
Current Payoff - The field represents the current payoff amount on the contract. If the customer wants to payoff the remainder on the contract, check to "Payoff" option. This will populate the "Payment Amount" field with the current payoff amount.
Press F12 Process to proceed with the payment transaction.
Reversing / Removing a Payment
In the event that an incorrect payment is entered or a payment is made to teh wrong contract and/or account or job, follow the steps below to remove the payment.
1.Remove the payment from the Rent to Own contract.
a.Change to the branch linked to the Hire Purchase contract if necessary.
b.Point of Sale > Hire Purchase
c.Select the contract that had a payment incorrectly applied.
d.Select the “Linked Payments” tab.
e.Click the “Delete” check box next for the payment you want to remove.
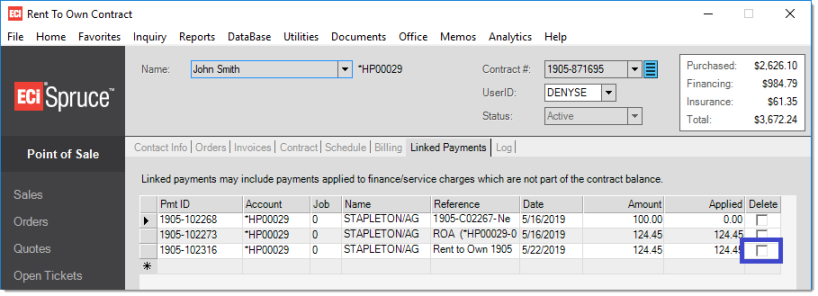
a.The "Apply to Contract" dialog will appear to confirm the action. If you choose "No", nothing will happen.
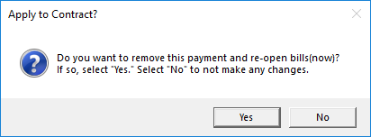
a.Answer “Yes” to continue. This will remove the payment and then re-apply all the payments on the contract (this way if you remove one that wasn’t the most recent, it doesn’t leave a gap in the payment history.
b.*This immediately removes the payment and updates the billing schedule even if you don’t re-save the contract* If you accidentally remove the wrong one, you can re-link the payment by selecting it again from the data grid.
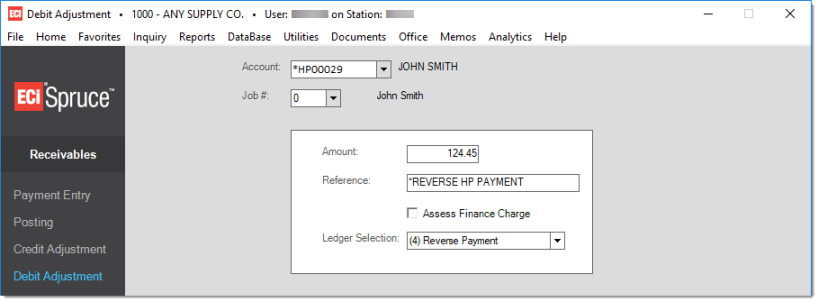
2.Create a debit adjustment for the payment on the account/job.
a.Receivables > Debit Adjustment
b.Select the customer and job the payment was applied to.
c.Enter the amount of the payment.
d.Select a ledger offset (you should map an account for payment reversal matching the offset to A/R that would have been used by the original payment such as “cash/checks,” etc.).
3.Post the payment to the debit adjustment.
a.Receivables > Posting
b.Select the customer, job, and payment.
c.Apply the payment to the debit adjustment created in step #2 (not any other charges). You can double-click the row header (block on the left-hand column) to quickly set the posting amount for that debit.
d.Post (F8).
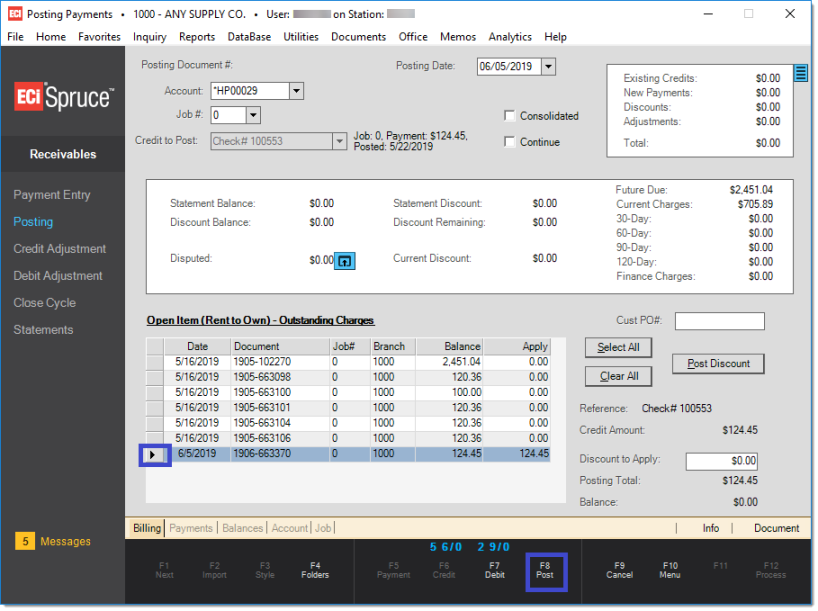
*Note: no filtering is done on the list of charges in this case because the payment is no longer linked to the contract.
4.Re-enter the payment correctly (if necessary).