Use the Promotional Signs feature to print signs for pending sale pricing, price updates, and inventory item price changes. To use the Promotional Signs feature, create templates in the Signage Designer. You can print signs for both applied and unapplied price updates and sale prices using the Import functionality. Please contact your Aftermarket Sales Representative to enable this feature.
To access the Promotional Signs feature, from the Main Menu, choose Inventory > Utilities > Promotional Signs.
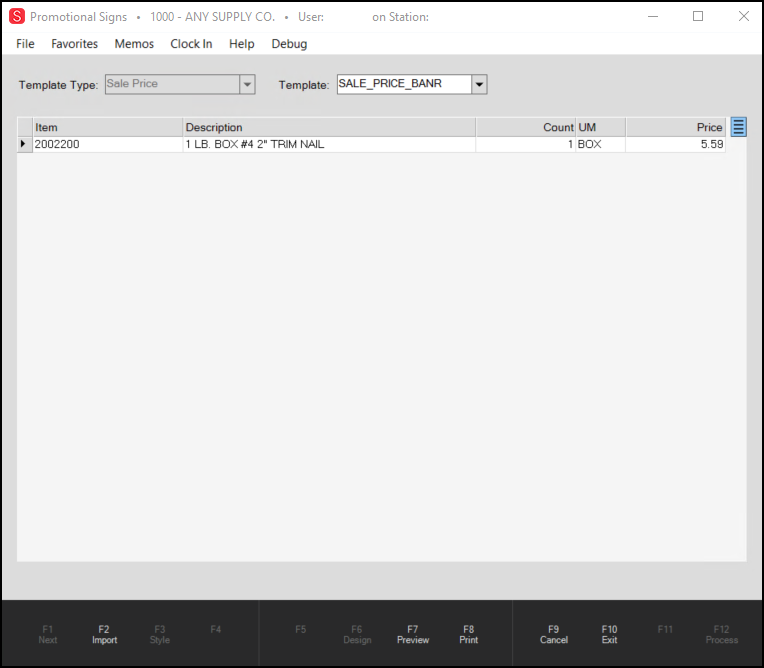
Using the Price Update /Sale Price Template
To print promotional signs based on a Price Update or Sale Price template, from the Template Type list, select the desired template type, and enter a new template name to use.
Choose the Import (F2) feature to import price changes/sale price. Price updates and sale prices are
pulled from changes made in Inventory > Price Updates.

Select one of these options, based on the price update you want to display in the promotional sign:
Applied Price Updates / Sale Price – Inventory price updates that have been applied.
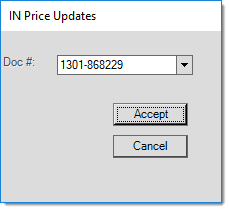
oSelect the price update document to use from the Doc# dialog and click Accept. The data grid will populate with the items associated with the selected price updates.
Unapplied Price Updates / Sale Price – Inventory price updates that have yet to be applied.
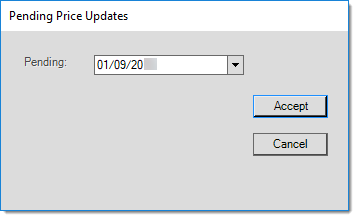
oSelect the Pending price update from the drop-down list and click Accept.
The data grid will populate with the items associated with the selected pending price updates.
After the grid is populated with the items and descriptions, enter the number of signs you want to print in the Count field. The Description and Price columns are for reference purposes only and cannot be edited. If the selected template has data mapping of an Item price, the data mapping value will supersede the price shown in the grid.
Preview the promotional sign output by clicking F7 Preview or send the sign directly to the printer by clicking F8 Print. You can also print the sign from the Preview dialog window.
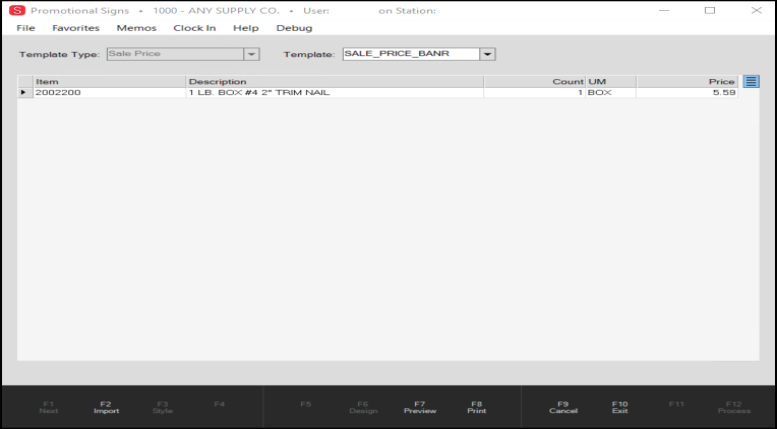
When creating promotional signs based on Inventory Template Types, items can be entered manually or through the Import (F2) feature. The Count field represents the number of signs to be printed for the item. The Item, Description, and Price fields cannot be edited.
•Manually entered items – Type Item name/number in the grid. Update Count field to reflect the amount of signs to be printed for the selected item.

•Import – The Import (F2) option for inventory offers a variety of options for selecting and copying inventory items into the data grid. Selection choices include the following: group/section range, keyword, location code, and classification. The Selection control used here matches the control used by inventory reports and functions identically. For more detailed information about selection by inventory, click here.

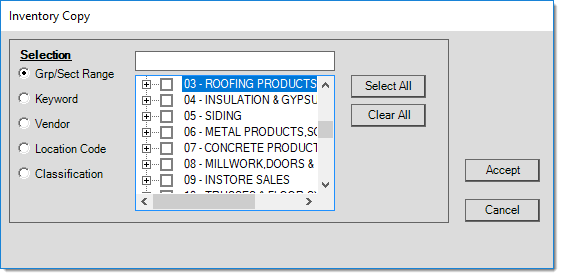
After all the required items have been entered, you can preview the promotional signs by clicking F7 Preview or you can send them directly to the printer by clicking F8 Print. It is possible to print from the Preview dialog window.
 Click here to see the Print Preview result for the above example.
|
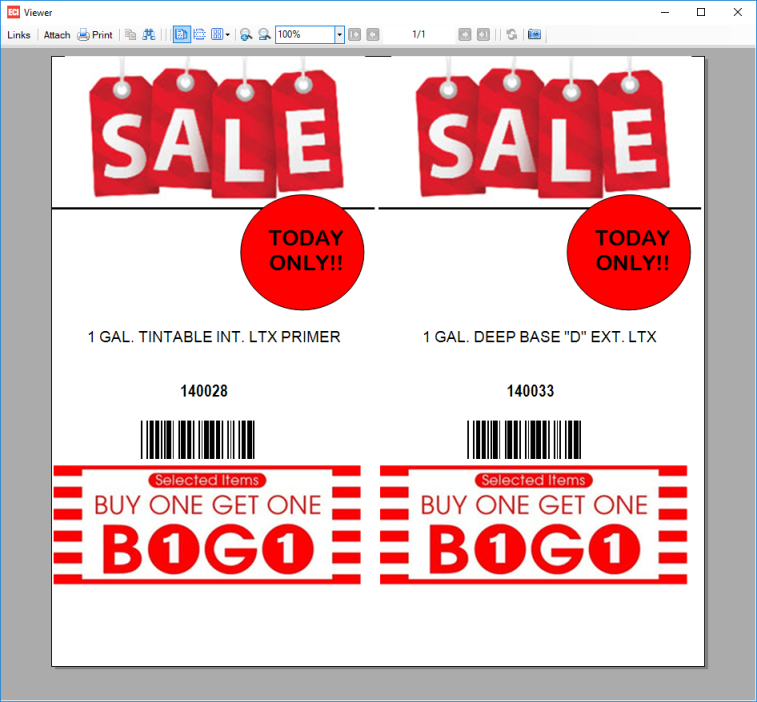
The following table lists icons and options used on the Document Viewer toolbar and explains what they do:
 Print Print
The Viewer's Print button opens the standard Microsoft Windows® print dialog. This can be used to print a copy of the current document or report. It also provides the ability to print selected page, pages, or a range of pages (these options are only enabled for multi-page documents and reports). Printer selections are determined by the printers available in Microsoft Windows for your computer (server, PC, client, etc.) and are neither dependent upon or determined by the application. Any issues printing or questions regarding individual printer options would need to be resolved or handled by your company.
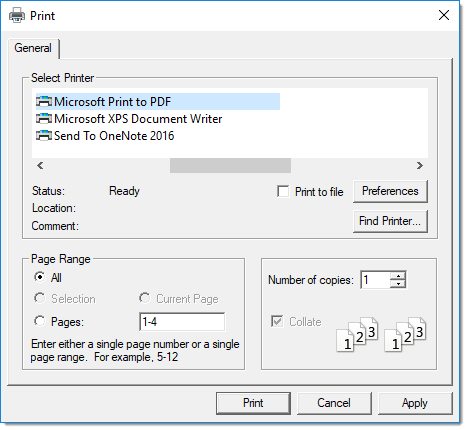
Microsoft Windows Print Dialog
This is a standard Windows dialog, not an application control, so it is subject to change and may appear differently based on your Microsoft Windows operating system.
|
 Find Find
The Find tool is used for searching text within the current document or report. The control allows you to search either up or down from your current location in the document. Choose the "Find Next" button to begin your search or to look for additional matches within the displayed document or report. Matching text is highlighted with a blue background color. The "Cancel" button can be used to close the Find dialog (or click the "X" button in the upper right-hand corner of the dialog).
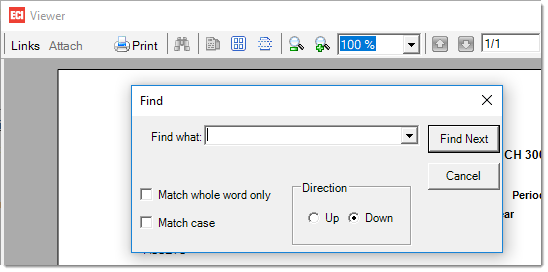
Find Dialog
This combination text-area and drop down allows you to enter your search text as well as reference any recent search (find) text you may have entered. Past search text is only saved temporarily and if you actually choose "Find Next" after entering the text.
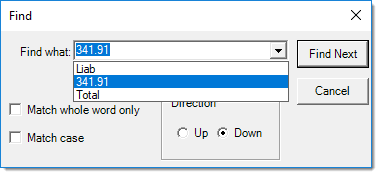
This option, if selected (checked), treats the entire text entered as a single phrase rather than individual words. This really only applies when a space exists between text characters in the "find what" text area. For example, if you wanted to search for "BOB SMITH" but not find all occurrences of either the words "BOB" and "SMITH," you would check this option.
This option, if selected (checked), only looks for matches with the exact same case structure as the text typed in the "find what" text area. If checked and the search text was "Bob," the words "BOB" and "bob" would not be recognized as matches.
Use these radio buttons to change or indicate the direction of the search.
|
 Single Page Single Page
The Single Page Mode button changes the Document Viewer's scroll mode back to a single page view from continuous scroll. In "single page" mode, the vertical scroll bar on the right-hand side of the Viewer can only be used to scroll through the current page. Continuous Scroll (another option on the Viewer toolbar) allows the use of the vertical scroll bar for all pages of a document.
This option is not enabled when the Viewer is first initialized (opened). Single page view is the default, so until continuous scroll is indicated, this option won't be available.
|
 Multiple Page Multiple Page
The Multi-Page Display button changes the Document Viewer's display so that multiple pages can be viewed in the Viewer panel. Options allow the users to select the number of pages to display up and down in the viewer panel. The more pages selected, the smaller the size of the images. Click and drag the mouse across the page icons to expand the page display to the desired format.

|
 Continuous Scroll Continuous Scroll
This only applies to multi-page documents. When selected, this allows the vertical scroll bar to be used to scroll across pages instead of requiring use of the previous and next page buttons. Choose the "single page" icon to return to single page view (the default).
|
 Zoom Out Zoom Out
This magnifying glass icon decreases the scale of the document displayed making it appear smaller. The scale is decreased to the next lower preset percentage value (as listed in the Zoom "Combo" drop down control).
|
 Zoom In Zoom In
The magnify icon increases the scale of the document displayed making it appear larger. The scale is increased to the next highest preset percentage value (as listed in the Zoom "Combo" drop down control).
|
Zoom Combo
The Zoom Combo is a text-area combined with a drop down control listing preset "zoom" values. Selection or entry of a value either increases or decreases the scale that the document or report image is displayed using. Select from preset sizes to resize the document in the viewer. Choices include the percentages: 10%, 25%, 50%, 75%, 100%, 200%, 400%, and 800%.
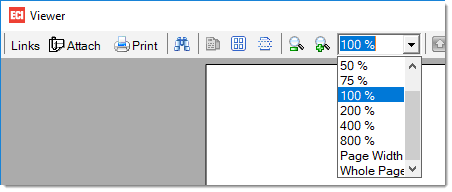
The "Page Width" sizes the document to the maximum possible width matching the current size (width) of the Viewer's display area but allows for vertical scrolling.
The "Whole Page" sizes the document so that the entire document fits within the current dimensions of the Viewer's display area.
|
 Previous Page Previous Page
For multi-page documents, and when continuous scroll is not enabled, this button is enabled and allows the user to display the previous page when applicable.
|
 Next Page Next Page
For multi-page documents, and when continuous scroll is not enabled, this button is enabled and allows the user to display the next sequential page when applicable.
|
 Page Number Page Number
This text-area has two (2) functions: (1) it displays the current page number as well as the total number of pages for the current document/report and (2) it allows the user to type in a specific page number to display.
|
 Previous Document Previous Document
The "NextDoc" (Next Document) button is provided for use when multiple documents have been loaded into the Viewer. One way documents are considered as "loaded" is when they have been displayed in the Viewer (linked documents are not considered a "view" unless the link has been selected and the document shown). Another way documents are considered loaded is when multiple selections are made from the Documents form and the View (F7) function is used to open or refresh the Viewer. Previously "loaded" or viewed documents are not retained after the Viewer is closed.
|
 Next Document Next Document
The "NextDoc" (Next Document) button is provided for use when multiple documents have been loaded into the Viewer. One way documents are considered as "loaded" is when they have been displayed in the Viewer (linked documents are not considered a "view" unless the link has been selected and the document shown). Another way documents are considered loaded is when multiple selections are made from the Documents form and the View (F7) function is used to open or refresh the Viewer. Previously "loaded" or viewed documents are not retained after the Viewer is closed.
|
|


![]() Click here to see the Print Preview result for the above example.
Click here to see the Print Preview result for the above example.


