Import (F2), Inventory Feature
Inventory
The Import (F2) option for inventory offers a variety of options for selecting and copying inventory items into a transaction's data grid. Selection choices include the following: group/section range, keyword, location code, and classification.
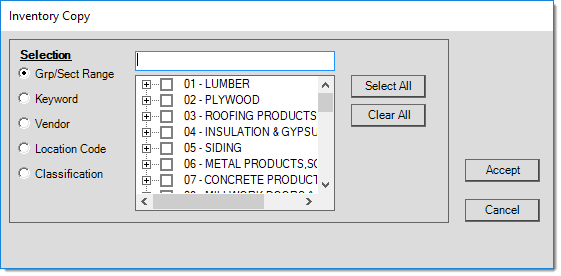
Inventory Copy
The Selection control used here matches the control used by inventory reports and functions identically. For more detailed information about selection by inventory, ![]() Click here
Click here
Inventory Selection OptionsSelection using inventory, primarily used with reporting, offers the following selection choices: group-section, keyword, location code, and classification. In some cases, vendor selection may also be allowed. Radio buttons determine which selection options are displayed in the area on the right-hand side of the panel. Depending upon where this panel is used, you may or may not be able to specify more than one selection choice. When more than one selection criteria has been selected, a check box is used to indicate which selection methods have been assigned values. 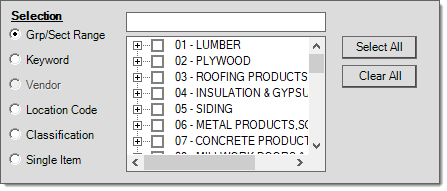
Item Selection by Group Section Group/Section RangeGroups and sections are numeric values between 1 and 255 that are assigned text descriptions and used for inventory organization. Your company can define up to 255 product groups. Within each group, your company can also define up to 255 sections. This provides many different group and section combinations. Groups and sections are required. In most cases, the structure of the groups and sections has already been established prior to using the software. This organization might have originated outside your company to coincide with a primary supplier's structure or it might just have been some logical order your company came up with at some point. Groups and sections are listed in what's referred to as a "tree." The tree is comprised of "nodes" and each node has an associated check box. There are two levels of nodes. The first level are nodes that indicate your company's product groups. The second level are nodes indicating sections within each product group. Product group nodes within the tree are expanded by clicking the "+" to the left of the node or group's description. Doing this displays the next level of nodes which are used to list the product sections assigned to the selected group. When a node is expanded, you can then click the "-" to hide that node's contents. Selections are made by checking the check box next to a node. Checking a group node selects all the section nodes within that group. Checking a section node in the second level, only selects that section. Group nodes with only some, but not all, sections selected display a check with a grey background color Two buttons are provided: Select All and Clear All. The "Select All" button selects (checks) all group and sections in the tree. The "Clear All" button clears all group and section selections in the tree. We should point out that selecting all groups and sections without any other selection criteria or conditions (such as reporting filters) will include your entire inventory which may return a significant quantity of data (items). Selections involving large quantities of items can produce warnings in some cases. The tree supports keyboard navigation. If you tab to the tree control using your keyboard, the up and down arrow keys can be used to navigate through the nodes. Nodes can be expanded or minimized (hidden) by using the right (expand) and left (close) arrow keys. Expanding and hiding (closing) only works on "group" nodes, however. Selection (checking the check boxes) is accomplished by pressing your keyboard's space bar in this case. An alternative to using the tree control is to type the group and sections using the text-area found above the panel containing the tree control. For example, if you type "01/01" and press the TAB key, the group 01 and section 01 (within that group) will be selected. Here are some examples to illustrate how keyboard selection works:
KeywordKeywords are one of the look up methods provided for item selection. It is best practice to use keywords that are more general than specific so that keywords reflect more general attributes describing a product. These are intended to be used for broader selection rather than specific item selection. For example, a keyword of Hammer would be more useful than a keyword matching the manufacturer's SKU since Hammer would apply to many items as opposed to just one. Keywords are associated with items from the Item Maintenance form's Common, Select tabs. 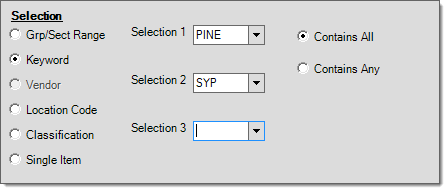
Item Selection by Keyword Keyword selection allows you to choose between one and three keywords to match on. Matching has two variations: Contains All and Contains Any. The "Contains All" condition means that for items to be selected, they must be associated with all of the keyword selections made. For example, if you choose three keywords, only items that were associated with all three would be included in the selection. The "Contains Any" is less limiting and tends to return more results. When the "any" condition is applied, items only need to match one of the selections you have made. VendorVendor selection isn't provided in all areas, however, when it is permitted, it selects items with a primary vendor matching the selection. Alternate selection is provided matching on the vendor's name or company name. Type in the name prior to choosing alternate selection methods from the context menu (usually a right-click). 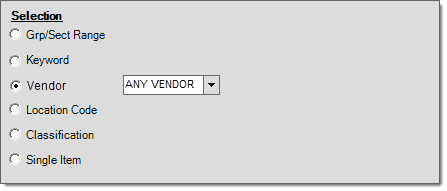
Item Selection by Vendor Location CodeLocation codes are similar to keyword selection in function; however, location codes are used for indicating where a product can be found. Items are limited to a maximum of three location assignments. Each location is a code with an associated description. You can define the Location Codes in either the Item Maintenance form or the Codes Definition form (Inventory > Database > Code Definition). 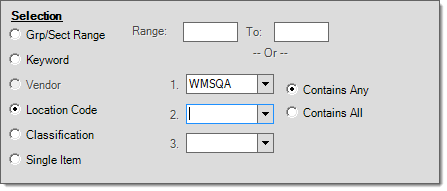
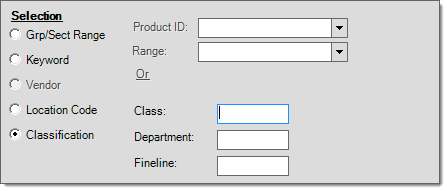
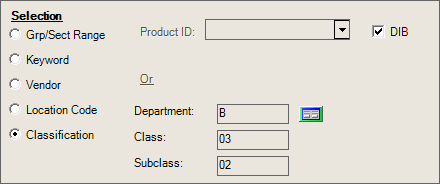
Item Selection by Location Location selection allows you to choose between one and three locations to match on or a range of location codes in certain cases. Matching has two variations: Contains All and Contains Any. The "Contains All" condition means that for items to be selected, they must be associated with all of the location selections made. For example, if you chose three locations, only items that were associated with all three would be included in the selection. The "Contains Any" is less limiting and tends to return more results. When the "any" condition is applied, items only need to match one of the selections you have made. If selection is permitted using a range (not available in all cases), use the text areas near the top of the panel to designate a valid range of location codes. The range must be done in numeric-alphabetical ascending order with the lower (lesser) range in the left-hand text area and the higher (upper) range in the right-hand text area. Location codes can contain either letters or numbers as well as certain characters. Every character is assigned a specific ASCII order. This is important to understand especially if your company's location codes are all numeric. Numeric codes are not ordered based on numeric value, but are treated as text instead. Just as how words would be alphabetized, the character value of the "numbers" are grouped in reading order (from left-to-right) to determine placement. The following is an example of a list of numbers ordered by text value (ASCII order): 00000123 00065 1 1005884 1005886 305 3899841 99 If your company does only use numbers for codes, it's a good idea to keep the overall length of the location code consistent (consider padding codes with zeros to keep the length constant). Note: selection is permitted either by range or specified location codes, not both. Classification (Merchandising)The classification selection allows you to select items based on their merchandising classification settings (Class, Department, and Fineline) found in Item Maintenance or the Product ID assigned to the item(s). Product ID is either a self-determined organizational structure or it can originate with a supplier such as Do it Best Corp. Use the DIB check box to indicate that product ID selection is to be done using Do it Best Corp. classification product IDs instead of a self-determined structure. For more information about Product ID or merchandising classifications, search for these items in the Help System.
When you enable True Value EDI settings for your branch location, the application represents the merchandising (classification) codes differently and provide a tree-based selection option (accessed from the Maintenance Settings
Single ItemThis option is only provided in the Post Physical Counts utility (Inventory > Utilities > Updates > Post Physical Counts). Enter, scan, or select the item for selection from the drop-down list. The selected item's description will be listed below. 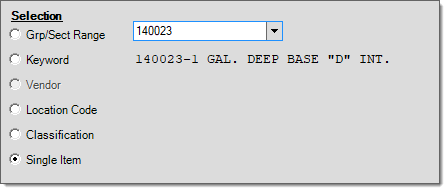
Item Selection by Single Item |
