Barcode Scanners
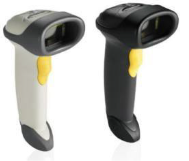
This topic section lists the barcode scanners we currently support along with links to the scanning sheets that can be used to program the scanners. There are a few different types of scanners listed. The "2D" variety are capable of scanning barcodes from a screen (phone, display, etc.) as well as those printed on a flat surface. 2D-type scanners can also scan QR codes. Standard, 1D, readers work best when scanning barcodes from a one-dimensional or flat surface such as barcodes printed on a label or package; however, they may also work with UPC codes displayed on a screen. These do not provide the capability to scan QR codes. Many customers now use smart phones for coupons and your employees may need to scan codes from tablets or other devices as well, so moving forward, 2D capable scanners are usually the best choice.
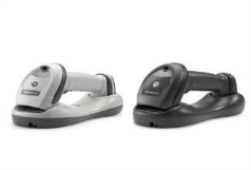
Symbol® LS2208 and Symbol DS4308/DS4608 (2D) | Symbol LI4278 and Symbol DS8178 (2D) | Symbol CS4070 Bluetooth |
---|---|---|
USB Wired Models |
Wireless with USB Cradle |
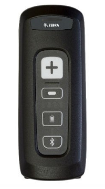
Bluetooth |
There are also different types of connections. Wired connections require a USB connection. Wireless-model barcode scanners communicate with either a cradle (connected via USB) or another device's Bluetooth® connection (tablet, PC, phone, etc.).
Scanners must be programmed prior to use. Programming a scanner involves scanning a series of barcodes in a particular sequence. One part of this process is setting the appropriate prefix to use. The software interprets the prefix as a signal that a scan is being done as opposed to keyboard input. The prefix required varies based on the type of connection. Remote desktop-type connections (cloud hosted using remote apps, for example) don't work well with control characters, so a "pause" control (7006) is used instead as the scan prefix or indicator. For local applications (not remote), a key combination of CTRL-B (1002). The Socket Mobile CHS 7Ci Bluetooth scanners use a prefix of the tick\accent symbol (`).
For information about barcode formats and scanning, click here...
Most transactions that support item entry allow either manually entry or scanning. Some transactions allow you to scan items at any time; however, others require other entry before scanning is allowed. Scanning isn't just for items, scanning can be used along with documents, gift cards, and certain rewards programs as well. Scanning Items into a Data GridUsing a supported barcode scanner is one of the easiest way to add items to a data grid. Scanning a barcode to add the product to a data grid produces one of three possible results:
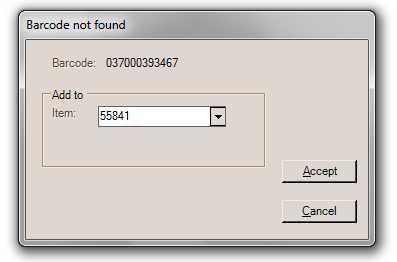
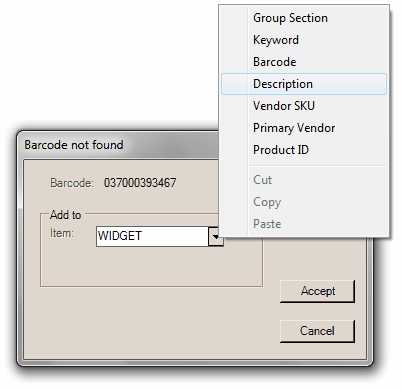
During a sale, the software recognizes the signal from the scanner and will place the scanned items in the grid regardless of your active position in the activity. For example, if the "name" field is active and an item is scanned, the item will appear in the grid, not the name field. In this case, users still are able to select a customer at any point before processing. This is also true of some other areas such as receiving; however, there are also other activities that do require form completion prior to scanning (or grid entry). Items that are scanned will default to a quantity of one, and after scanning, the cursor is placed on the Quantity field automatically so you can type a quantity in when needed. If the quantity of one is correct, you can immediately scan the next item. There is no need to press TAB or the Enter (or Return) key. When there are multiple quantities of the same item, you can either repeatedly scan the item or enter the quantity by hand. Use whatever method makes more sense based on the situation. For example, scanning small quantities of the same item is often easier than specifying the quantity manually; however, scanning larger quantities is usually not as easy as simply modifying the quantity in the grid one time. Adding New BarcodesFor scanning to function as a method for item selection, you must associate one or more barcodes with the item. There are a number of ways this may be done. Barcodes can be individually assigned to items from the Item Maintenance form (done from the Common and Select tabs under the "Bar Codes" label). The software also offers a Barcode Entry utility program allowing you to associate barcodes with items all at one time by using a file that contains a delimited listing of item numbers (SKUs) and associated barcode numbers. EDI may also keep barcode information up to date for you. In some cases, support staff may also be able to assist to load barcode information from external data. Once the item database has barcodes, existing codes will occasionally change and new items may be added without any barcode. When a new barcode is encountered, a form will pop-up notifying you that the scanned code was not found. Barcode Not FoundWhen scanning, if an item that matches the barcode scanned is not found, if you have permission to access the Barcode Entry Utility (Point of Sale), the application will prompt you to enter the SKU of the item to associate with it. This function is only provided when a scanner device has been assigned to the station being used (Note: It is possible for a scanner to function even if it is not assigned to the station). Security is controlled by the user's assigned "Permissions List" which sets navigation permission to various areas in the application. Barcode Not Found If you are not sure of the item number, you can try using the alternate menu to locate the item or choose Cancel (Alt-C) and find the item's stock number using some other method. This alternate menu is available from most drop down type selections throughout the software. Barcode Not Found: Context Menu Barcode FormatsThere are a wide variety of barcode formats in existence. The application uses and reads certain formats, but not all. Below are some details regarding formats we use and accept.
Sample 39 Extended
- Lengths of 12 use UPCA (if there is a valid check digit).* This format only supports numeric barcodes. Sample UPC - Lengths of 13 use EAN13 (European Article Numbering System). Sample EAN13 - Lengths of 14 or more or codes that don't meet the requirements for UPCA or EAN13 use 128B (this format supports upper and lower case characters, punctuation, and numbers). Sample 128B Random Weight Barcode Scanning - Sample UPC-A - Produce
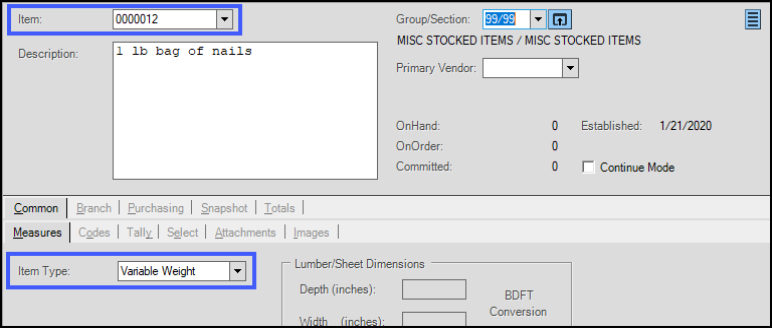
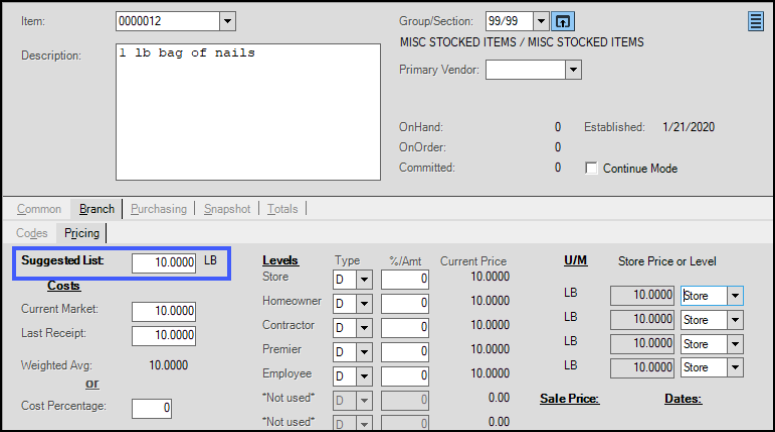
Items to be used for this feature must first be setup in Item Maintenance. Click here for help on setting up items for Random Weight barcode scans. Supported scanners programmed according to our specifications should be able to scan any of these formats. We don't support all the possible formats available. It may be possible to program a scanner to accept other formats or to ignore certain digits of a barcode; however, your company is solely responsible for this effort if your barcodes don't match one of our supported formats. *For 12-digit UPCA barcodes, the first digit indicates the number system (or type of code) and the last digit is a check digit that is calculated from the other eleven (11) digits. If a barcode is 12-digits, but the check digit isn't valid, the UPCA format won't be used. 128B is used in this case. |
Purchasing Scanners
Zebra (ZIH Corp) owns Symbol Technologies; however, they don't sell devices directly to the consumer; their web site https://www.zebra.com offers options for finding partners (sellers) as well as additional details about their products (specs, etc.).
Socket® Mobile CHS 7Ci Bluetooth (#8550-00062A) scanners are products of Socket Mobile (www.socketmobile.com). This scanner can be used with Remote Desktop apps from various pads and tablets and used with the AnyWare app for Android™ platform devices.
Software Setup
The station that will use the scanner must be enabled for scanner use in the Device Maintenance form available from the Maintenance area’s Database menu. It’s a good idea to close the Spruce application on the station and re-open the application after changes to ensure that the changes to settings become effective.
Command arguments on remote connections may be necessary.
Tested Models & Programming
The following models have been tested and deemed suitable for use with our application(s); however, conditions apply, so be sure to choose the device appropriate to your situation. The links below offer access to scan sheets. Scan sheets can be printed prior to use for 1D (1-dimensional) barcode scanners; however, you can scan codes from a screen in most cases. The appearance of the 1D (1-dimensional) and 2D (2-dimensional) Symbol model scanners is more or less identical. Model numbers are printed on the label attached to the devices. 2D models scan with a horizontal and vertical line (laser) or "cross hair" whereas 1D models scan with a single horizontal line. This is one way to tell easily whether your model is 2D or 1D. 2D models are capable of scanning QR codes whereas 1D scanners are not.
Note: Check the current General System Requirements (GSR) document for your region to review the current list of supported models. The GSR is available on the Customer Portal.
Symbol LS2208 Wired (LS2208-SR20007R-NA)
Zebra CS6080 Bluetooth Scanner
Symbol LI4278 Wireless (LI4278-TRBU0100ZWR)
Socket Mobile CHS 7Ci Bluetooth Scanner
Zebra ET50/55 Windows Tablet Scanner
The programming scans are identical for the two Symbol wireless models as well as the two Symbol-brand wired models; however, we provide separate topics in the Help in case we need to make changes in the future and to avoid possible confusion. Should you have or have purchased a Symbol model that's not listed here, choose either the wireless or wired scanning options based on your type. The scan options presented here may or may not work with other Symbol models. It is extremely unlikely that the scanner programming provided here will work with scanners that are not manufactured by Symbol Technologies.
Support
ECI Software Solutions, Inc. is not affiliated in any way with the manufacturers discussed in this topic. Other scanners may potentially work if programmed appropriately; however, we don't provide any assistance or documentation for other models or manufacturers which aren't listed in this Help System. We provide no end-user support for hardware, including devices we sell or list for use with our applications. If you need assistance or have an issue, please contact the manufacturer’s support department, warranty, and documentation. All other support should be arranged through a third-party provider. We sometimes use the term "supported" as reference to whether a particular device has been tested with our software application(s) and is considered suitable for use; however, this does not mean that we provide any end-user assistance or warranty for the devices themselves. A manufacturer or other parties may make changes beyond our control that render devices inoperable or unusable at any time.