Trucks (Codes)
The Truck (Lorry) Maintenance form is where all of the truck/lorry based data comes together. It defines each delivery vehicle for each branch. Each vehicle is assigned a truck/lorry (code), truck type, a default driver, and maximum weight with options for specifying the weight value including the options of assigning the weight in Cubes and Board Footage. Setting up the Truck (lorry) Codes is required. You create the listing of default drivers in the user list (User ID Maintenance) and a Dispatcher who is assigned a type of Dispatch, who has the permission to access the branch where the truck/lorry is being added.
To associate a truck/lorry with a truck type, driver, and to specify it's capacity:
1. From the Main Menu, choose Delivery > Database > Trucks. The Truck Maintenance form displays.
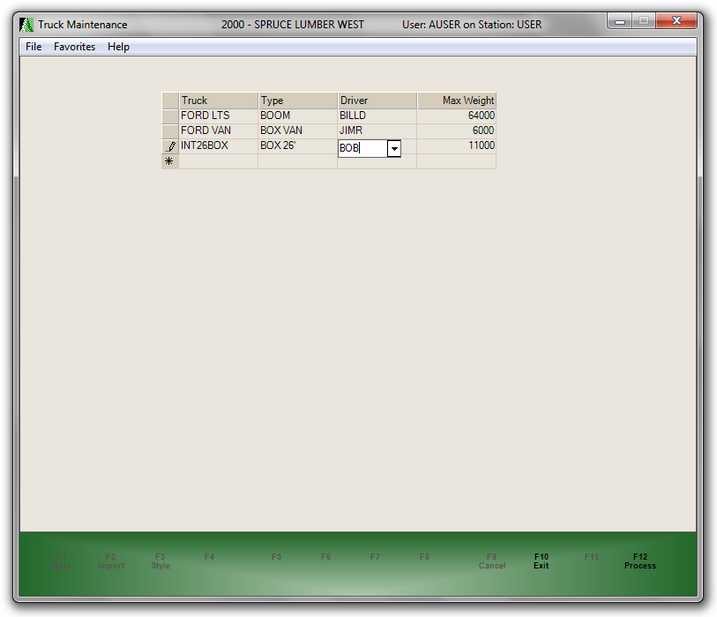
2. In the Truck field, enter the name you use to identify the truck/lorry.
Each truck (or lorry) in this list represents an individual delivery vehicle. Dispatchers assign each vehicle to delivery runs (referred to as either a "load" or "manifest" in the software). Each vehicle must have a unique code. If you try to re-add an existing truck in the same branch location, the software will not save it (and no warning displays).
3. From the Type list, choose the Truck Type that represents the truck/lorry you specified. The Truck Type is a more general classification of the delivery vehicle. Some types might be flat bed, dump truck, box van, etc. These types will appear at Point of Sale and Salespeople can select the general type of truck needed for a particular delivery. Truck types are defined separately in the Truck Types Maintenance form.
4. From the Driver list, choose the driver who usually runs this vehicle. The users in this list have the Driver user type in the User ID Maintenance form and are assigned to the same default branch as the current branch. Assigning a driver to a truck is not required, so when you assign a driver, they are considered the default driver and will be automatically selected whenever the truck is selected for a delivery.
5. In the MAX Weight field, enter the maximum weight the vehicle can safely handle. This compared to the weight of products assigned to a load for the truck. The application calculates the weight of the items to be delivered for each delivery document and is based upon the weight load factors in the item database (if used). These numbers are only accurate if your company maintains these values and applies them consistently. If the load exceeds the truck's maximum weight as specified in this field, the Truck Code will change to red in the Load Schedule form.
6. If your business uses Cubes or Board Foot measurements for quantifying weight for delivery, use these fields to define the maximum quantities for this vehicle.
7. Repeat these steps for each vehicle you use for delivery.
8. When you have completed these entries, choose Process (F12) to save them.
Choose Exit (F10) or close the window to cancel any changes.
Modifying and Deleting Delivery Vehicles
To modify an existing delivery vehicle entry in this list to change the truck type, driver, or weight values, edit the existing entries and choose Process (F12). You cannot modify a truck ID other than deleting and re-adding the truck (this does not change the vehicle on existing deliveries).
You can delete a truck in the list by selecting the row and pressing the Delete key (or right-clicking the highlighted row and choosing Delete from the context menu). Then choose Process (F12). If you modify or remove a truck from this list, the software will not update existing loads or deliveries that were already assigned to the deleted truck.
See Also:
Truck Type
Understanding Cubes for Calculating Volume