Account Maintenance
Use the Account Maintenance form to add, define, change, and remove system and customer accounts. The details you add to the account determine how the application processes the records you associate with this account, including the pricing, taxes, currency values, invoicing, how and when their statements are produced, and even who can purchase items for the account. It makes sense to understand the settings carefully and think through the consequences of the choices you make here.
Note: The Account Inquiry form shows the same fields and entries as Account Maintenance, but the entries are view-only. If a user needs access to this information without being allowed to change account information, consider providing them access to the Account Inquiry form instead.
Adding a New Account
To add a new account, follow the instructions below. To modify or delete an existing account, enter or select the account code in the Account list. The Function Key area (at the bottom of the window) briefly displays a message when you add a new entry or change an existing one using the messages: Creating a new entry or Database Updated as appropriate.
To use the Account Maintenance form to add a new account:
1. From the Main Menu choose Point of Sale > Database > Account. The blank account Maintenance form displays.
2. Click the New button to add the next sequential Account ID or enter a new Account ID manually in the Account field.
3. From here, complete the fields and selections that are appropriate for the new account, based on these descriptions.
-
Make sure you complete the Contacts settings as described in this tab. The entry in the Name field is Contact 0.
-
Complete the other tab details as described in this section.
4. When you have completed your entries, choose Process (F12) to save the account to the database.

Account Maintenance Form
Understanding the Account Maintenance Fields
In the main form (the area above the folder section), you add or modify the basic information about the account. Most of this information is self-explanatory; however, a few may not be.
Account
This is an account ID for the account that may contain letters, numbers, and certain symbols. If you do not specify an account ID, or you click the New button, the application fills this field in with the next sequential account ID. In Point of Sale transactions, team members can enter the customer's name; however, there are a few areas where account code is the primary selection method. Alternate menu choices are available whenever account selection is required, so it's not ever your only choice, and in many areas you can use both the name and account ID to find the account record. You can enter a partial customer name as a alternative to account ID number in the Maintenance form, but you must click on the down arrow button to view matches; otherwise, it assumes you are adding a new account. The account ID is an optional selection on some reports. Your company can use a variety of attributes (such as branch, account type, etc.) to define the structure of the Account ID, if you prefer.
New Button
The New button (next to the Account list) displays when a new account prefix has been defined for the current branch location. Prefixes may be defined from the Receivables tab of the Parameters form (accessed from the Maintenance area's Database menu). For more information about prefixes, please see the Receivables Parameters documentation.
Address Fields
The formatting of the Address fields is determined by the Account parameters as well as your computer's regional and language settings. The address appears differently based upon whether your company is located in the United States, Canada, or the United Kingdom. The same address control is used in a wide range of transactions and forms; however, each area may use the address differently. Branches, accounts, contacts, jobs, and vendors all have associated address data.
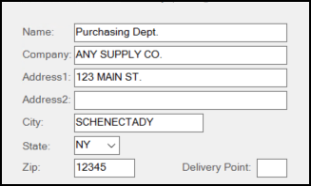
Name
Use this field to add a name associated with the account. The application will use this entry as the first (top) line when the account's address is printed or displayed. This can be the business owner, the person that is responsible for the bill (accounting), or the person who is responsible for purchasing. This entry can be up to 50-characters long.
In some cases, the Name field performs additional functions that might not be obvious. For example, when adding a new account, the Name becomes the default for the Sort Name field and also the primary contact for the account. You can modify the Sort Name entry so that it is different from this one, however, if you change the Name field entry, you also update the Contact 0 entry for the account to keep both fields the same.
Company
Use this field to add the company name to the account. If supplied, the Company entry prints/displays below the Name field entry and above the Address Lines 1 and 2. The Company entry can be up to 30-characters long.
|
Note: If the Company and Name fields for the account match exactly, the text only prints once on documents to avoid unnecessary repetition. |
Address Line 1 and 2
Use these fields to add the address for the account. Both of these fields are optional if you do not intend to send mail to the account's address. Usually, when an address is displayed or printed on a document, an address line is only shown when it has been assigned a text value. This is done to avoid unnecessary blank spacing between address lines. Each address line can be up to 30-characters long.
City/Suburb
Use this field to add the City (Town, Village, municipality name, etc.) for the account's address. This part of the address can be up to 30-characters long.
Note: For some regions, it is appropriate to use the suburb name instead.
State or Province (Code)
Use this field or list to identify the state/province associated with the account. This portion of the mailing address varies based on the region setting located in the system parameters (United States, Caribbean, United Kingdom, Australia, and Canada). When shown, it is a postal abbreviation used for the state, province, or territory where the address is located. When using a zip code database, entry of a zip code (postal code in Canada) can result in this field automatically completing. Listings of state and province codes also include territories. This part of the address can be up to two-characters long. In some cases, the printed address will only show the State/Province option if the City entry is also present.
Upon request, Support can enable a parameter that would include country codes in addition to the state or province code.
States, provinces, and country codes are grouped together. If your company is located in Canada, province codes are listed first in the list followed by states and then countries (if enabled). In the United States, state codes are listed first, followed by Canadian provinces and then country codes (if enabled). If your company is located in the United Kingdom (UK), this field is not shown, nor is it typically printed. There is no "UK" parameter setting. If you are located in the United Kingdom, the software uses the region and language settings of your computer as well as the region settings in Parameters (in certain cases).
Zip or Postal Code
In certain cases, postal (ZIP) code changes can trigger other changes such as setting the sales tax location. This part of the address can be up to 10-characters long. In North America, the zip code is numeric and is listed to the right of the city and state/province. In the United Kingdom, the postcode is printed as a separate line (the last or bottom line of the address).
Delivery Point
The USPS (United States Postal Service) assigns delivery points in addition to the zip + 4 codes as a way of designating multiple delivery points at the same address (4 offices in the same building -- or -- 2 apartments in the same house, for example). Delivery points are not typically printed (except for Canadian users in certain cases) but are included when POSTNET bar-coded mailing labels are printed. Usually, this is a single digit added to the end of the ZIP code, ZIP+4 code, or a combination of both codes when printing a barcode. Typically, a check digit is also added after the delivery point (if included). This part of the address can be up to four-characters long.
For Canadian users, the delivery point field has an alternate use (see below):
 Delivery Point Settings for Canada
If your company is located in Canada (and assigned to the Canada regional parameter), the delivery point can be used to add a country notation to addresses on documents. If the delivery point is US, USA, or CAN, these is printed with most document addresses. Again, this is only done for Canadian systems (as determined by the "Canada" system parameter).
Phone #
Use this field to enter the primary phone number of the business, including appropriate country codes, if needed.
Est Date
Date the account was created. This is not an editable field.
Sort Name
The Sort Name field is used by reports and is the default for account selections by name in other areas. Sort Name is automatically defaulted to match the Name field but it can be modified. This providing some control over how the account's name appears in selection lists (first name, last name or last name then first, for example). This should be done consistently and match with your company's preferences for reporting and account selection.
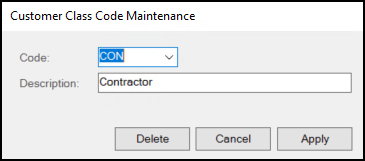
Class
Class is a organizational tool for accounts that is entirely optional. Class codes can be up to three alpha-numeric characters or blank if no class is assigned. You can use Classes as a selection method on some reports and also for statements. Use the Settings ![]() icon beside the Class field to add or modify class codes and descriptions.
icon beside the Class field to add or modify class codes and descriptions.
Corporation
The Corporation field provides a way to link individual accounts that may be related in some way. The intention behind this feature is that an account may be part of a corporation that includes a number of separate accounts. For example, a corporation may be a construction company that builds housing. Each account representing a separate building project (location) along with jobs representing the individual lots at that specific development. You can link these accounts together by assigning them to a corporation. To create a corporation record, click the Settings ![]() icon beside the Corporation field.
icon beside the Corporation field.
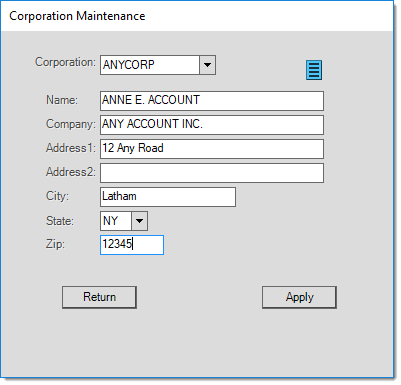
Corporations are not accounts and are for classification, inquiry, and selection (look-up) purposes only. Corporations are not used with statements, posting, or A/R processing. There is a separate inquiry (Corporation Inquiry) for corporations and a separate report (Corporation Status) that summarizes the balances of accounts linked with a corporation. You can add, modify, and delete Corporations from the Account Maintenance form. You can add an address to the corporation record; however, this is optional (only a code and name are required). When you add a new code for an unassigned account, the Name and Address information will default to the currently selected account.
In the Corporation Maintenance form, you can use the Menu Marker  to delete an existing corporation code.
Price Level
This selection field is used to assign accounts to one of seven potential inventory price levels. Level 0 is always labeled as Store Retail. Other level descriptions can be modified by a system administrator. Level pricing can be set up differently for each item. When you assign an account a price level, it determines the pricing the software will use for each individual item sold to the account. You can set price levels based on a set price, discount off of list, or a markup based on cost. For more information about price levels, see Price Updates - Price Level Entry.
Compare to Store RetailWhen you set the account's price level to something other than "store retail" (price level 0), there is an additional Compare to Store Retail check box available. If you select this check box, and the store retail price is less than the account's price level price, the application uses the "store retail" price instead. Other pricing that is not based on price levels, such as contract pricing, can override this behavior. |
Price Group
Another way you can define an account's pricing structure is by defining and choosing a Price Group (such as Contractors, Premium, Employees). This gives you a way to define the pricing strategy for groups of accounts based on the same group discounts or mark up calculations. For more information about price groups, see Price Groups.
Tax ID
Use this field to record the account's federal tax ID number. In most cases, tax/business identification numbers are required in limited circumstances, so it may not always be necessary for your company to maintain a record of it. For some accounts and situations, it may be required, however. If your company needs to retain this information for filing forms with a government agency, obtain this information from the customer, and use this field to keep their ID in the account database. You can also consider attaching a scanned copy of any tax related documents associated with the customer to the account (such as an exempt certificate). Because this information is considered sensitive, the application masks all but the last 4-characters of the Tax ID (******1234, for example) in the Maintenance and Inquiry forms, except when the current user is a System Administrator.
Alternate Name
Use this field to enter an alternate name for the account. In some cases, a company might be a subsidiary of a larger corporation, for example. In this example, the account's billing and sales may use one name, but tax forms might go to the owner company. Alternate name could be used to store information such as a subsidiary's owner.
Alternate Tax ID
Similar to the previous field, user this field to add an alternate Tax ID for companies who may be owned by another entity. The owner company may have a different tax ID number from the subsidiary.
Continue Mode
Use this option to add, review, or modify accounts in a sequence. If checked, Continue Mode maintains the current tab selection after you choose either the Process (F12) or Next (F1) functions.
For example, if you are modifying the Override code on a series of accounts, choosing Continue Mode would prevent having to re-click the Codes tab as you move through the list of sequential accounts, after each account is processed (or when you choose Next).
Reviewing the Account Tab Settings
There are nine static tabs in the Accounts Maintenance and Account Inquiry forms, which may or may not display depending on the features you have enabled. Use the links to find out more about a specific tab:
Receivables (ALT-R) Tab
Use this tab to define whether the account is used with self-managed receivables, and if so, how the application should bill and manage the account financials.
Codes (ALT-C) Tab
Use this tab to add additional settings related to the account's general operation, primarily with regard to Point of Sale.
Contacts (ALT-O) Tab
Use this tab to add, modify, and remove contacts associated with the account.
Attachments (ALT-A) Tab
Use this tab to manage the account's attachments (windows files, map links, web addresses, and application documents).
Purchase Agents (ALT-P) Tab
Use this tab to add, modify, and remove purchase agents associated with the account. Purchase agents are the individuals allows to use the account for purchases. Names may optionally be linked with an image. If purchase agents are added, selection is required at Point of Sale.
Balances (ALT-B) Tab
Use this tab to display a summary of the customer's receivables and sales activity.
ProLink (ALT-L) Tab
Use this tab to enable the ProLink app for the account and to enter an email address.
Loyalty Tab
Use this tab to set and track the account's loyalty/rewards programs settings and the data associated with those settings.
Ecommerce Tab
Use this tab to specify how the application applies account payments that are made online. Here, you define how the Payment Posting Rule is applied to the account.
Account Maintenance Functions
There are several standard function keys available in this form, and a few that are specific to the Account Maintenance form.
The standard functions include Next (F1), Cancel (F9), Exit (F10), and Process (F12). The two additional functions are explained below.
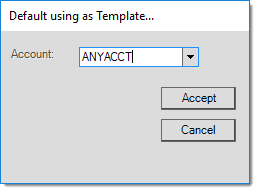
Template (F5)
The Template (F5) function is used when adding a new account using the settings of another account. The template function will use most of the selected account's settings, except for those that are unique to the original account (such as Contact names).
Warning: Use the Template (F5) option at the very beginning of account entry or you will lose the information you add before you select the Template option. Any previous entries you make before you select the Template (F5) key will be lost and overwritten with the template account's information.
Save/Modify (F6)
Use this function to save contact records you are adding or modifying for the account. This key is only enabled while the Contacts tab is active. The function will be labeled Save when you add a new contact and Modify when change a previously saved contact.
Warning: The Process (F12) function does not "save" contact information. You must choose either Save (F6) or Modify (F6) before you choose Process (F12) for your Contact changes or additions to be retained!
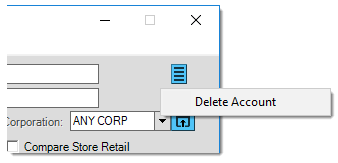
Deleting an Account
Users with administrative security permission have access to Menu Marker context menus that allow them to choose the Delete Account option. Accounts can only be deleted in certain cases.
To delete an account, there can be no current activity associated with the account. This includes any non-zero balances as well as any outstanding finance charges and unapplied credits. In addition, the account cannot be associated with any of the following documents: invoices (except a "canceled" transaction), Point of Sale orders, open credits, receivables posting, and receivables adjustments. If an account cannot be deleted for any of these reasons, you can change the account's status to "Closed." Closing an account does not remove any balances or activity.
Alternatives to Deleting an Account
You can merge or rename a customer account using the Account Merge (Rename) utility found on the Utilities > Receivables menu. Please read the documentation regarding this utility before merging or renaming any accounts.