Price Groups
The Price Groups Maintenance form, located in the Point of Sale area (Database), is used for creating codes that define pricing overrides that may be assigned to customers. These alter pricing on goods based upon their product group and/or section. Codes can be designated to assign a particular price level or percentage based price to items in a group or group-section. Once added, price groups would be assigned to one or more customers.

What is the difference between a Price Group and Price Level?
Price levels affect all items across the board. Price Groups are used to affect item pricing for just specified inventory groups or group-sections and not others. Price levels and price groups are used in combination. If the inventory being sold meets the conditions of the customer's assigned price group, the group's pricing will be used. If there is no price group, or the price group doesn't include the item, the standard level price assigned to the customer is used.
What kind of pricing can be assigned using price groups?
Price Groups are comprised of selected groups and/or sections which have been designated with either a particular price level, percentage (markup or discount, for example), or both. Once an account is assigned to a price group, the price group's pricing will override the customer's normal pricing structure for any items included in that group code's selected groups and/or sections.
The same price group code may be assigned with as many accounts as desired. As many separate codes as needed may be added. Using shared codes is helpful because it makes changes to a customer pricing faster and easer (otherwise, you'd have to individually modify each customer's pricing structure one at a time). Price groups must be assigned at the account level. Price groups can also be established for jobs.
Adding a New Price Group
To add a new price group:
1. From the Main Menu, select Point of Sale > Database > Price Groups to display the Price Group Maintenance form.
2. In the Price Group Code field, enter a code that is currently not in use.
3. In the Description field, enter a description for the code (appears in selection lists and in the account database screen).
4. Select either the Price Level or Percentage radio button to define how to set the pricing for this group.
Note: Don't check any groups or sections yet. To define the Price Group by:
-
Price Level, select the Price Level option and then select an existing Price Level type (such as Store, Contractor, Premier etc.) from the drop-down list.
-
Percentage, select Percentage and specify a price type (discount, markup, margin, etc.) and specify the percentage amount to apply to the price group. The percentage amount must be a whole number.
5. From the Group/Section list, select the check boxes next to any entire groups or individual sections you want to assign the Price Level or Percentage to.
6. When you have completed your choices, choose Process (F12) to save your new Price Group.
7. Repeat steps 3 through 5 until all desired pricing is assigned for the new group. You can modify price groups later at any time.
Making Changes
Either the mouse or keyboard (space bar) may be used to "check" or "clear" the box to the left of a group or section. Changes to the "price level selection" field only affects those groups or sections that have not previously been selected (checked), so in order to change a previously assigned group or section's level, it's necessary to first clear the check box. For help with tree navigation, see the section "Selection Trees."
Template (F5)
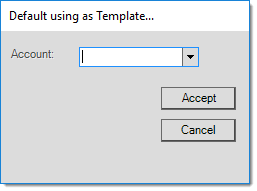
One easy way to add new price groups is the Template (F5) function. This may be used if there are existing price groups and allows a user to copy an existing price group using the F5 (Template) function, but save it as a new code. Note: This only makes entry easier if an existing price group has a similar structure to the one you wish to add. The template function is not available when modifying existing price groups.
Use the F12 (Process) function to save the new price group then assign it to accounts using either the Account database or by processing a global modify. Press or click the F10 (Cancel) key to clear the form and begin again without saving changes.
Modifying an Existing Price Group
Enter or select the price group from the drop down for modification. To change a previously selected group or section, begin by clearing the check box to the left of the group or section in the tree listing. Next, change the "price level selection" field to the desired level and re-check the box to assign it. Checking an unselected group will automatically check all the sections within that group and assign them to the current price level chosen.
Use the F12 (Process) function to save the new price group then assign it to accounts using either the Account database or by processing a global modify. Press or click on the F10 (Cancel) key to clear the form and begin again without saving changes.
Limiting Price Groups for Price Leader Products
You can exempt a product from a price group when the item is popular and competitively priced. In these cases, you may want to avoid discounts because you might accidentally price a product below your cost.
To exempt an inventory item from a price group:
1. From the Main Menu, go to Inventory, Database > Item and select the item you want to exclude from the price group it is assigned to.
2. Click the Codes tab to display the Ignore Price Groups check box.
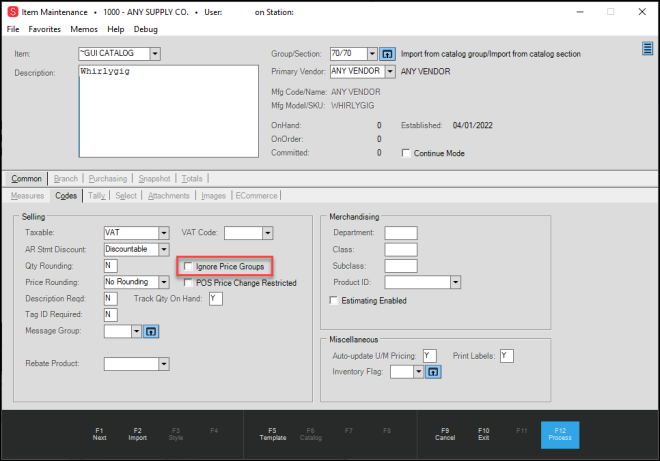
Item Maintenance Form > Codes Tab > Ignore Price Groups Highlighted
3. Click the Ignore Price Groups check box to exclude the current item from repricing due to price group membership.
4. Click Process (F12) to save the setting.
Note: When you import an item that you have added the Ignore Price Groups option to, the application remembers this setting and sets this option for the incoming inventory as well.
Adding a Price Change Restriction to an Inventory Item
To restrict the POS price changes for an item in inventory:
1. From the Main Menu, go to Inventory > Database > Item to display the Item Maintenance form.
2. From the Item list, choose the item you want to restrict the price change for and press Enter.
3. Click the Codes subtab.
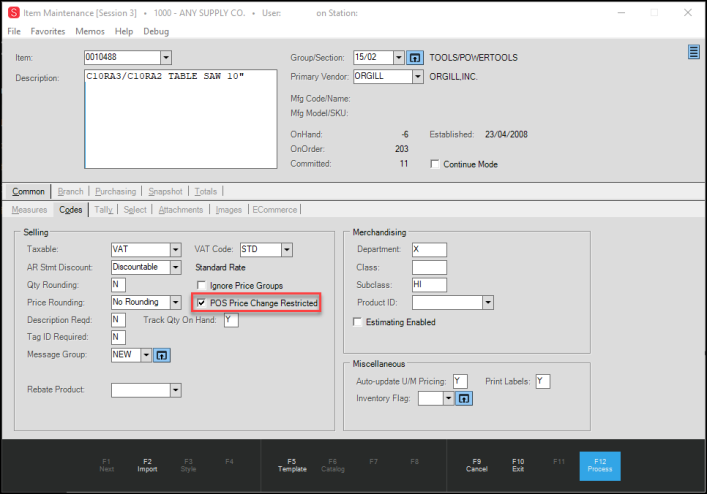
Item Maintenance Form > Codes Tab with POS Price Change Restricted Highlighted
4. Select the POS Price Change Restricted check box to prevent the restricted user from lowering the item price.
Note: You may also want to consider selecting the Ignore Price Groups check box if you want to use the price listed in the maintenance form without applying price group discounts.
5. When you have completed these selections, click Process (F12) to save these changes.
Note: When you import an item that you have added the POS Price Change Restricted option to, the application applies this setting and sets this option for the incoming inventory as well.