Receipt Document Adjustment
Receipt document corrections are intended to be used for making changes or additions to the adjustments (adders, discounts, etc.) associated with an existing receipt document. This is done for the purposes of updating adjustments (adders such as freight charges, for example) before any A/P (Payables) invoicing. Two (2) types of adjustment codes can be specified: purchasing and receiving. The set up of the codes as well as the timing of the adjustment in relation to the receipt document can affect how adjustments are applied and how they are reflected financially.
Here are a few important points regarding receipt document corrections:
•The "AP Reference #" listed in the form and the drop down (used for document selection) is the "vendor reference" assigned at time of receipt (Usually, this is either going to match your PO # or the vendor's packing slip depending upon your company's procedures).
•If the AP reference appears blank, it means that the receipt was not processed with any "vendor reference" (entry of the reference is optional unless your system or application administrator has upgraded the task list warning to an error).
•The "AP reference" does not indicate that any processing (invoicing) has been done in Payables.
•If an invoice has already been created for the purchase when the cost adjustment is done, the Payables invoice will need to be manually updated to reflect any changes.
•Typically, one would do this type of cost correction prior to A/P invoicing.
If an item has been sold or other receipts have been processed since the receipt in question, it may be better to perform a "receipt item cost correction."
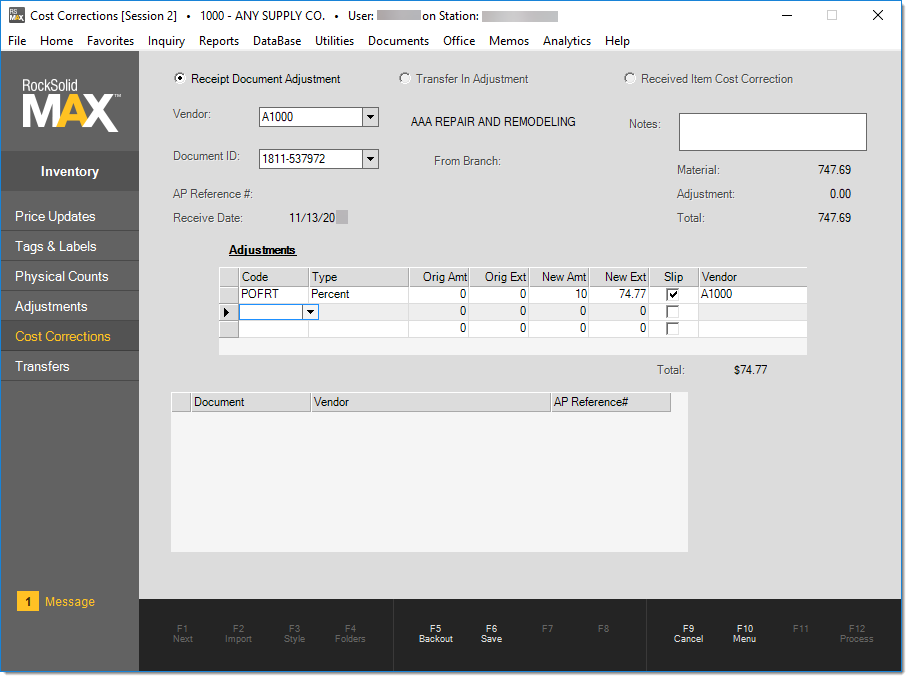
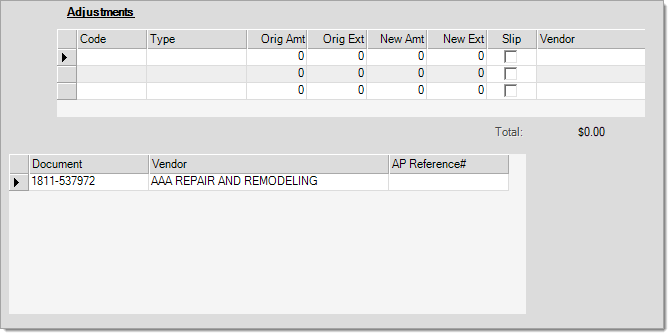
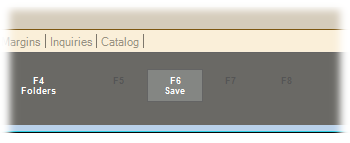
Once all adjustments have been specified for the selected document, choose F6 (Save). This will move the document into the table below the Adjustments grid. Only those adjustments that have been saved, will be processed (F12). This allows for entry, review, and processing of multiple adjustments all at one time. Choose F12 (Process) once all adjustments have been made to update the receipt documents with the changes.
Notes
The notes text-area is not used with Receipt Document Corrections or Transfer-In Adjustments. It is only used with Received Item Cost Corrections.
Saving & Processing
After you have specified all cost corrections for the selected item/document, choose Save (F6). This will move the document into the table (grid) in the lower section of the form. Only cost corrections that have been saved (those that appear in the grid) will be processed when you choose Process (F12). This allows for entry, review, and processing of multiple corrections all at one time. Choose Process (F12) once all corrections have been made to update the receipt documents with the changes.
Before processing, you can modify any of the documents listed in the (lower) grid. In this case, the F6 function's label is changed to the word "Modify." To save any modifications made, you must press or select the Modify (F6) function before choosing Process (F12).
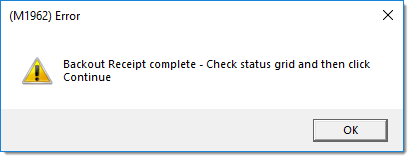
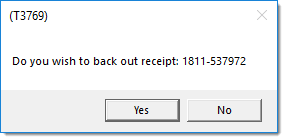
Receipt Backout (F5)When applicable, the function key labeled Backout (F5) in Cost Corrections can be used to reverse a previous receipt. Available with release 11.5.3 and later, a new reversal process has been implemented which now allows the back-out of a prior day's receipt. This process entirely replaces the previous process for both same day and prior day receipts. The primary intention of the back out procedure is to correct the average cost of the received items. PLEASE NOTE: THE BACK OUT NO LONGER OFFERS THE OPTION TO RE-OPEN THE PURCHASE ORDER (IF ANY). The new procedure will remove the Inventory Quantity record created by the receipt, re-point any linked documents (sales, adjustments, etc.) to the previous record, and adjust each item's weighted average cost. The process will create a reversal receipt. The only purpose of the document is for adjusting AP Accrual and GL Inventory. Document links will be created between the original receipt and the reversal, a Document Correction document with zero adjustment will be created for audit purposes, and Universal Log entries will be made for each item with resulting status. After the process completes, the user will be presented with a status grid for each item showing the success or failure to complete the reversal. Answer "OK" to the message pop-up to view the grid and then select the "Continue" button when viewing is complete. Restrictions: 1. You cannot back out any receipt that has already been backed out. If you attempt to do this, the following dialog displays. 
Backed Our Receipts are not valid 2.You cannot back out a reversal receipt. 3. You cannot back out receipts with negative or a mix of both negative and positive quantities. If you select a receipt document meeting this condition, the "back out" function key will not be enabled; however, no message or prompt is provided. 4. You cannot back out receipts that include lot or lineal tally items. If you select a receipt document meeting this condition, the "back out" function key will not be enabled; however, no message or prompt is provided. 5. For items where receipt is the first Inventory Quantity record, the application only adjusts the on-hand quantity. Average Cost, as displayed in Item Inquiry and Maintenance, is not adjusted back to its original value if different. If needed, this must be done separately. For items that had no previous activity, the average cost would have been set to match the current market cost at time of entry. Since the item will have a zero on-hand after the reversal, the next receipt of the item will correct the average cost. 6. You can only back out one (1) receipt at a time. 7. If the application does not encounter any errors, you will receive a confirmation message and the reversed items will be displayed with a Continue button. At this time, the selected Receipt has been reversed for GL purposes (AP, Inventory, etc.). Any detail items that receive processing errors must be dealt with separately for adjusting average cost. This might happen if items have been merged, for example.
After processing, received items are listed in the data grid and the Backout (F5) function is disabled. After reviewing the results, click "Continue" to reload (reset) the form. Since processing has already been completed at this time, choosing Cancel (F9) will not "undo" the process. Canceling effectively provides the same function as "continue" in this case.
Prior to Release 11.5.3 If your company is running a version of the software prior to 11.5.3, the process, outlined above, has not yet been implemented. For information on the process for your release, please
|