DYMO® LabelWriter® Printers
The application can integrate with both DYMO LabelWriter 550 and DYMO LabelWriter 550 Turbo printers. The DYMO LabelWriter 550 Turbo is a direct replacement for the now deprecated/discontinued DYMO LabelWriter 450 Turbo, but the new model requires DYMO-branded labels, which have an RFID tag in their core. The 550 Turbo will not print to labels without this proprietary core.
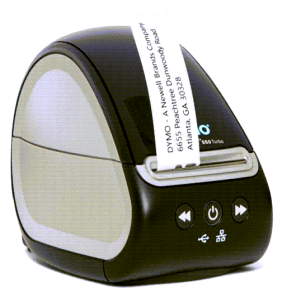

DYMO LabelWriter 550 Turbo and DYMO LabelWriter 550
ECI Software Solutions, Inc. does not provide any support for DYMO printers or products beyond the operation of our software. As a courtesy, we offer this documentation to assist our users. You must install printer drivers, which are available from the manufacturer's web site (instructions can be found further down in this topic). The DYMO 550 printers require a USB connection and 550 Turbo printers use a USB connection or a network. Both printers require the Remote Client utility to ensure successful integration.
What is a DYMO Printer used for?
There are two possible uses for this printer: document labels, and bin/price/special order labels.
Document Labels
These printers print barcoded labels that represent a document ID (1610-076220, for example) which may be attached to other documents in order to associate them together. For example, you might want to associate a customer's purchase order document with a specific invoice or order. Another example, would be associating a vendor's invoice or packing slip with a particular Payables document. Almost all application-generated documents maintain automatic links and use printed barcodes, so it's unnecessary to use DYMO labels with these documents. Labels are used for linking documents from other sources to an application-generated document.

Sample Document Label
DYMO printers can be used outside the application to print other types of labels such as address labels for mailing; however, the application only supports barcode labels for documents. You can install add-in's and third-party software to print labels from other Microsoft® Windows® compatible applications for a variety of purposes.
Bin Labels, Price Tags, and Special Order Labels
You can also use DYMO printers to print pre-formatted bin, price tag, and special order labels. These are printed using the Tags & Labels utility located under the Inventory > Utilities menu in the application. There is a built-in Designer function for DYMO labels. The Designer for DYMO labels also supports unit tally item labels and tags, price update tags and labels, and sale price tags and labels. It does not support WMS related elements (WMS Barcode and Location Barcode). We also offer a "custom" option that can be used to create labels including fields that don't exist in the Designer.
Changing Label Sizes
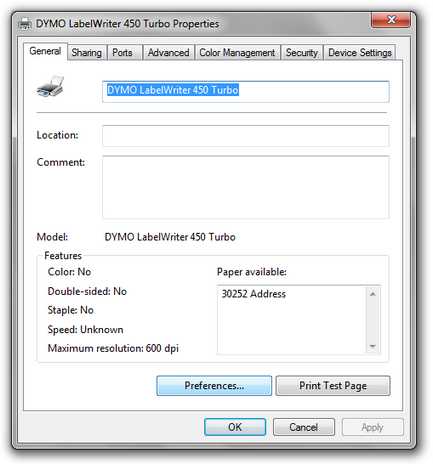
Anytime you change to a label sizes, you need to modify the Windows® properties for the DYMO printer to reflect the new label size (the printer does not know this automatically). Printer properties are accessed in different ways depending upon your computer's version of Windows.
1. From the Start ![]() button, choose Settings > Bluetooth & devices > Printers & scanners and click the Dymo printer you want to manage the label sizes for.
button, choose Settings > Bluetooth & devices > Printers & scanners and click the Dymo printer you want to manage the label sizes for.
2. Choose Printer Properties from the list. The Printer Property tabs display.
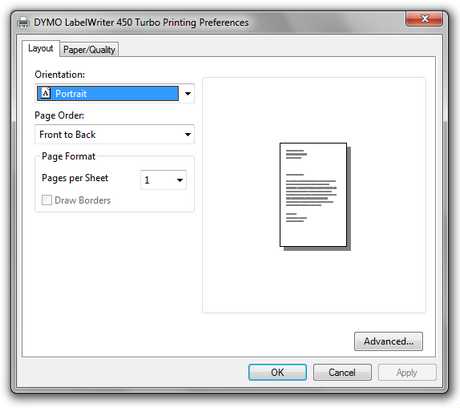
3. Choose the Preferences button.
4. Choose Advanced.
5. Choose Paper Size and select the appropriate label number from the list (the number matches the SKU on the DYMO brand label box).
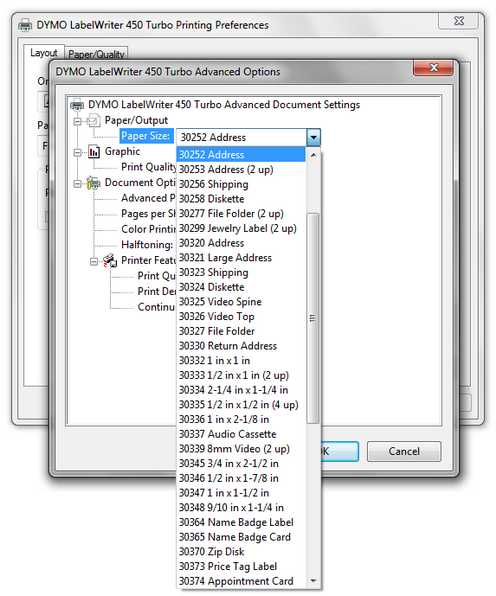
6. Choose OK.
Where can I purchase DYMO labels?
You can order the labels online (www.dymo.com) or from many other retailers. We do not sell labels nor do we sell DYMO printers. Here is a list of the supported labels sizes (colored labels available in the same sizes are also suitable):
|
SKU |
Description (Count) |
Size |
Uses |
|---|---|---|---|
|
30323 |
White Shipping Labels (220) |
2-1/8" x 4" (54mm x 102mm) |
|
|
30336 |
Multi-purpose Labels (500) |
1" x 2-1/8" (25mm x 54mm) |
|
|
30252 |
Address Labels (350) |
1-1/8" x 3-1/2" (28mm x 89mm) |
|
|
30327 |
File Folder Labels (2 Rolls of 130) |
9/16" x 3-7/16" (14mm x 87mm) |
Document Labels (Only) |
Adding a DYMO Printer
Using and configuring a DYMO printer is a bit different from other printers. DYMO printers are installed locally (on the user's PC) and connected by a USB cable, so there is no capability for printer sharing as there would be if it were a TCP/IP (network) connection. This means that this type of printer does not need to be installed on the server, just on the PC that will use it.
Important! The procedure for installing a DYMO printer has been simplified. The application no longer requires the DYMO Label Software for label printing.
If multiple DYMO printers are being installed, this set up will need to be repeated for each PC that a DYMO printer is connected to. Remember, DYMO printers are connected via a USB cable and are not shared.
Installing the DYMO Printer Driver
Do not plug the printer's USB cable into the PC until instructed (depending upon your PC's operating system, this may or may not cause an issue). If this is done and the printer does not operate. Uninstall the printer driver/device from the PC and start over.
The appropriate driver for the printer must be installed on each PC that will use a DYMO printer.
1. Identify the operating system version of the PC. Most newer computers are 64-bit. If you have a Windows 7 or older computer, you will need to identify whether your computer is installed with either a 32-BIT or 64-BIT operating systems.
2. Download the correct printer driver software.
Note: The best choice for downloading the most recent drivers is to visit www.dymo.com directly. From the DYMO website, choose Support and Drivers & Downloads. Choose the type of printer and model.
3. After downloading the MSI (Microsoft Installer Package) for the driver, either choose Run (if prompted) or open the Download folder and double-click the installer file.
4. When prompted by the installer, plug the printer into an available USB port on the station that will use it and plug the power cord in.
Adding the DYMO Printer to the Application
To add a DYMO printer to a station:
1. From the Main Menu, choose Maintenance > Database > Devices. The Device Maintenance form displays.
2. Select the Printer radio button.
3. In the Device Name field, choose a device name for the printer (DYMO, for example).
Note: When you use more than one DYMO printer, each printer needs a unique name (such as DYM1, DYM2, etc.).
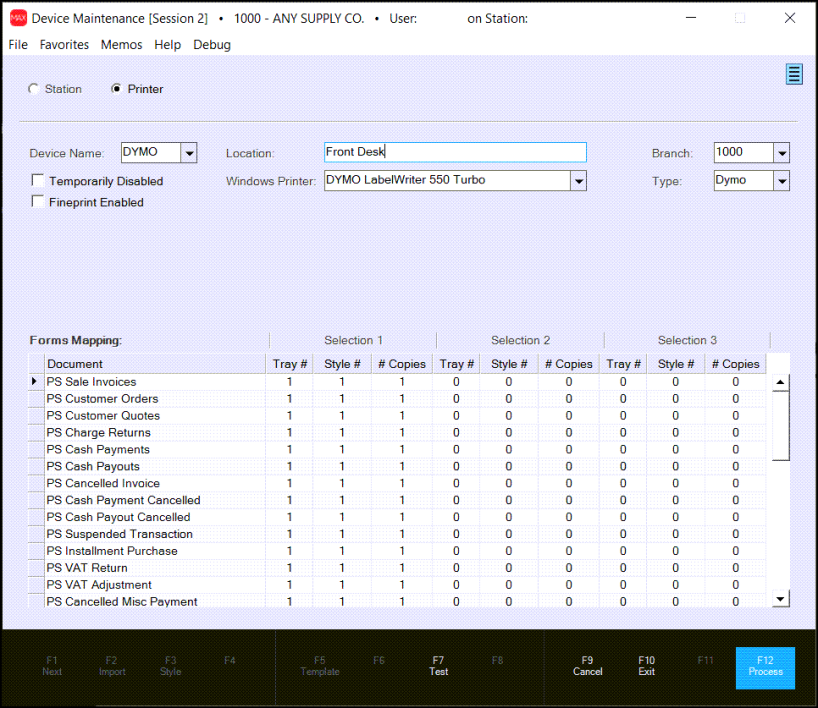
4. In the Location field, enter the printer's location in the store. (Such as Front Desk).
5. From the Windows Printer drop down, choose the appropriate DYMO printer from the list (you must be at the PC where the printer was installed).
6. Select the device's branch.
7. From the Type list, choose DYMO. This step is very important!
Note: The Forms Mapping section does not apply to DYMO printers.
8. Select Process (F12) to save the printer settings.
Assigning a DYMO Printer to a Station
After you add the DYMO printer to the application, you are ready to assign it to the station it is assigned to.
1. In the Device Maintenance form, click the Station radio button.
2. From the Device Name list, choose the station that uses this printer.
3. In the Default Printers list, scroll down to the Label list and choose the name of the DYMO printer.
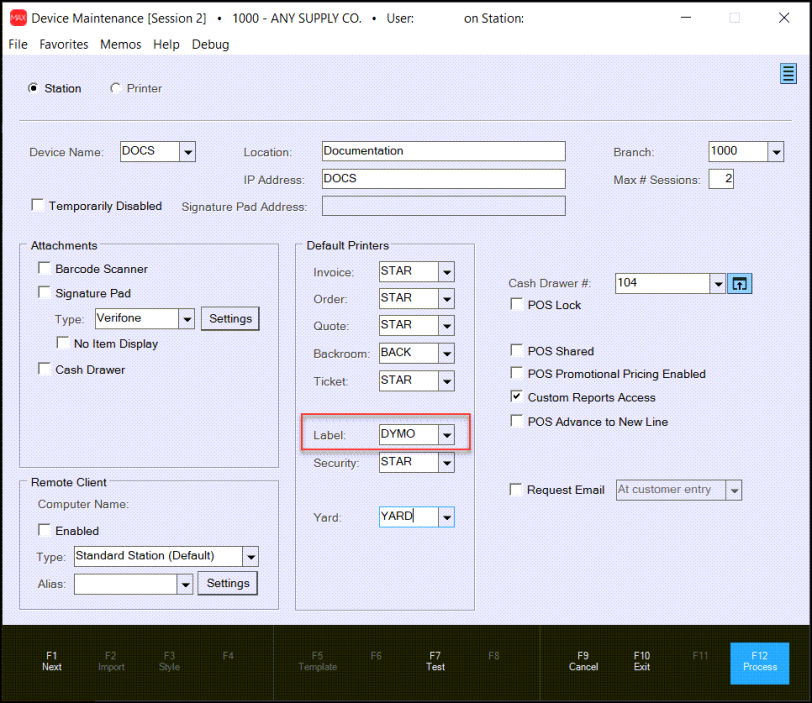
4. Select Process (F12) to save this printer to the station.
After you save this setting, close the application and re-open it to make this setting effective.
Using a DYMO Printer
If the station has a DYMO® LabelWriter® 550 Turbo printer installed, you can print barcoded labels for attachment to external documents. Labels are printed using the document number of the transaction being processed. You can attach the label to outside documents so that you can scan them in the Document viewer to bring up the associated document later. Currently, labels may be printed for the following Point of Sale transactions: Sales, Orders, and Quotes. You can also print labels when you process Purchase Orders,
After you configure a label printer for a station (Maintenance > Database > Devices), the process form's Print (ALT-P) tab displays two additional fields relevant to label printing. when you enable (check) the Print Identifier box and enter a quantity of labels in the # Labels field, the attached DYMO printer will print barcode labels for this purpose. You can set a default number of labels for each supported document type under the Documents tab in the Parameters database (Maintenance > Database > Parameters).
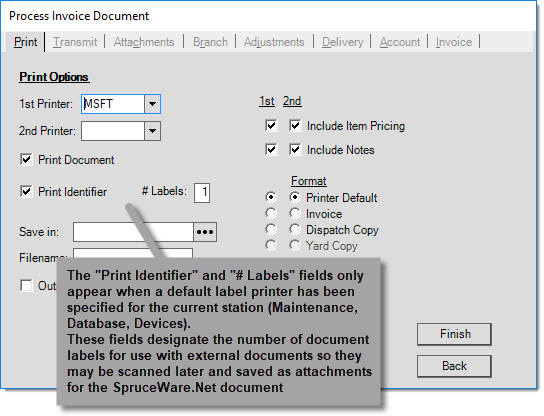
If a DYMO label printer has been installed and set up properly, there is no need to specify the DYMO printer as either the 1st or 2nd printer. In this case, the application is aware that a label printer has been set up for your station.
Document labels include a barcode as well as the document identifier (printed below):
Sample Document Label
DYMO and LabelWriter are registered trademarks of Newell Rubbermaid, Inc.
Selecting Default Parameters for DYMO Label Printers
The Parameters database has settings specifically for use with DYMO printers, which allow you to set the default number of labels for processing each document type. You can override the number of labels that print during processing; these are only default values. To set these parameters, choose Maintenance > Database > Parameters and from the Parameters form, choose the Setup and Documents tab. Look for the grid labeled "Document Mapping" (shown below). Only a system administrators can modify these settings.
Note: If the number (#) of labels is set to a value greater than one, the process forms will always default to print the designated number of document labels. Setting the value to zero, clears the check box for printing and requires the user to select the number of labels manually. If the Print Identifier check box on the Process form is selected and the default is zero, the # of copies defaults to one.

Document Mapping (Parameters)
DYMO and LabelWriter are registered trademarks of Newell Rubbermaid, Inc.