Parameters > Setup > BankCards Tab
The ECI Implementation and Support teams use this tab to set up payment methods for Point of Sale transactions in the application. Credit card types must be enabled on a device level, but these settings are required for those device settings to work.
After the Credit Card S/W parameter is enabled, and the Interface and Settings options are complete for each station in the Device Maintenance form, these settings determine or reflect the third-party software the application uses to process credit card authorizations (TSYS Cayan, Verifone Point™ or VeriFone PAYware Connect™, Moneris, Clover, Linkly, etc.) and the types of credit cards accepted for payment by that software. If your business is going to make a change that necessitates an update to these settings, please reach out to the ECI Support team for assistance in editing these configurations.
Note: Automated Clearing House (ACH) transactions are currently only supported for some online payments in limited circumstances. You must enable ACH as a payment method below to use this feature to reconcile this payment type in the application infrastructure. To learn more about setting up ACH payment processes, see Handling ACH Payments.
Interface
From this list, choose the Interface type your business has contracted with. Then, choose Settings to set the branch-specific options. There are some legacy interface products included in the list that are no longer supported.
Note: These settings are typically required for each branch location. Usually, each branch location has their own merchant account.
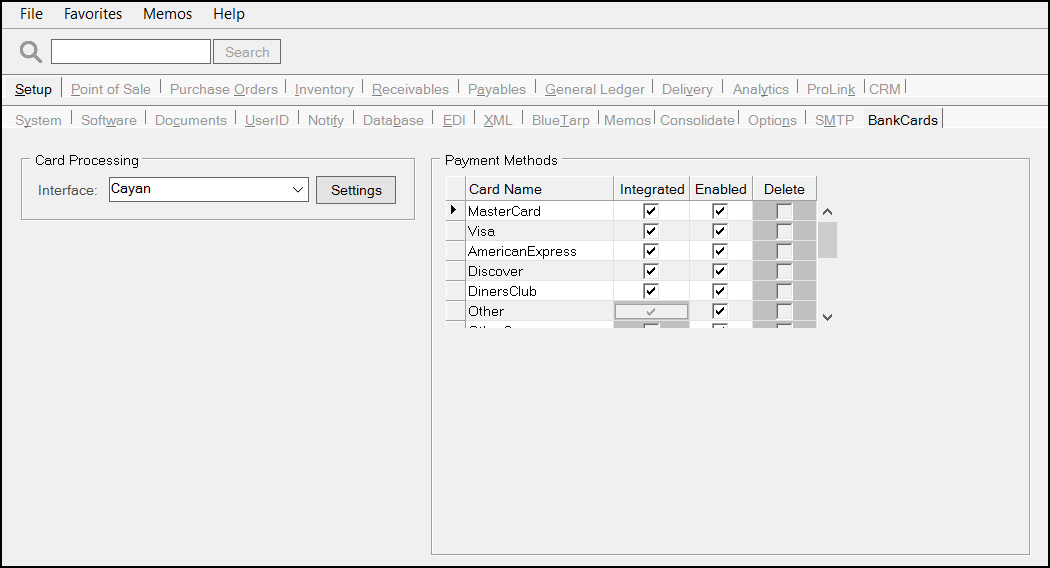
Setting up Credit Card and ACH Payment ProcessingUse this section to indicate the types of cards your application will accept for Point of Sale payment processing. While the credit card settings here are used to process credit card transactions using the station devices, the ACH settings are typically used to track transactions that are processed outside of the application-based devices. Due to more device-based processing, the settings here may not actually control which cards your device or interface accepts. In these cases, you should set the types to match all types your device or card interface is capable of processing. The list of cards determine the card types available at Point of Sale. Your customers can use these payment options (card type) when the Card Name is set to Enabled. To add a new credit card processor or ACH setting: 1. From the Main Menu, choose Maintenance > Database > Parameters. The Parameter Settings form displays. 2. From the Setup tab, choose the BankCards tab.
3. In the Card Processing section, from the Interface list, choose the credit card processor your business uses (Cayan, Verifone, or Moneris, Clover, etc.). The application displays the settings options for that device. 4. Complete the necessary settings for each branch that uses your selected processor and choose Accept. 5. When these settings are complete, choose the Integrated and Enabled check boxes that are appropriate for each payment method your business supports. Choose:
6. To add a new payment type (that does not appear in the list), select an empty row at the bottom of the list, type in the card name, and select one of the following options:
7. After completing these selections, choose Process (F12) to save the changes. 8. To complete the implementation process of this feature, log out of the application and log back in. Do not create an Integrated card entry if your card devices cannot process them. |