Contract Maintenance
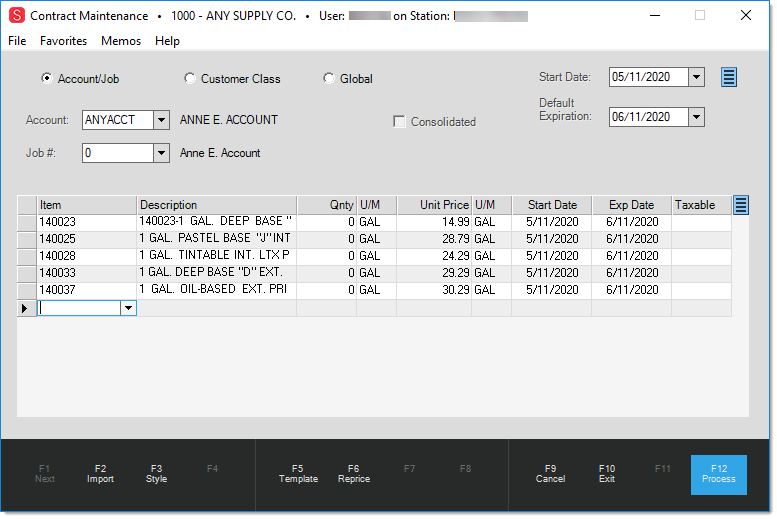
The Contract Maintenance form (ALT-C) maintains information about special pricing for specific accounts and jobs. Contracts are saved by item individually rather than as a group and override ALL other pricing that may apply at Point of Sale. Contract pricing is applied even when a lower price would normally be available to the customer (contract prices override volume discounts, sale prices, unit of measure pricing, etc.).
Each item may have different contract parameters and contract pricing is considered and applied on an item-by-item basis, not as a group. Each item's start date, expiration date, and quantity limits can vary or they can be the same for all items. When using the same dates for all or most items, it's easiest to set the default dates before adding items to the grid. Menu Marker options do allow you to set all dates to match the defaults later as well.
Beyond manually just assigning a set dollar price to items, contract prices can be either
(1) calculated using levels, markup, margin, discounts, or U/M prices (these are just used to calculate a "set" price, and are not perpetually linked to the contract price) -- or --
(2) use a "floating" price option so that the contract price varies based on changes to the item's retail price or one of three costs: last receipt, market, and weighted average. You can also use the Reprice (F6) function to calculate a price using many of the same reprice functions available from Point of Sale transactions.
New contracts are assigned a default start date (effective date) and a default expiration (ending) date. Both dates are used as the defaults for new items as they are added in the grid. Date defaults can be changed at any point during entry to save time. Menu marker options allow you to update all item's expiration or start dates to match the current selections.
The Global option (available in release 12.16) provides the ability to import global contract updates and additions to large number of customer/job contracts at once via spreadsheet data. Once a user has created/edited a spreadsheet, they can import the details by pressing the F2 Import option and selecting the desired file. The fields listed ![]() here must be included in the spreadsheet to ensure a successful import.
here must be included in the spreadsheet to ensure a successful import.
-
Account: Limit of 10 alpha-numeric characters. Must be a valid customer account.
-
Job: Integer. Must be a valid job for the customer.
-
Item: Limit of 16 alpha-numeric characters. Must be a valid item. If the item starts with 5 tildes the remaining characters into a group and section. For example, ~~~~~8500185099 would include group 85 sections 1 to 255. When a group-section range is indicated, all items in that group section range are processed.
-
Quantity: Zero is assumed if not provided. Zero is only valid if there's a valid DiscountType provided.
-
Price: Decimal value representing the price.
-
PriceUM: 4-character code corresponding to one of the item's defined units of measure.
-
Discount Type: Only used if the price is zero. If so, determines the level price to set the price using for the contract. Valid values are L0, L1, L2, L3, L4, L5, L6, L7.
When using the global option, if an update that has price changes is pulled in, but has the start and end dates (along with account and job), the system will update the prices. Click ![]() here to view the logic the application follows.
here to view the logic the application follows.
Understanding the Contract Pricing Options
Over time, we have added contract shortcuts that allow you to manage unit pricing for materials your customers need. When you find a group of products with pricing strategies that you want to apply to more than one contract, you can now do that using the Customer Class and Global settings in the Contract Maintenance form. Some of our customers keep track of this pricing on spreadsheets, which they can import and apply to contracts in the Contract Maintenance form. We have expanded that capability as shown in the instructions, Applying_Contract_Pricing_to_Multiple_Accounts.
For example, in the Contract Maintenance form, you can set the unit price for a particular item as a percentage of market value or a discount percentage rather than a specific amount.
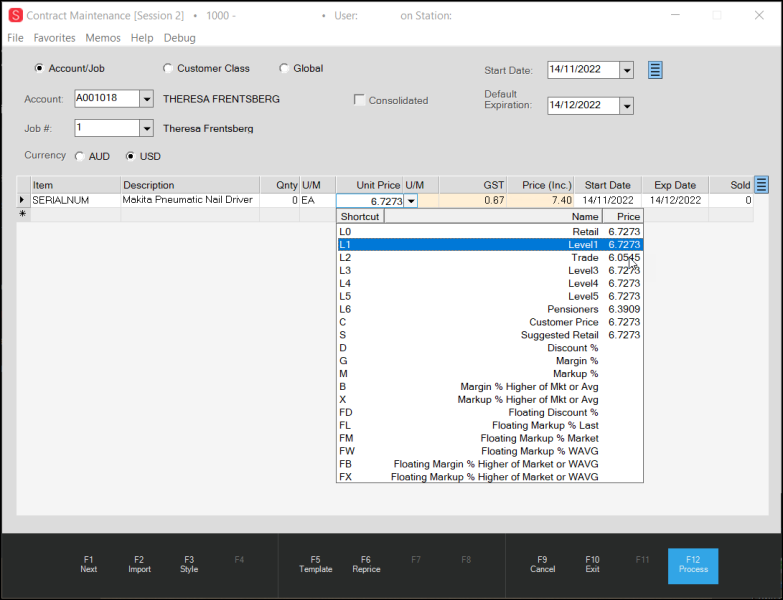
Contract Maintenance > Unit Price Options Displaying
Those percentages can be based on:
-
L0, L1, L2, L3, L4, L5, L6: A price level you set for a particular kind of business or contractor type
-
C: Customer Price
-
S: Suggested Retail (List)
-
[Valid Unit of measure for the item]: Unit of Measure Price
-
D: Discount % off Level 0 Price
-
G: Margin % above the weighted average cost (WAVG)
-
M: Markup % above the weighted average cost (WAVG)
-
B: Margin % above the higher of Market or the weighted average cost (WAVG)
-
X: Markup % above higher of Market or the weighted average cost (WAVG)
-
FD: Floating Discount %
-
FL: Floating Markup % Last
-
FM: Floating Markup % Market
-
FW: Floating Markup % Weighted Average Cost
-
FB: Floating Margin % Higher of Market or Weighted Average Cost
-
FX: Floating Markup % Higher of Market or Weighted Average Cost
For example, in the Contract Maintenance form, rather than setting a price for a particular product, you can enter M23 (Markup by 23%) to indicate the price of this product for the assigned contracts should be marked up 23%. Enter D18 to discount the price by 18% and so on.
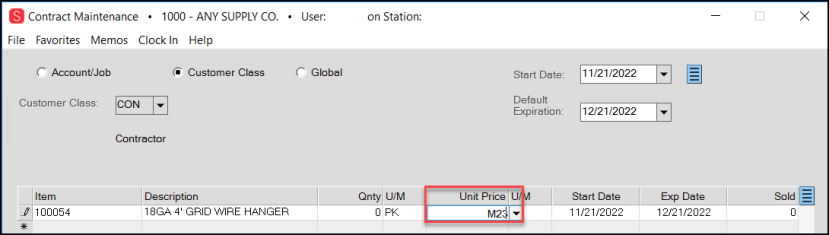
Contract Maintenance with New Unit Price Entry
You can set this item price strategy for a group of contracts rather than just one account using the Customer Class and Global radio buttons on the Contract Maintenance form. If you keep track of these pricing strategies in a spreadsheet, you can import these items, price settings, and date ranges into the Contract Maintenance using the standard Import process.
Entering Quantities
If a quantity is entered for a contract item (optional), a quantity-based expiration is assumed. This means that the customer will only be allowed the contract price until the quantity entered is met or exceeded during sale. Expiration date is considered as well, so it's a "whichever comes first" arrangement.
Note: Quantities sold at the contract price can potentially exceed the contract amount in some cases. If the contract is specified for 99, but the customer purchases 101 all at the same time, the contract file won't have been updated yet, so the account will receive all 101 at the same price.
When no quantity is entered (zero), no quantity limit is enforced on the contract, so a customer may purchase that item as much as they please for the contract price (until the expiration date).
Specifying Alternative Pricing
Beyond a set dollar contract price, users can specify that the price be set using a number of options. Letter codes are used to designate these. Click on the drop down next to the U/P (unit price) cell to select or view the valid codes. In some cases, it's necessary to enter a number (such as a discount percentage) after the letter code. Only the "floating" codes are saved with the contract items. All other codes are only used to quickly calculate the item's set price, and are not retained after a price is calculated.

Discount percentages should be entered as whole numbers (not decimals) unless entering less than 1% (0.5 results in 1/2%, not 50%). If entering a decimal discount (or margin/markup) that is less than 1 percent, it's necessary to add a zero prior to the decimal. For discounts above 1% (5.5%, for example), this does not have to be done.
Floating Margins
As a specific example, to specify a 22% floating markup using WAVG (weighted average), the user should enter FW22 in the Unit Price column. Floating contract pricing will be displayed with a light blue background in the cell to distinguish it from a set price.

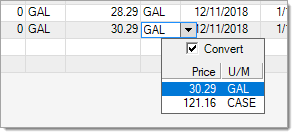
Changing the Unit of Measure
If you want to enter pricing using a different unit of measure, you can; however, it's best to choose the U/M first and enter the desired price second (prices are automatically converted when you choose another U/M unless you clear the "convert" check box on the U/M drop down).
It is important to note that you cannot use this to provide different contract prices on the same item (for different units of measure). For example, you cannot define one PC price and a different CASE price for the same item. The contract price is not given based upon a quantity threshold being sold. This is true no matter what Unit of Measure you choose when entering pricing.
Checking Margins
We have added a "GM%" style to the grid which can be used to display the current cost and gross margin (based on the contract price) for any items in the grid. This read-only style is accessed from the Style (F3) function. Costs and margins can be restricted by user security settings, so only users with permission to view costs and margins be able to view this option.
Taxable
If the current user has permission to change items' tax statuses at Point of Sale, they can designate the tax status for the item along with the contract. This doesn't update the item's tax status permanently and is only considered while the contract is in effect. Once the contract items quantity or date period expires, the normal tax status of the item replaces any taxable status from the contract. It is your company's responsibility to ensure that tax is charged where required by law.
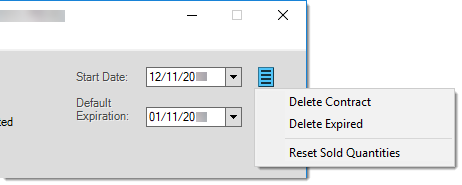
Reset Sold Quantities
In some cases, you may have an open or expired contract that you want to reset, extend, or re-use. The top-most menu marker's  context menu provides a "reset sold quantities" option. While a contract is in effect, quantities are retained when items are sold using the contract price. The quantities sold are retained both for analysis and for determining quantity expiration on contract items. Use this option to clear the quantities sold for the selected contract(s) listed in the data grid. This will return the sold quantities to zero. Any previously sold quantities won't be available after you do this.
Use security must be enabled to allow access to this option. Permission is granted by modifying the user's Application Security setting for "Allow Reset of Contracts Sold Qty."
Importing Group/Section Items into a Contract
This feature gives you a way to import each item in a specified inventory group or group/section into the selected global contracts.
Note: You can import these items using the Unit Prices options described in the last release and with the floating price levels described in this one.
When you select the Global option in Contract Maintenance, you can now import all the items in particular group and/or all items in a particular Group/Section from an Excel spreadsheet. This process assumes you have put these group and section settings (as well as the other required columns) in the spreadsheet correctly before you start the process below. The spreadsheet needs to include the following fields at a minimum (column headings are required):
-
Account
-
Item
-
Quantity
-
Unit Price
-
Unit of Measure
-
Start Date
-
End Date
To import group/section records into a group of contracts:
1. From the Main Menu, choose Point of Sale > Database > Contracts to display the Contract Maintenance form.
2. Choose the Global button.
3. Choose Import (F2) to display the context menu and choose Batch.
Follow the prompts to import the spreadsheet you want to import and choose OK.
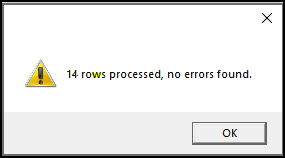
The application tries to import the spreadsheet entries and reports on the status when this process is complete.
Contract Maintenance Before Imported Entries Display
Note: If not all of the items are imported, the application reports the errors. If items were disabled when you tried to import them, the application reports the number of items that were disabled.
4. Click OK to close the message.
5. Choose Cancel (F9).
6. From the Account list, choose the account you imported from the spreadsheet to display the new entries.
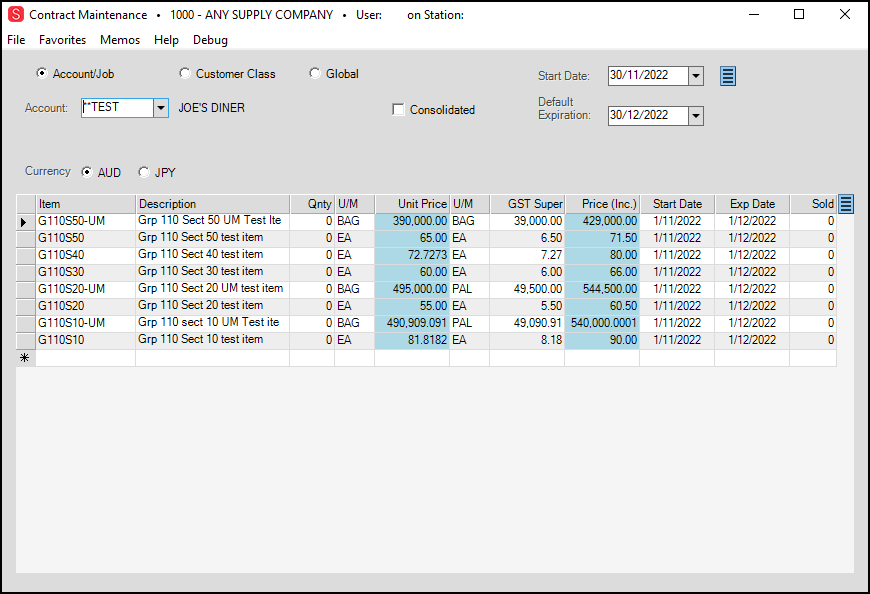
Contract Maintenance with Imported Entries
If you entered floating price entries in the Unit Price column, you can review that calculation by placing your cursor in the Unit Price column and choosing the down arrow.
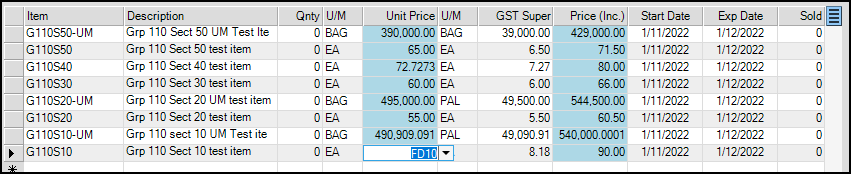
Contract Maintenance with Unit Price Calculation Method Displaying
Clearing an Accounts Contracts Before Importing New Entries
Before you add new contract items and pricing to an account, you might want to remove the existing contract entries from that account. This allows you to start with a clean slate. You clear the existing contract from an account by adding a new entry to the spreadsheet you are importing for that account.
![]()
Spreadsheet with Clear Entry
In the first row of the spreadsheet, type the account ID, the Job number, and in the Item field, type *CLEAR*. Leave the rest of the fields blank. If you enter a StartDate and an EndDate entry, the application will clear the contract for the specified account as of the selected date.
Using Contract Functions
You can use a number of functions to make contract pricing entry easier.
Import (F2)
There are four (4) Import (F2) options that providing a few different ways to populate the contract form's data grid with items: inventory, customer quote, document, and wizard. You need to import a minimum of 10 items (rows, records) for the import process to work correctly.
Style (F3)
Three styles are provided for the data grid: item entry (default), report sequence, and GM%. The default style is the only style that allows editing. The other two (2) styles are read-only, but are useful for reference (you can also choose the "Sort By" context menu option on the data grid to sort by other fields and then reselect the "Item Entry" style to retain the sort order). For example, you could use "GM%" and then "Sort By" the column GM%. When you then choose Style (F3) and Item Entry, the sort order is retained. For more information about the style function, click here.
Template (F5)
This function allows you to copy the pricing options from an existing contract. There are two (2) contract template options:
-
The "account" template option copies the contract price settings from consolidated contracts (where one contract covers all the jobs). Contracts may or may not be linked to a job, even if jobs exist for the account. The account template option copies the job 0 contracts, if there is no consolidated contract on the account.
-
The "job" template option only functions differently from the "account" option if job-specific contracts exist for the selected account. In this case, the application displays a second dialog box so you can choose the job you want to copy contract price settings from.
Reprice (F6)
You can use the Reprice (F6) function to manage the pricing of items in the Point of Sale data grid. This feature is present for several transaction types, including Sales, Orders,
Note: There is a different reprice function in the Purchasing area.
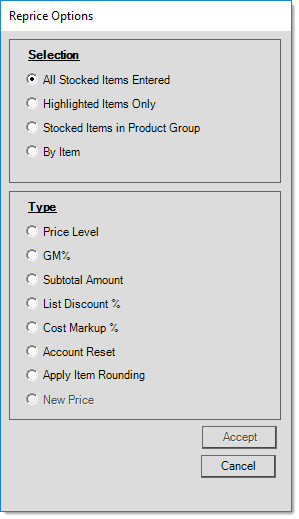
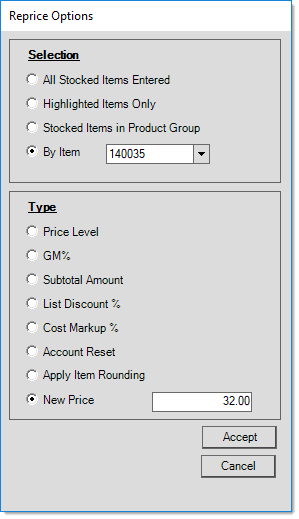
Selection
Use the Selection radio buttons to choose a reprice selection method. There are four ways you can select items for repricing:
All Stocked Items Entered
Choose this option to reprice to ALL the stocked items entered into the data grid (any non-stocked items are not affected by this reprice change). Since non-stocked item pricing is typically set manually, we assume that the desired pricing was entered at that time.
Highlighted Items Only
Select the items you want to reprice in the data grid and then choose the Reprice (F6) key to limit the price changes to the selected rows. When rows are selected, the items are highlighted in the data grid. Here are some ways to do that:
-
To select a single row, click the box to the left of the row in the data grid.
-
To select consecutive rows, click the box to the left of the first row in the range (top or bottom), hold the Shift key, and click the last row you want to select.
-
To select non-consecutive rows, click the box to the left of the first row, hold the Ctrl key, and choose the box to the left of each of the other rows you want to include in the selection.
After selecting the desired rows, choose the Reprice (F6) function key, and choose the Highlighted Items Only option to update the pricing for the selected rows. Then choose a type for the reprice function that is appropriate for the price change.
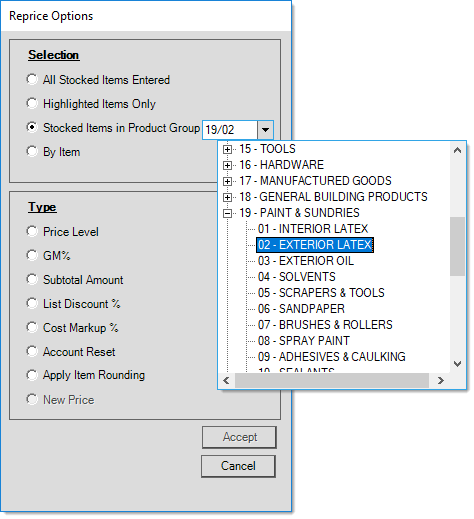
Stocked Items in Product Group
You can use this option to reprice just those products that belong to a group and/or section you designate. When this option is chosen, a group/section selection form is displayed. Users can choose either an entire group or an individual group and section.
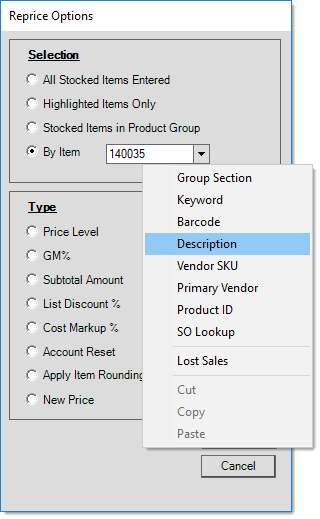
By Item
Using the "By Item" selection method, the application only reprices the item you specify. If the same item exists in multiple rows in the data grid, all rows matching the item are updated. If you need to find the item in the data grid, click the down arrow in the list to choose a search option.
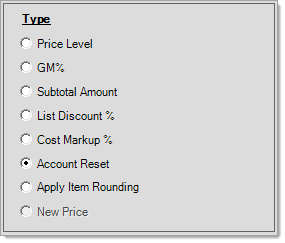
Type
After you select the items you want to reprice, you choose the type of reprice you want to make. There are seven reprice methods, which are listed in detail below.
Note: The New Price (Excluding Tax) option is only available when you select the By Item selection option.
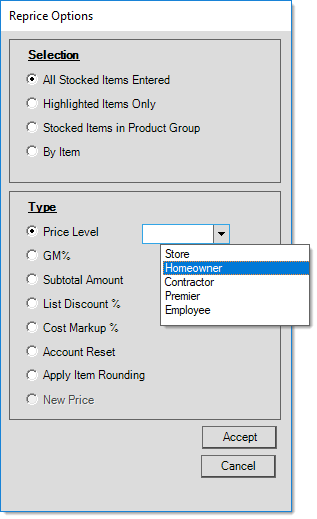
Price Level
Use this option to apply a price level to the selected items in the data grid.
The default Price Level calculations are defined in the Inventory tab of the Parameters form and individual price levels are assigned by item in the Item Maintenance form. You can create up to seven price levels for each item. Your company may choose to use fewer than all levels available. Except for the Store Retail level, you can define price level descriptions that work for your company (such as "Homeowner" or "Contractor," for example). Any examples in the documentation dealing with price level descriptions will likely vary from those defined by your company.
The Price Level option is the only reprice that adjusts the unit price of repriced items based on each product's price rounding setting.
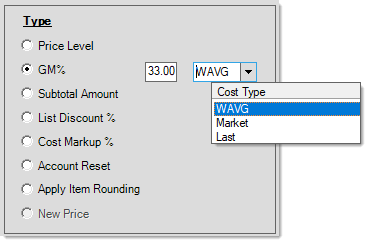
GM%
Use this option to set a Gross Margin (GM%) percentage and cost type for the entire sale or for selected items or for the product group items. If you apply the reprice is being selectively, the application will only adjust the prices of the selected items, and the overall margin for the entire transaction will not match the percentage entered. You may choose to base the margin on either the WAVG (Weighted Average), Market Cost, or Last Receipt Cost settings.
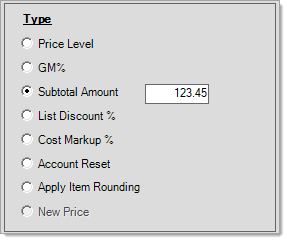
Subtotal Excluding Tax
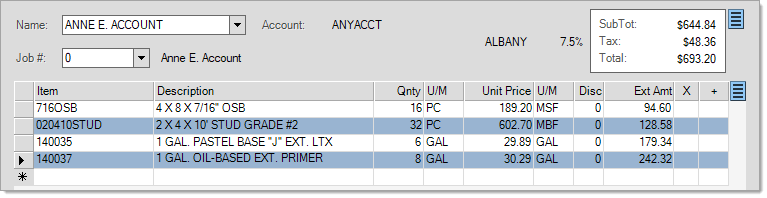
Use the Subtotal Excluding Tax option to enter an ending subtotal amount, which the application uses to adjust the prices of the items in the data grid. When you choose this setting, the application only reprices the selected items in the data grid, other item prices will not be affected. In this case the overall subtotal won't match the Subtotal Amount you enter if there are non-selected items in the data grid. The application adjusts the item pricing based on the percentage amount that each selected item's extended amount represents related to the original subtotal for those products.
For example: If you enter five items into the data grid, and each item has an Extended Amount of $2.00, the Subtotal Excluding Tax is $10.00. If you select one of the items, choose Reprice (F6), select Highlighted Items Only, with a type of Subtotal Amount, and enter $8.00 as the subtotal, the selected item's price changes from $2.00 to $8.00 and the new overall subtotal is $16.00, which is the selected item amount plus the cost of the other non-selected items.
If you apply the same subtotal with the All Stocked Items Entered selection option, each item's extended amount updates to $1.60 so the subtotal would be $8.00.
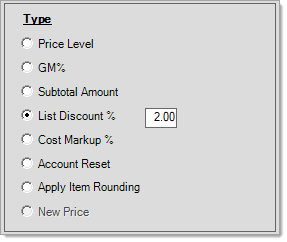
List Discount %
Use the List Discount % option to reduce pricing for the selected items by a percentage of their assigned Suggested List price (set in the Item Maintenance form).
Note: This entry cannot be a negative amount.
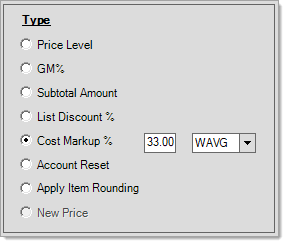
Cost Markup %
Use the Cost Markup % option to specify the markup percentage and cost options for the selected items in the data grid. Cost choices include Market Cost, Last Cost, and Weighted Average (WAVG). For more information about costs, read the section Item Costs & Pricing.
Account Reset
Use the Account Reset option to reset the pricing for the selected items back to the account's default pricing levels.
Apply Item Rounding
The Reprice functions often use all four decimal places to match a particular subtotal or calculation you set, so they don't necessarily or usually result in a rounded price. Select this option to reprice the selected items based on their price rounding settings. Rounding usually results in changes to item prices and extended amounts.
New Price Excluding Tax
Use this repricing type to replace the current unit price of a By Item entry with the amount you specify in the field. This option may only be used with the "By Item" selection method and is disabled whenever you choose other selection options.
The standard Cancel (F9), Exit (F10), and Process (F12) functions are provided. To save an existing contract or changes made to an existing contract, you must choose Process (F12) prior to closing the form.
Deleting a Contract
The top-most menu marker icon offers a context menu that provides the ability to delete the current (selected) contract or all expired contracts. Once deleted, the contracts are permanently removed from the database, so please use caution.
Delete Contract
This option deletes the currently selected contract only. If a valid contract is selected (meaning at least one item on a contract is shown in the data grid), a confirmation prompt "Delete contract?" is provided. If the user chooses yes, the contracts for any items appearing in the data grid will be removed. The contracts removed are not based on date selections in the upper area of the form. All contracts listed in the data grid will be removed.
Delete Expired
This option is only available before account and job selection in the form; otherwise, it is disabled. The "delete expired" option removes all expired contracts up to a date provided by the user. To prevent accidental deletions, the application does not allow the current date or any future date. In addition, a warning is provided if a date within the last 30-days is selected. Contracts that have not expired are never removed. Please use caution when selecting a date.
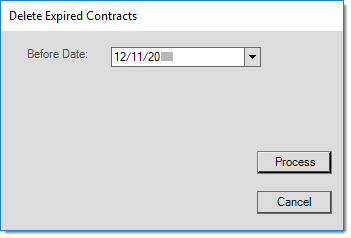
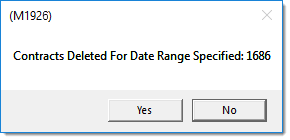
Once the deletion is processed, a dialog reports the number of contracts that were deleted.
Applying Contract Pricing to Multiple Accounts
To update multiple accounts with new contract pricing settings:
1. From the Main Menu, choose Point of Sale > Database > Contracts to display the Contract Maintenance form.
2. Choose the Customer Class or Global option, depending upon the measurement/price changes you want to add to your customers’ contracts.
-
If you selected Customer Class, select the Class type from the Customer Class list.
3. In the date fields (Start Date and Default Expiration), enter the date range that you want these contract prices to be in effect.
4. Depending upon how you decided to keep track of the pricing strategy (by spreadsheet or by SKU template) do one of the following:
-
Choose Import (F2) > Wizard to import the spreadsheet of items you have prepared into the data grid. Set the appropriate grid mapping to import the data into the data grid and click Process. The Import Wizard instructions are covered in detail in the Help System.
-
To add the contract pricing established for a specific account or job to other contracts, choose Template (F5),Account or Job to display the Default using as Template list. Choose the account or job contract from the list and choose Accept.
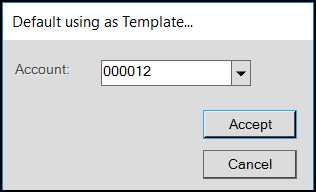
Contract Maintenance > Default using as Template List -
Add the SKUs you developed to the data grid manually until each of the SKUs that you want to apply to the selected contracts display in the grid.
Each of these approaches populate the data grid with the data you have prepared for this purpose. You can use a combination of these methods to collect information from different sources and remove the items you do not want to apply.
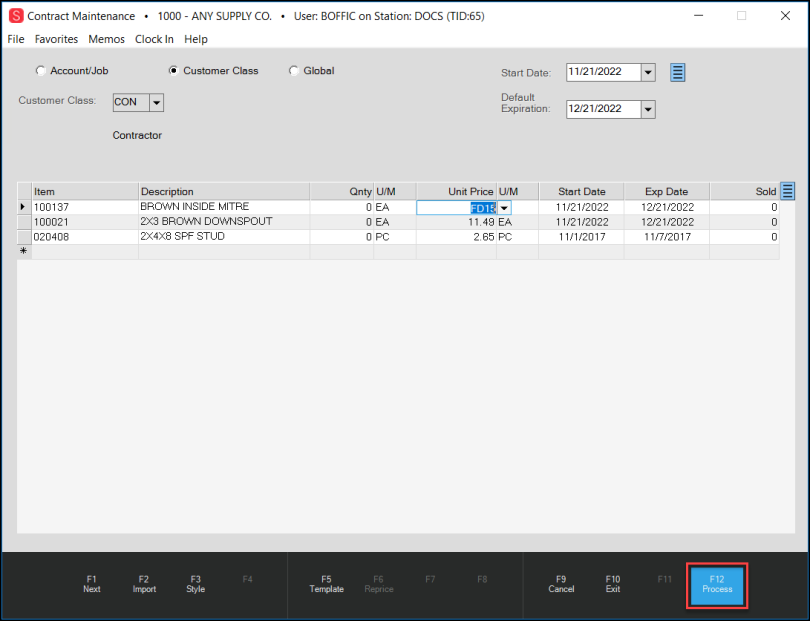
Contract Maintenance with Entries (Unit Price Detail Displays)
5. Click in the Unit Price entry columns to make sure the short cut displays as you expect for each item you are applying.
6. When you are ready to apply these item prices to the selected contracts choose Process (F12).
Managing Multicurrency in Contracts
When you create an account/job contract with a customer that uses a foreign currency, the application saves the contract amounts in the customer’s currency rather than your local currency by default. When a cashier adds those contract items to a customer’s data grid, the application applies the contract pricing to those items. You can use the new Point of Sale options to display the prices in local currency at any time. Contract Reports show the customer’s currency code when the report includes the customer’s foreign currency account.
In the Contract Maintenance form, we have added a Currency section above the data grid that displays when the contract you are adding is for a customer using a foreign currency. The local currency displays on the left and the customer’s currency displays on the right. In the example below, the prices that display are in Japanese Yen, which you can tell is the foreign currency because the background of the Unit Price, U/M, GST (Tax), and Price fields is yellow.
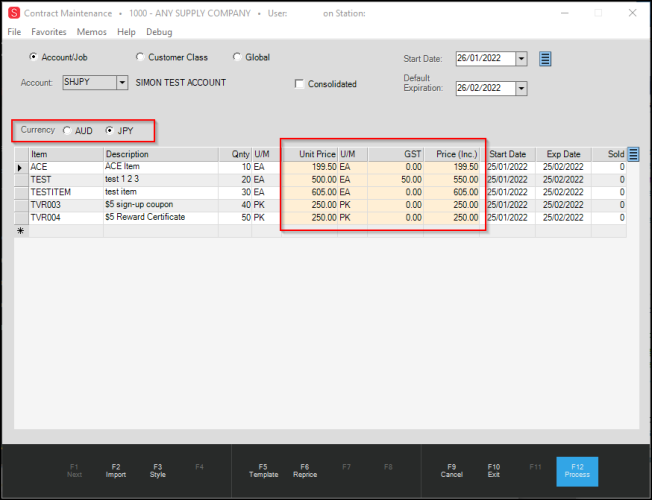
Contract Maintenance Form Showing Foreign Currency
To review the same entries in local currency, click the local currency button (in this case AUD) to update the values in the Contract Maintenance data grid.
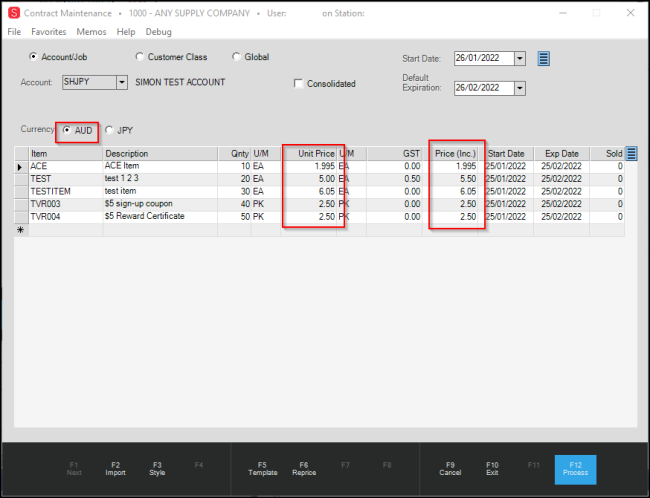
Contract Maintenance Form Showing Local Currency Values
When you complete your contract entries and click Process (F12), a confirmation message displays.

Contract Pricing Confirmation Message
Do one of the following:
-
Click Yes to confirm that you want to save contract pricing in the foreign currency, or
-
Click No to save the contract pricing in your local currency instead.
When you save contract pricing in local currency the current exchange rate stays in effect, even if the exchange rate changes. So, when you add contract items to the data grid in Point of Sale, the contract price will be in effect. If you change the display options in the Point of Sale data grid to local currency, the contract price will convert to local currency using the exchange rate in effect at the time of the initial contract.
Note: The Currency setting (Local or Foreign) in place at the time that you process the contract is the currency setting that is saved with the contract. If you save the contract with the local currency set, the confirmation message does not display. The exchange rate change rules remain the same.