Inventory Unit Item Maintenance
You can display the Inventory Unit Item Maintenance form by choosing Inventory > Utilities > Unit Item Tally from the Main Menu.
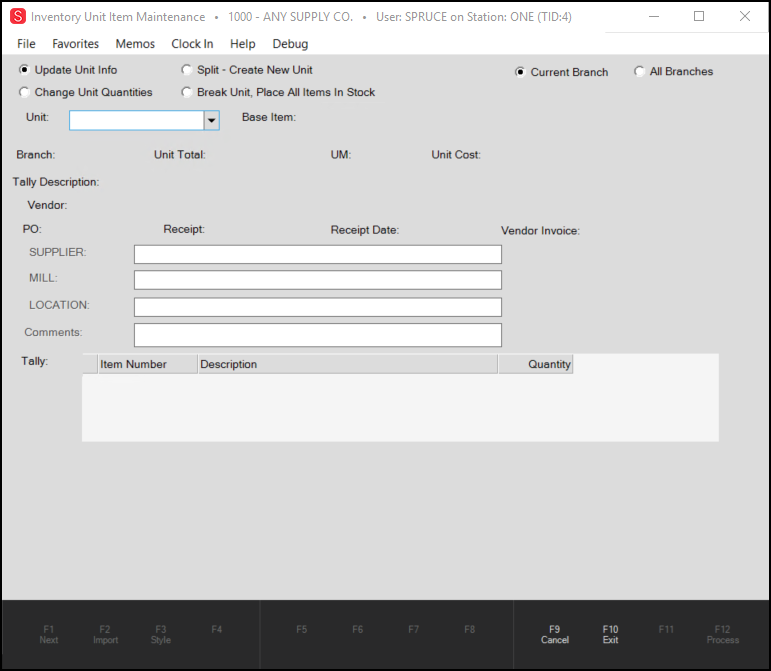
This form gives you four (4) functions that relate to unit tally items:
-
Update Unit Info,
-
Change Unit Quantities,
-
Split - Create New Unit, and
Break Unit.
A "unit tally" is used with products with some dimensional aspect, meaning they are measured by volume, area, or lineal length, and are packaged together and treated as a single "unit" rather than as individual components. Using Unit Tally item types gives you a way to create a "base" SKU from which you can create custom (volume, area, or lineal-based) items tied to a new SKU that is specific to your customer's needs. The application generates a renumbered item SKU similar to how special (non-stock) ordering functions.
Note: Changes that impact the overall quantity of a previously configured unit do not result in any change the unit item’s on-hand or stock value. Unit quantities are assumed to be included in the item’s on-hand, so changes made in this utility do not impact the unit item’s overall quantity on-hand. To adjust the item’s on-hand quantity, create a separate adjustment. The uses of these four (4) radio buttons are described below.
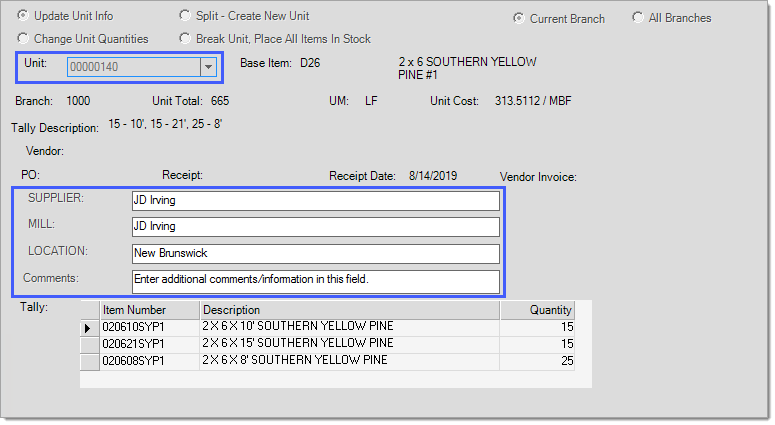
Update Unit Info
Use this option to update the supplier, mill, location, or to add comments details to a unit tally item. Changes to the tally quantities are not allowed in this section.
1. Choose the Update Unit Info button and from the Unit list, choose the SKU of the unit tally item you want to update.
2. In the fields provided update the information associated with the unit tally item as needed. Changes can be made in the current branch or all branches.
3. When you have completed your changes, choose Process (F12) to save them to the database. Changes will be reflected on the Unit History report.
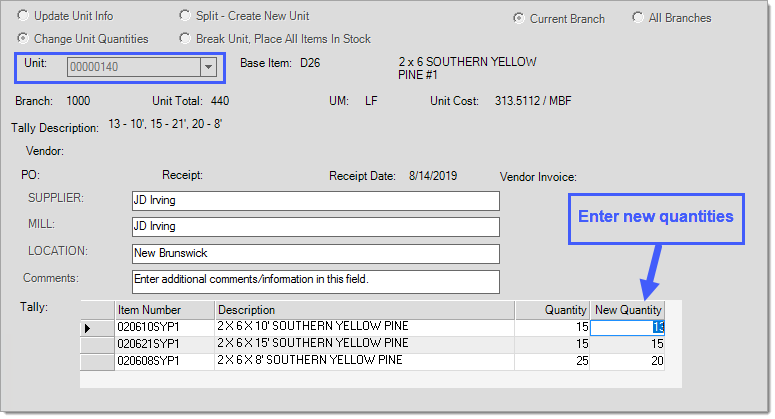
Change Unit Quantities
Use this option to change the quantity of a specific item associated with a base unit. You would use this option if one of the unit quantities are returned or you received more of a specific unit type of a base tally item. It is also possible to edit the optional user-defined fields from this option.
1. Choose the Change Unit Quantities button and from the Unit list, choose the SKU of the unit tally item you want to change.
2. In the New Quantity field, enter the new unit tally item quantity for the selected base item. Changes can be made in the current branch or all branches. You can also make changes to the Supplier, Mill, Location, and Comments section using this feature.
3. When you have completed your changes, choose Process (F12) to save them to the database. The Unit History report will reflect the quantity change.
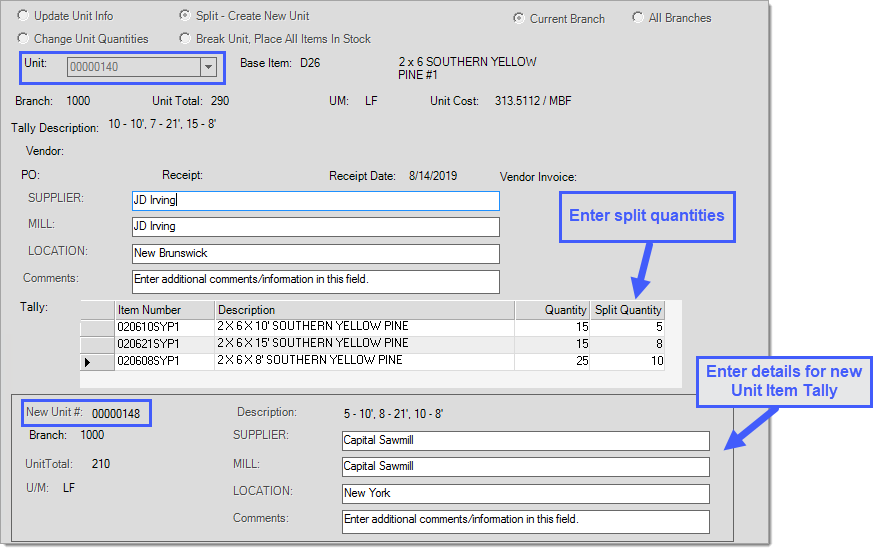
Split - Create New Unit
Use this option to take an existing unit and remove an existing quantity to create a new base unit. The existing unit remains and is reduced by any quantities pulled for creation of the second unit. The application will generate a new unit SKU automatically and the split quantities will be allocated to the new unit.
1. Choose the Split - Create New Unit button and from the Unit list, choose the SKU of the unit tally item you want to split.
2. In the Split Quantity field, enter the quantity of this tally item that will be in the new base tally item. Changes can be made in the current branch or all branches.
3. In the New Unit Number fields, enter the new Supplier, Mill, Location, and Comments section information. Changes to the tally dimensions are not allowed.
4. When you have completed your changes, choose Process (F12) to save them to the database. The Unit History report will reflect the quantity change.
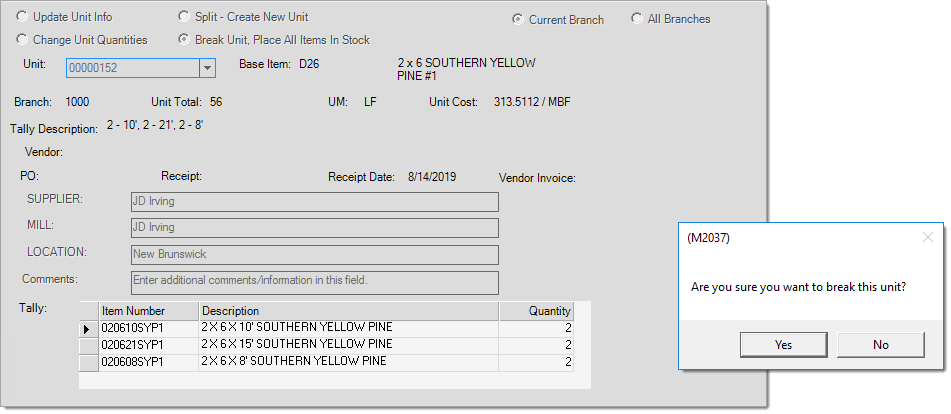
Break Unit - Place All Items In Stock
Use this option when an existing base unit is no longer in use and you want to add the remaining components of the unit to unallocated inventory.
1. Choose the Break Unit, Place all Items In Stock button and from the Unit list, choose the SKU of the unit tally item you want to change.
2. Choose Process (F12) to save this change to the database. The Unit History report will reflect the quantity change. The application displays a warning message, requesting confirmation.
3. Choose Yes to mark the SKU as Disabled.
Stock items must have at least one measure that matches the unit of measure used by the selected unit. The "unit total" and "to stock" totals must match to allow processing.