True Value - Updating a PO
Once you've place your order and its been filled by your RDC (Retail Distribution Center), True Value Company creates a file that can be retrieved (downloaded) and used to update either an existing or new purchase order with the quantities and items being shipped. Data is generally made available on some type of set schedule determined by True Value Company. The retrieval of data is done using the Vendor EDI transaction's "Purchase Order Update" feature. A file name format of MRInnn.DAT is used by True Value Company. The "nnn" portion of the name is replaced by a sequence number. Features described in this section are currently only available with release 12 (expected release date of January 2017) and later.
If the data contains items that were ordered using a Purchase Order from the
Retrieving Data
From the Vendor EDI transaction (Main Menu, Purchasing) choose an "EDI Interface" and "Vendor" if necessary. If only one (1) EDI interface has been configured for your branch location, selection is automatic and done for you. Select the "Purchase Order Update" radio button from the panel in the upper right-hand corner of the form.

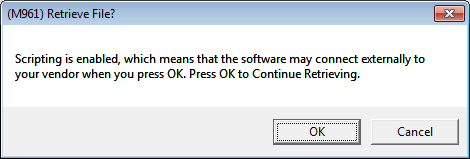
Next, select the Retrieve (F5) function. Unless you have disabled scripting (using the context menu ![]() ), the "Retrieve File?" prompt appears. Choose "OK" to continue unless you previously downloaded the update file. If you previously downloaded the update file, you can disable scripting, browse, select the file, and process it skipping the retrieval step.
), the "Retrieve File?" prompt appears. Choose "OK" to continue unless you previously downloaded the update file. If you previously downloaded the update file, you can disable scripting, browse, select the file, and process it skipping the retrieval step.
After choosing "OK," the application runs a command-line script that will briefly open a command window. The window closes on its own. The script window will look similar to the example below; however, it is shown very briefly and you might not even notice it.
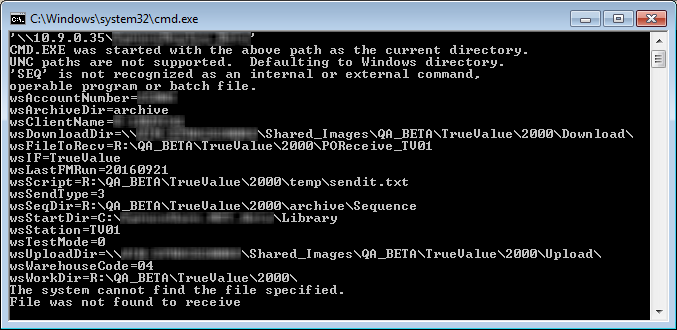
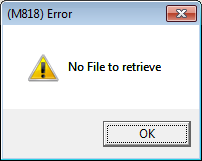
The script (above) attempts to connect using the Afaria software installed on the server to True Value Company and retrieve a file. If no file is found, an "error" message appears. This does not necessarily indicate a problem with setup or communication. In those cases, you will generally receive other types of messages.
After Successful File Retrieval/Selection
If a file is retrieved, it will be processed and the results of processing will be displayed in the data grid. A single update file may contain several orders, so you may see more than one row or entry. As mentioned at the beginning of this topic, if the data references a purchase order originating from the
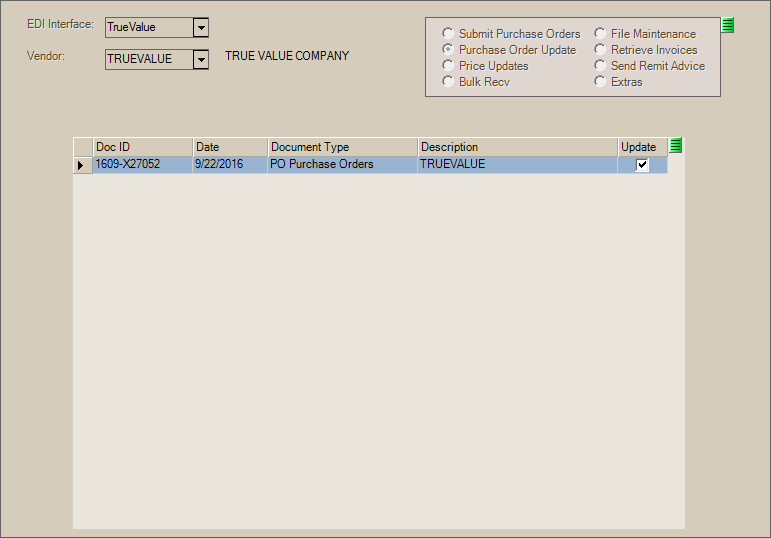
At his point, any purchase orders listed in the data grid have not been updated. Updating of item quantities is not done until you choose Process (F12); however, we suggest that you preview the data before doing this.
Assign or Create Purchase Orders for Unassigned Order Data
If no "Doc ID" is listed, the description will say "PO Not Found." You can either create a new purchase order or select an existing purchase order to update using the drop down available from the "Doc ID" column cell.

Previewing the Data
Before processing, which updates the purchase order with the EDI quantities, we suggest previewing the order data from the Vendor EDI transaction. To preview data double-click on the row's header column cell (![]() ). This is the left-most column in the data grid. The "preview" display should appear listing the items on the order along with the EDI quantity and cost for comparison to the original (PO) quantity and cost. This can be very helpful and may avoid issues due to invalid units of measure and package quantities, etc.
). This is the left-most column in the data grid. The "preview" display should appear listing the items on the order along with the EDI quantity and cost for comparison to the original (PO) quantity and cost. This can be very helpful and may avoid issues due to invalid units of measure and package quantities, etc.
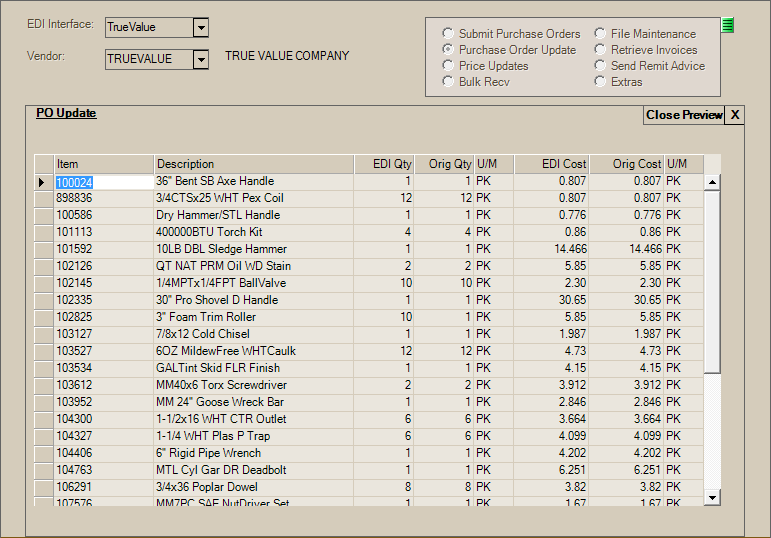
A few points and tips about using the Preview:
•Zero quantities in the "Orig Qty" column indicate that the item doesn't currently exist on the Purchase Order document. This may be due to the item being ordered directly from the vendor (on-line, etc.) or because the item was removed from the order after transmission. Added items typically appear at the end of the listing (scroll to the end/bottom).
•EDI will automatically add new items to your inventory if the vendor is shipping something you don't currently stock. The settings for new items are based on the "template" SKU specified in your branch EDI settings as well as catalog information where available. The description of these items will say "Created from Template Item:" in the data grid.

Items added via the template usually require additional maintenance (changes) such as changes to the group/section, purchase settings, etc. Companies should review their "added" items on a regular basis.
•Columns can be sorted by clicking on the column header cells (press the Esc (Escape) key on the keyboard to cancel sorting). Clicking on the same header cell again changes the sort order. It's a good idea to do this on the quantity and cost columns to check for any extremely large quantities and costs. These can be an indication of unit of measure issues which you may want to resolve before updating the purchase order.
Processing
Once you are satisfied that the data is correct, select the rows you want to update (by placing a check in the "update" column) and choose Process (F12). When you process the order data, a record is created in the EDI Log for the current data that summarizes what was done. This can be used to see which data was updated or not, for example.
It's important to point out that updating the purchase order(s) does not actually receive the ordered items nor does it adjust on-hand or on-order quantities. Processing does update the costs on the purchase order setting them equal to the cost values in the EDI data. The original costs are retained with the purchase order details; however, when you view the order or receive it, the costs shown will be the EDI costs, not the original values.
Receiving the purchase order(s) is a separate and additional step.
Post-Processing
To actually receive the ordered items into inventory, you use the Receipts transaction available from the Purchasing area. There are a number of procedural methods and options for doing this.
Receiving Inventory Procedures
There isn't necessarily one "right" way to receive inventory using the application. Each company must choose the best method from the options provided. Below are a few different methods that can be used:
Receiving from a Purchase Order
In this case, we are immediately copying in all of the items ordered on a purchase order and updating those items in the data grid. This generally works fine for smaller orders or if you are choosing to "blind receive" a purchase order that was previously updated by EDI processing; however, it is cumbersome for larger orders since you have to locate the items in the data grid if changes are necessary.
Use the Receiving (F5) function to select either an existing purchase order or mobile receipt to associate with the transaction.
Once the items from the selected order have been added to the Receipts transaction's data grid, update quantities to match what was received as needed.
|
Please note! Scanning items won't update the existing item quantities in the data grid. Please look up: "Reconciling to a Purchase Order" for a "scan and receive" method in the Search field of the Help System. |
If the purchase order was updated by EDI processing, the quantities listed in the data grid will be the EDI quantities, not the original order quantities. Costs on the purchase order are updated when the "Purchase Order Update" is processed in the Vendor EDI transaction to match the EDI costs. You can use the Reconcile (F7) function to view the differences between the ordered quantities and current receipt before processing.
Reconciling to a Purchase Order
This method involves a detailed "check-in" of the received items followed by a comparison of those results to the original order and/or EDI quantities. To begin, you specify the date, vendor, and reference then scan the items you were shipped. The process of scanning can be done either from the Receipts transaction or it can be done using the
After all of the items have been scanned and had the receipt quantities set based on what was shipped, use the Reconcile (F7) function to compare the ordered (and/or EDI ) quantities to the current receipt before processing. Investigate and correct any issues found.
No Purchase Order
This option only applies to receiving when there is no EDI data involved. In this case, you simply scan or enter the items and quantities being received and then process the receipt. The downside to this option is that you don't necessarily know if what you ordered matches with what was shipped.
|
Blind Receive "Blind Receive" is a method usually used along with EDI (Electronic Data Interchange) processing. The name, "blind receive," is used because the process of carefully checking in each item shipped is either avoided entirely or minimally done. If the EDI quantities supplied by your vendor tend to be pretty accurate, it may make sense to consider this method. Instead of checking in each item individually, you would instead receive the purchase order based on the EDI quantities or do a quick reconcile (F7) and check for gross discrepancies only. This method makes sense if the time, labor, and resources required for checking each received item outweigh the average cost of discrepancies that may be present. Before instituting a "blind receive" method, you should be confident with your EDI process and that your item data and settings for purchasing are correct most of the time. It's best to monitor the amount of discrepancies found during receiving for a period of time before making a decision. If your company is spending significant time receiving orders and that process isn't identifying any or many discrepancies over the review period, consider this option. |