Message
The Message feature allows users to add, modify, or delete a message alert that can be issued to a
|
Expectations and Limitations Messaging in the Note: If you use a Gmail account, check out this Google App Password topic to learn how to make your communications more secure. |
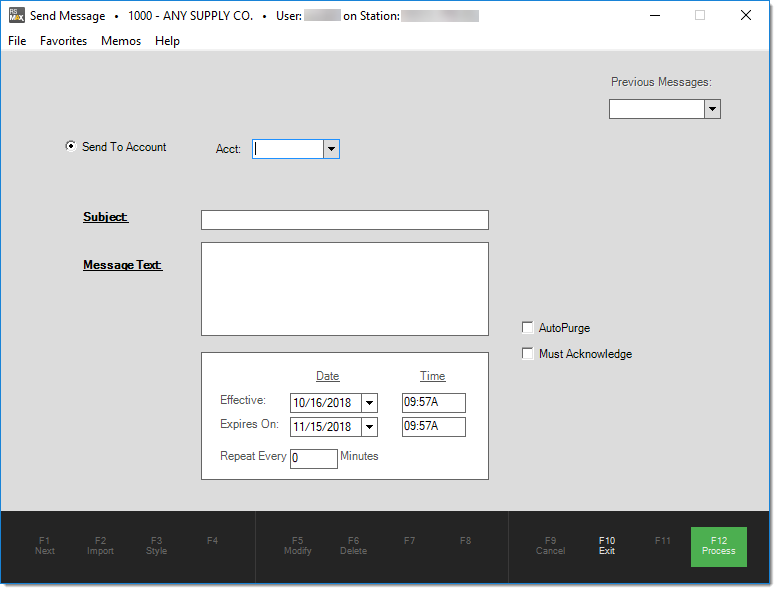
Messages can be sent with a date/time range associated with them. This allows users to schedule a message for the future and to expire on a particular date. They can also be designated to repeat on a regular basis (the repeat feature only works when used with users and stations, not accounts).
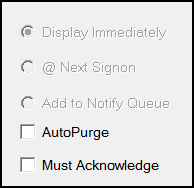
Message Delivery
-
Auto Purge - Use this check box to define whether the application should purge the message automatically. If set, this does not immediately purge messages after reading; however, it does make them eligible for automated purge processing (a service that runs daily to purge messages that have expired and are set to purge automatically). Administrators can set a parameter to define the number of days after expiration when messages are purged (Expired Messages Purge Days).
-
Must Acknowledge - When you send a message to an account, there is an additional Must Acknowledge option. These messages are always "Display Immediately" by nature. Must Acknowledge messages display before the user closes the Message popup window. If there are multiple "immediate" messages queued and any of the "must acknowledge" messages haven't yet been displayed, the user won't be able to close the form until all the user has seen all of the "acknowledge" messages. Attempts to close the window will result in the next message being displayed instead. A beep sound is also produced but is only audible if the computer has such sounds enabled.
When any of the "immediate" messages queued are "must acknowledge," some other aspects of the messages change as well. For example, the Message pop-up is usually semi-transparent, but in this case the form is not transparent at all. In addition, instead of appearing near the tray (lower right-hand corner usually), the messages display in the center of the form. This prevents use of the main form until the must acknowledge messages have all been viewed.
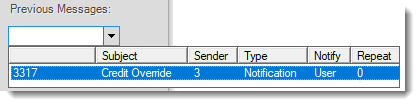
Making Changes or Deleting an Existing Message
Use the "Previous Message" list button to choose an existing message for editing.
To just view Account messages, choose the "Send to Account" radio button first.
To view, modify, or delete a single customer's messages, enter the account prior to choosing the "Previous Messages" drop down. Unless you are an Administrator, you can only view and change previous messages if you were the sender.
Make changes if necessary and choose Modify (F5). To remove a message, select Delete (F6).
The alternate menu can also be used to select messages by subject or by account. To use these options, type in either the text or account (code, not name) to be searched for. don't press tab or enter. Instead, select the menu using your mouse's alternate menu button (the right-hand button on a right-hand configured mouse).
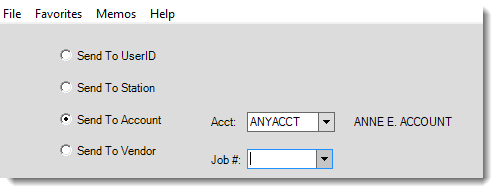
Sending a Message to a Customer via their Account
When you send messages to a customer's account, it will display during most Point of Sale activities (except Payments and Pay-outs) when the account is selected for use. To send a message to an account, choose the Send To Account radio button and select or enter the account you want to message. Messages cannot be sent to specific jobs.
A message to an account appear as a separate window when the account is entered or selected. Message windows don't prevent or inhibit Point of Sale entry. A message window can be responded to or ignored indefinitely based on the user's preference. Message windows will appear semi-transparent until the user clicks on the message window. This prevents the message window from interfering too much with a recipient's current activity.
")
Message From... (to Account)
If an account has multiple messages, the user can choose the Next button to view them in order.
Messages / Notifications
Message notifications are found at the bottom of the Main Menu.
To review the messages in your queue, click the Messages  icon.
icon.
The Notification Queue displays the messages in User ID order (based on entries in in the From column) and then oldest to most recent. You can click the Date/Time column to re-order the list. Messages remain in the queue until they expire or you (or someone to whom they are addressed) deletes them.
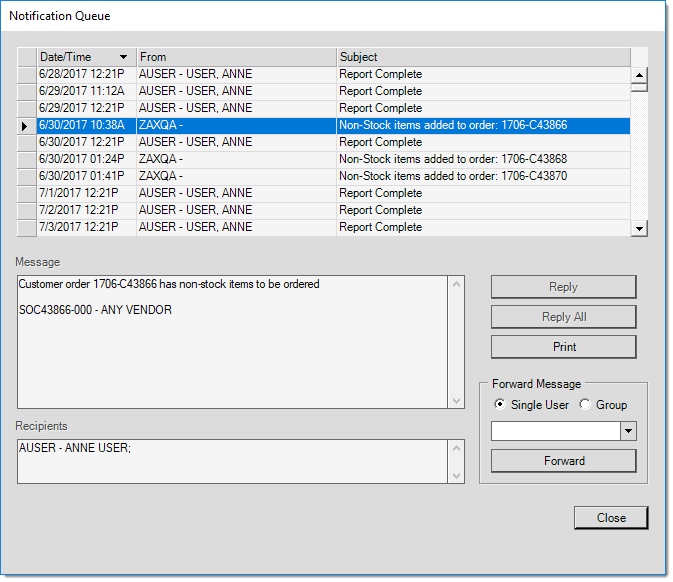
Print - To print a message or messages, select the desired message(s) from the grid, and click on the "Print" button. You may also right right-click on the selected message(s) and select Print from the selection menu.
Forward - Messages can be forwarded by a user to another user or group. Select whether you will be forwarding to a single user or to a defined group. Using the drop-down list, select the desired recipient, and click the "Forward" button.
Delete Message(s) - Messages can be deleted directly from the grid after reading. Select the row in the grid containing the message and press the Delete key on your keyboard. You may also right-click on the selected message(s) and select Delete from the selection menu. For helpful tips on selecting multiple rows, please click here
Close - Click on the "Close" button to close the Notification Queue window.