Status (Receivables Accounts)
The Account/Job Status form displays information about customers and/or jobs for whom your company maintains self-managed receivable's for. This inquiry can be used to view either consolidated (all jobs) or specific job information (when applicable). After selecting an account or account/job, summary information displays in the upper area of the inquiry form.
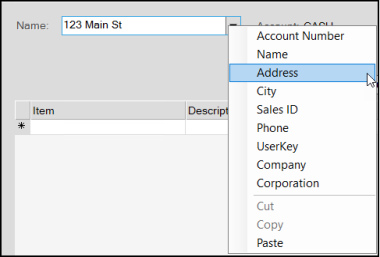
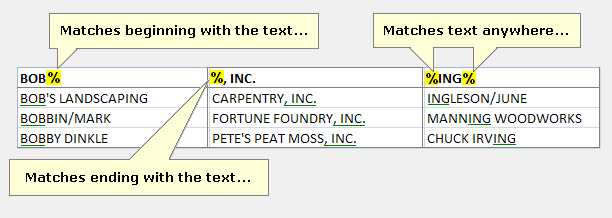
The default selection is by account ID (code); however, users can use alternate menu selections from the account selection field to choose a customer by name, address, sales id, phone number, user defined key, or corporation. For more information about Account selection, ![]() click here.
click here.
Selecting an Account
Selecting a Job
Folder Area
The lower area of the inquiry form offers a folder area containing five (5) tabs: status, charges, credits, history and log.
Status
The status tab has three (3) main areas: balance & payment history, outstanding balances, and current status.
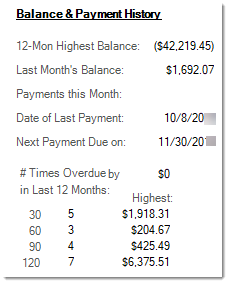
The Balance & Payment History section provides the customers most recent payment information, overdue table, 12-Month Highest Balance, and previous month balance.
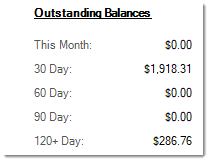
Outstanding Balances displays an aging breakdown of unpaid charges (a monthly scheduled billing cycle ages balances).
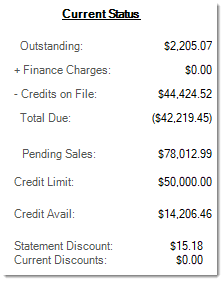
The Current Status tab lists the overall outstanding balance of unpaid charges and debit adjustments, finance charge total, unapplied credits, and a total due. This same area shows the customer's pending sales (balance on orders, tickets, etc.), credit limit, available credit, and statement discount total (eligible).
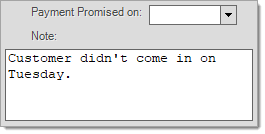
A "promised payment" function is available from this tab as well. It allows the user to select a date and enter a note regarding contact with a customer regarding paying their bill. This function can be used in conjunction with the Past Due report (available under the Receivables, Reports drop down) to create a list of customers who have not paid by the date promised. If the promised payment date or note is updated, use the Process (F12) function to update the database. A history of notes is now being maintained and can be viewed from the "Log" tab.
Charges
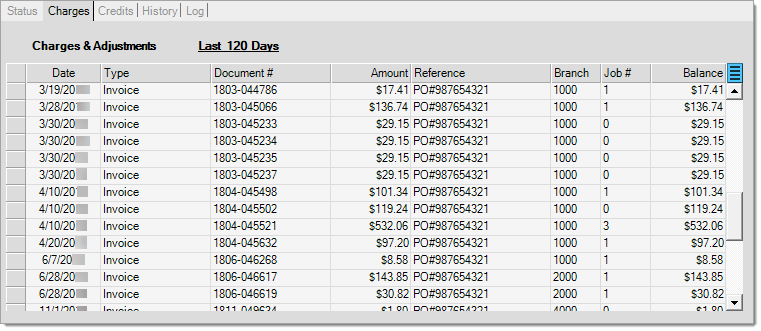
The Charges tab displays a listing of charges (any type of debit entry) for either the current billing period (the default display), last statement period, or last 120 days. Use the menu marker ![]() to modify the time period displayed. Double click on a document number (#) to open that document in the Document Viewer for more detail.
to modify the time period displayed. Double click on a document number (#) to open that document in the Document Viewer for more detail.
Credits
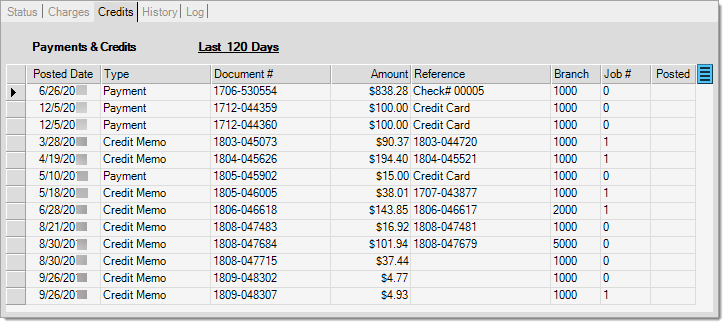
The Credits tab displays a listing of credits (payments, charge returns, discounts, and credit adjustments) for either the current billing period (the default display), last statement period, or last 120 days. Use the menu marker ![]() to modify the time period displayed. Double click on a document number (#), when applicable, to open that document in the Document Viewer for more detail.
to modify the time period displayed. Double click on a document number (#), when applicable, to open that document in the Document Viewer for more detail.
History
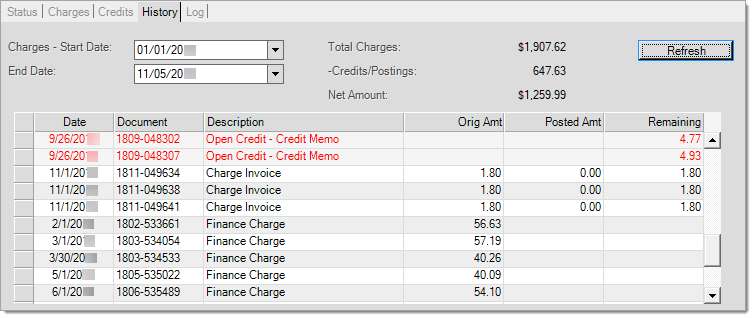
The History tab lists a combination of charges (debits) and applied credits (payments, memos, discounts, etc.).
|
This information is gathered from various sources including posting documents and invoices; however, it may be rendered inaccurate if the customer account's posting type (open item vs. balance forward) or billing level (job or account) have been modified in the past. Details can be lost when moving from a type that normally maintains more detail (open item or job billing) to less (balance forward or account billing). Overall totals will match; however, the detailed records that once existed won't be retained. Even if you change an account back again after this, the original details are not returned. In addition, archiving, which removes selected data, can have an impact if you go back far enough and have arching enabled. |
Users can select a starting and ending date to produce a range. Applied payment references appear in red text below the items they were applied toward. The "refresh" button allows you to update the grid with any changes to dates or new activity. Double clicking on the document associated with a payment reference row opens the AR Posting document which lists any other invoices/debits that check was applied to. This same function can be used to quickly view documents for charge sales, debit adjustments, etc.
Log
The Log tab displays credit department notes added to the account and allows users to add, modify, and delete existing notes. Future notes will be available until deleted. Notes can be added to the log in 4 ways: (1) from the Account Maintenance form, (2) from this Inquiry tab, and (3) from the Status tab in this Inquiry, and (4) from the Credit Override area.

Existing notes can be deleted by selecting the desired row in the grid and pressing the Delete key or selecting "Delete" from the alternate menu (usually a right click). Edit a note by double-clicking on the row in the grid you want to make changes to. There are currently no restrictions regarding adding, editing, or deleting notes; however, the Status form is the only area that notes can be modified or deleted, so restricting access to this form can prevent changes. Notes are limited to 1024-characters of text.
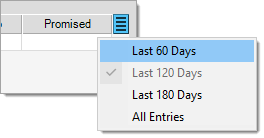
The last 60-days of notes are the default date range; however, users can modify this by choosing another preset (120 or 180 days) or "all entries" using the menu marker ![]() .
.
Use the Save (F5) function to save note additions or modifications from the Log tab. Deletions are processed immediately, so be careful when deleting notes.
Print (F8)
The Print (F8) function contains two (2) choices: statement and history.
Statement (Current)
The "statement" option prints a current "statement" (status) for the customer to the selected printer. It's important to point out that this statement isn't retained as a permanent document, it's just a preliminary summary for the customer's current account status and balances. This document can be printed, emailed, or faxed. The format of the "status" statement is not going to reflect the customer's assigned statement parameters, it's a distinct format just for this purpose.
The current statement will now only refer to "discounts" if the customer is eligible for statement discounts (releases 8.1.0 and later). New finance charges, if assessed on a date prior to billing processing (this is optional), are not reflected on a current statement.
History
The "history" print option prints the history selected under the folders (a date range is required).
Cancel (F9)
The Cancel (F9) function clears the form of any selections but leaves it open.
Exit (F10)
The Exit (F10) function closes the form window.
Process (F12)
If the "promised payment" date and note fields are used, the Process (F12) function will become active for saving changes.

