Adding Company Logo to your Documents and Screens
It makes sense to use company logos to create your own brand. Logos give you that visual representation of your business on your Point of Sale, business, and statement documents. If your company doesn't have a logo and you don't want to purchase paper with pre-printed logos, you can save an image file containing just your company's name, address, etc. in place of a graphical logo.
You can create and modify logo files using Microsoft® Paint™ (this program is provided with Microsoft Windows® operating systems) or other graphics applications. Once you have your logo images, we provide the instructions for adding these logo images to your documents and to the application itself, but it is your responsibility to create a quality and properly scaled image in electronic form. Any time spent by the ECI Support team to modify logos, after implementation, is billable.
If you do not create a logo, the application displays the standard ECI Software Solutions, Inc. logo in its place.
There are two types of user-defined logos we store in the application:
-
Logos that display on your documents, and
-
Logos that display on your forms (screens) when the application is in use.
The application resizes the document logos to ensure they fit properly on your customer-facing documents, but the application does not resize form logos, which display in the application forms (screens). The exception is the cash ticket logo, which we cover below.
Defining which Documents display your Logos
Before you get started creating and saving your logos, you will want to define what types of documents display these logos. You must have administrative permissions to set these options.
To determine which documents display your company logo:
1. From the Main Menu, choose Maintenance > Database > Parameters to display the Parameter Settings form.
2. Below the Setup tab, choose the Documents subtab to display the Document setting options.
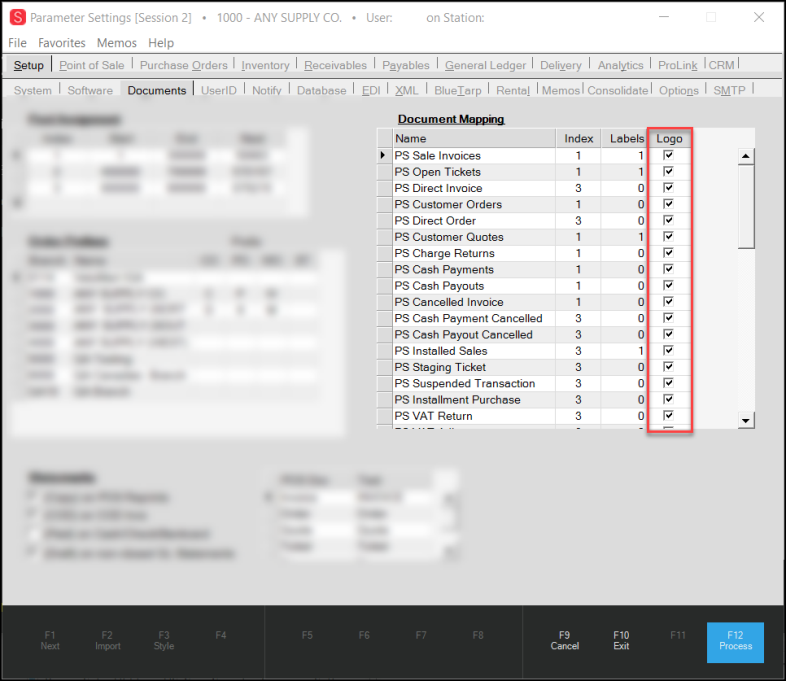
Parameter Settings > Setup > Documents Subtab with Logo Column Highlighted
3. In the Logo column, place a check mark beside each type of document on which you want to display your company's logo.
If you do not want the logo to display on a particular document, leave the Logo check box for that document type unchecked. The Document Mapping list includes every Point of Sale document the application creates (prefix PS) , every type of Purchase Order (prefix PO), every type of Inventory document (prefix IN), and every type of Accounts Receivable document (prefix AR).
4. When you have completed your selections, choose Process (F12) to save your changes.
Adding a Company Logo to the Application
Company logos in this application have very specific requirements to ensure that they fit correctly on the documents, tickets, and screens the application supports.
To create a save your company logo in the application:
1. Use image software like Microsoft Paint to create a box exactly 132 pixels high by 252 pixels wide with a white background.
Note: if you don't match the dimensions provided here, the image will get stretched or compressed and won’t look good.
2. Create the logo or copy and paste an existing logo in this box, resizing it to fit inside comfortably.
Note: Unless you use color printers exclusively, it make sense to make the logo black and white or use a gray scale image.
3. Align the image to the upper left-hand corner so that any white background that shows is either on the bottom or on the right-hand side.
4. When the image displays as you want it to, save it locally with the name 1x4Rect with a GIF, JPG/JPEG, BMP, or PNG format.
5. Open the File Explorer and save your company logo to the User Def Image Files folder (as specified in the Software Parameters).
Note: We recommend that you close and reopen the application after this is complete to display these logos.
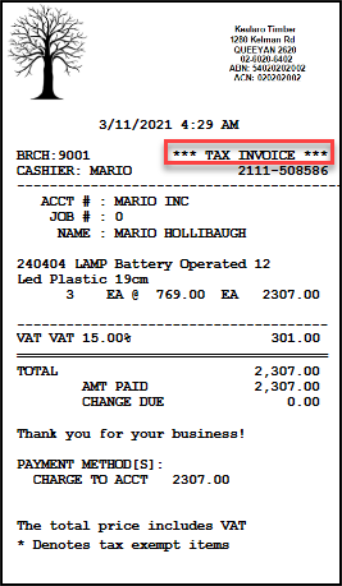
When the logo you created displays in production, it displays in the upper left corner of your documents.

Order Document with Logo Highlighted
Adding your Logo to your Background Screens
You can add your company logo to the application screen that displays in the background of your Main Menu form.
![]()
Company logos for screen display are scaled and aligned to fit an area that is a maximum of 530 pixels vertically and up to 770 pixels horizontally (or 20.9 cm x 14.02 cm or 8.02 in x 5.552 in). If your logo is smaller than this, the application scales it to fit the vertical area and then centers it. The application crops logos that are larger than this size, so any company logo file should be sized to be smaller than these dimensions. The aspect ratio of the original image is retained (this avoids distortion).
To create a form (screen) logo and save it in the application:
1. Use image software like Microsoft Paint to create a box exactly 530 pixels high and 770 pixels wide with a white background.
Note: If you don't match the dimensions provided here, the image will get stretched or compressed and won’t look good.
2. Create the logo in this box or copy and paste an existing logo in this box, resizing it to fit inside comfortably.
Note: Unless you use color printers exclusively, it make sense to make the logo black and white or use a gray scale image.
3. Align the image to the middle of the box so that it displays correctly on the screen.
4. When the image displays as you want it to, save it locally with the name LargeMenuLog.GIF. You can only save this file as a GIF file type.
Next, you need to find out where to save your logo.
Note: If you followed the directions for Adding a Logo to your Documents above, you already know where to save your file, so you can skip to step 5.
5. Open the File Explorer and save your company logo to the User Def Image Files folder (as specified in the Software Parameters).
Note: We recommend that you close and reopen the application after this is complete to display these logos.
Branch File Names for Document Logos
You can also add document logos that are specific to a branch location. To use branch-specific logos, add a dash to the document logo file name and enter the branch ID. For example, to add a separate logo for Branch ID 2000, name the logo file like this:
-
1x4Rect-2000.<file type>
If you do not create branch-specific logo files, the application uses the shared logo file if you add one. If no branch and no shared image file is located, nothing is printed in the logo area on documents. Follow the same instructions to save the branch logo file to the User Def Image Files directory.
What Determines a Document's Branch?
For documents, the branch that determines the logo is the Branch ID that is saved with the document. Most documents are created by a user processing some type of transaction. In these cases, the branch for the document will be the same as the branch the user was signed into at time of processing. Some types of documents, such as invoices, can have other branch locations associated with them, such as a "sale credited to" and "inventory provided by" in addition to the "entry" location.
Statement documents are a bit different because they are generated by a background process. Generally, any scheduled task that creates documents will use either the master branch or the branch where the scheduled task (checklist, report, etc.) was created from (based on the user who was logged in and added the scheduled item to the queue).
Statement documents are not created by using the Statements transaction in Receivables (this only "delivers" the statements to customers by printing, email, and/or faxing). The branch assigned to each statement document will always be the master branch location. If the customer account is assigned to a specific AR Branch (not a branch list), the designated location will be used for statement documents to display both the logo (if one exists) and the branch address (if the Print Address on Forms" option is checked (true) for the branch in question). The AR Branch setting has other ramifications beyond statement creation, so make sure you are aware of this before making any changes.
Changing the customer's AR Branch does affect all previously created statement documents when viewed in the software or delivered electronically after the change. Branch lists can be assigned to customers as the AR Branch; however, these do not affect the logo printed on statements. If a branch list is assigned, it will be ignored as far as the statement document's logo and address are concerned.
Cash Ticket Logos
If your company uses receipt/cash ticket printers, you can add a logo as a bitmap image at the top of the ticket. The file name for cash ticket logos is:
-
CTLogo.bmp
We suggest using a simple black and white image for best results (no colors or gray scale images), since supported ticket printers are thermal.
Logos for cash tickets should be small images (for the Epson T88V, the maximum width is 272 px (pixels); other printers may differ).
Image height can vary.
CTLogo (Approximate Size)
The application prints the logo on signature copies as well, if you print a signature receipt.
To remove a cash ticket image, delete the file or change its name.
Renaming Cash Tickets (Regional Setting)
If the common terminology for receipts in your region is not Cash Ticket, the ECIImplementation or Support team can rename it using a parameter in the Region Setup Utility. This change must be completed by the ECI team because it affects the wording on all receipts in your region.