Customer Order Summary Report
This report provides either summary or detailed information regarding customer orders that have been processed in the application or on an ecommerce website.
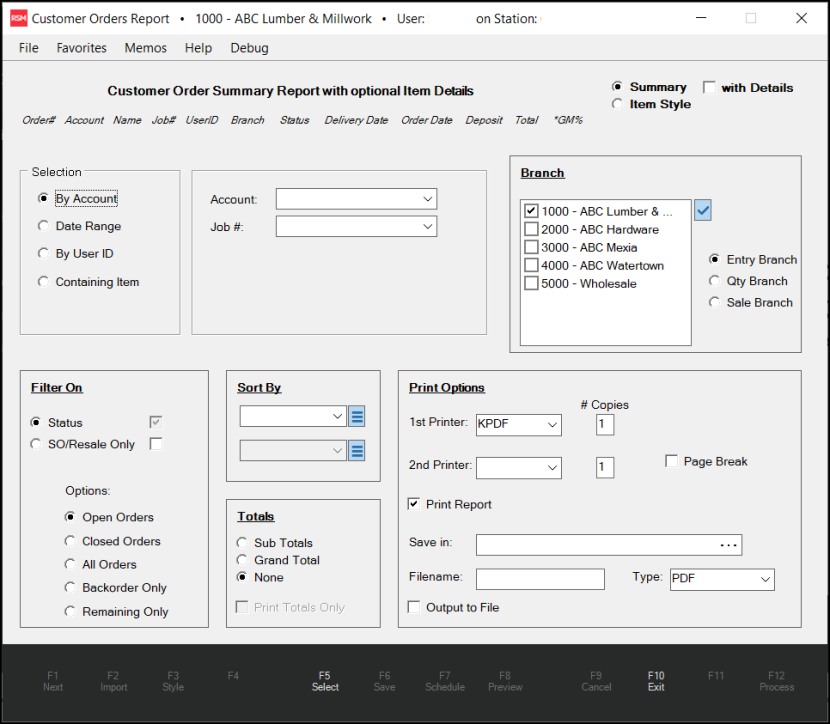
There are a lot of options to choose from in the Customer Order Summary Report. Follow the instructions below to create the report you need. There is an order status filter that allows you to list orders that are Open, Closed, or All). You can use a secondary filter to designate whether the report only lists Non-Stocked Items, and if so, whether those items have not been ordered, received, or sold. Selections can be made by Account, Date Range, User ID (of the sales person), and matching on an ordered item.
To generate the Customer Order Summary Report:
1. From the Main Menu, choose Point of Sale > Reports > Customer Orders.
The Customer Orders Report form displays.

2. From the Customer Order Summary Report with options Item Details list, choose one of the following:
-
Summary
The Summary format is the default and doesn't include any item details regarding the orders unless you are also using the Containing Item option for selection. When you specify the Containing Item selection option, summary information for orders that contain that item display in the list, along with any details for the specified item only (other items won't be listed; however, multiple occurrences of the selected item will be listed as separate lines). Summary information reports include: Order ID (#), Account (ID), Customer Name, Job ID, User ID (of the sales person), Branch ID, Status, Delivery (date), Ordered (date), Deposit (amount), Total, and Gross Margin %. -
Summary with Details
To include the item details below the summary information, select the Summary with Details option. Doing so adds additional lines below each summary line for all items on the orders.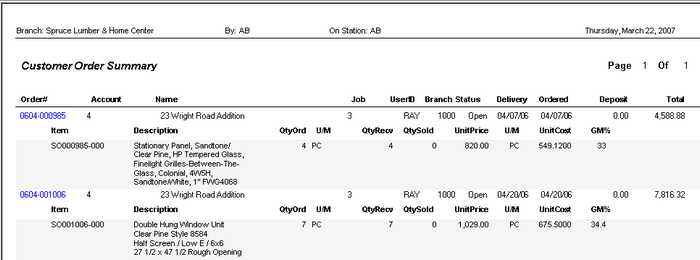
-
Item Style
Use the Item Style option to omit most of the summary data (except for the order's Document ID, User ID, and Branch ID) and print item details only. The Order Number, Branch, and User are listed at the end of each item detail line.
3. Choose the Selection options from the following:
Note: When you select multiple selection types, a check box  appears next to the active methods (to cancel a selection, clear the check box or press Cancel (F9) to restart completely).
-
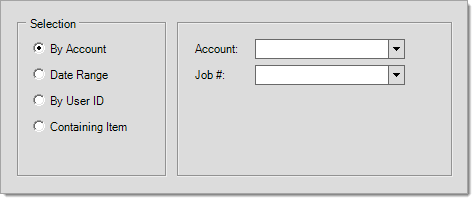
By Account
Account selection limits the orders reported to a specific customer account. Type the Account ID or use the down arrow button to select one from the Account list. The selection listing includes the Account ID (number), Customer Name, Status, Class, and Phone Number for reference.
-
Date Range
You can make a date range selection by:
Order Date: The date the order was initially processed.You can also use the Selection Marker
 to pick from a preset list of dates including:
Today, Yesterday, Current Month, Last Month, Current Year, Last Year, Last 30 Days, Current Fiscal Year, and Last Fiscal Year. The longer the time span you select, the longer the report (or larger the file) will be.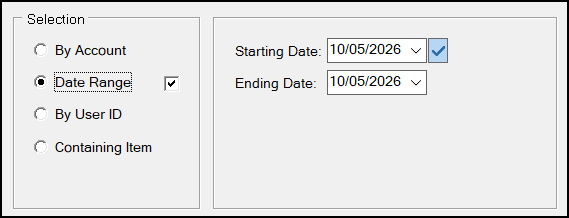
-
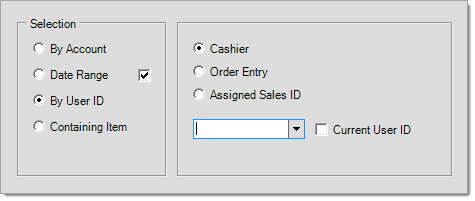
By User ID
The selection by User ID allows you to collect the transactions that a specific user processed (based on the User ID in-use when the transaction was completed). Check the box next to Current UserID to quickly select your own ID. User ID's are used for identity and print/display throughout the application, passwords are used for security and are not displayed or available to other users.
-
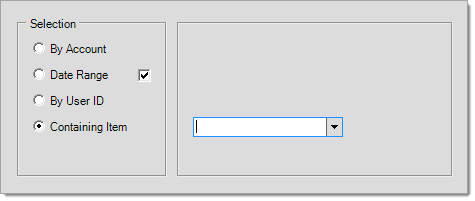
Containing Item
The final selection option is Containing Item. This limits the report to only include order that contain the selected item ID. When you select Containing Item with the Summary format, the report includes the details about the specified item regardless of whether the "with Details" selection was made. Orders that contain the same item repeatedly will display all detail lines matching the item.
4. Choosing the orders by Branch selection.
The Branch selection options allows you to collect the information for one or more branches in the report (when applicable). If your company has more than one location, select the branches that should be included in the report. Use the Selection Marker  to choose either the current branch, all branches, or a Branch list (when defined).
Note: Your user permissions may restrict your ability to choose this option.
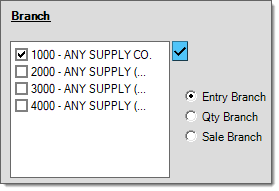
The radio buttons allow you to select the type of branch you want to apply to the selected orders. Orders can have a/an:
-
Entry Branch (the branch the user who created the order was signed into),
-
Quantity Branch (the branch that supplies the inventory for the order),
-
Sales Branch (the branch designated to receive credit for the sale).
Note: These branches are specified when creating or modifying an order from the Branch tab of the Process (F12) form. In some cases, these branches can be set automatically such as when inventory or sales branches are designated for delivery ZIP/postal codes, for example.
5. Choosing the Filters for the orders report as follows:
You can choose the filters that include or exclude information from the report based on two criteria:
-
Overall Order Status, and
-
Non-Stocked (SO/Resale Only) Item Status
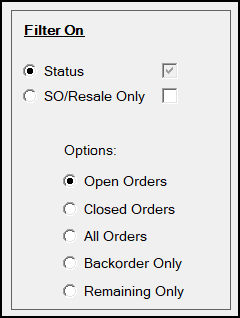
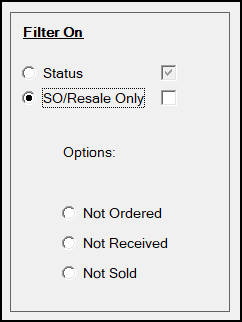
Each filter has a subset of options that are shown when the radio button for the filter is set (selected). Use the radio buttons to select a filter type and then choose one or more options as needed. The "Non-Stocked" filter is optional.
The primary filter based on the overall order Status is required and provides options that include the following: Open, Closed, All Orders (both Open and Closed Orders), Backorder only, and Remaining only. The final two options (Backorder and Remaining) Only function when you are running the report "with Details."
Options for Non-Stocked filtering, include:
"Not Ordered" means the non-stocked items are not currently ordered on a purchase order.
"Not Received" means that the quantity received is less than the quantity ordered,(not the same as "zero" received).
"Not Sold" means that the quantity sold is less than the quantity ordered, but not necessarily zero.
If you select an option for "Non-Stocked" filter, only orders with non-stocked items will be included and only item details for non-stocked items will be listed. Additionally, the report will include special order item details regardless of your "with Details" choice. Only one option selection per filter is allowed.
6. Choose the Sort By options.
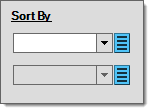
This report only has a primary sort with the following selections:
Order Number, Delivery Date, Account, and User. Data that meets the selection and filter requirements will be ordered based on your selection (if you make one). Sorts can be done in either ascending or descending order.
-
Ascending order sorts data alphabetically A-Z (numbers are sorted 0-9 before letters, but not based on their numeric value, they are treated similar to letters).
-
Descending order sorts reverse-alphabetically Z-A (numbers are sorted in reverse order after letters 9-0... again, not based on numeric value, but treated as though they were letters being alphabetized).
7. Choose the Totals options.
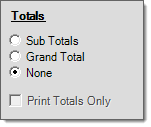
The Totals box keys off of the selections you make in the Sort By area. So if you choose to Sort By Account, and you select the Sub Totals option, the report displays a sub-total at the end of each account's list of orders.
None is selected by default.
8. Use the Print Options and Output to File options settings to determine how you save the report.
-
Print Options
Select the Print Report check box to print the report to either one or two printers by selecting from the list of installed printers. You can also print multiple copies of the report for each printer by entering a number in the # Copies box.
Use the Page Break check box to produce a page break after each subtotal. This feature requires that you choose both a Sort by field option and the Sub Totals option.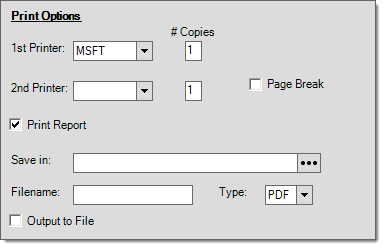
-
Output to File Options
To save the report as an external file, select the Output to File check box and choose the folder, the filename, and the type of file in the fields and lists provided. Use these settings to save the report to an external file that you can save locally.
9. When you are ready to review the results of the report, choose the Preview (F8) key. It is useful to review the results of the report to prevent printing or building a report that does not contain the data you expected.
10. To complete the report process, choose the Process (F12) key.
This is when the application prompts you for the branch settings.