Setting Up Time Clock Records
Time Clock requires three new record types to work. The ECI team runs a database script when you sign up for this feature to create Employee records from the existing User ID records in the application database. This script includes employee-specific identification information and compensation data. Initially, the compensation data entry will be generic, until you decide whether and when to populate this information. To these records you can add Gender (Male, Female, Unknown), Full Name (for searching), the employee’s work Status (Active, Terminated, Retired, Temporary, etc.), and their phone number. To add new or update existing Employee records, see Adding New Employee Records and Editing Employee Records.
Note: After the Time Clock feature is enabled, whenever you add a new User ID, a prompt displays asking if you want to create a new employee record for this user ID. Click Yes to create a new record if you want to track the user’s Time Clock records.
Time Clock Code records allow you to specify the types of clock out types, such as End of Shift, Break, Lunch, or Dinner etc. You can customize these entries based on the needs of your business. Once you create these records and associate them with Employee records, you can disable them, but you cannot entirely delete them. They appear in the list as red and crossed out. To edit existing time clock code records, see Modifying Time Clock Code Records.
Compensation Type records will be used to help you keep track of basic payroll information. Some of these entries are required. See Adding Compensation Types to Time Clock.
Access to the Time Clock records is regulated very carefully, using the same processes you are used to in the system. See Setting up Time Clock Permissions for Individuals and Groups.
Setting Up Time Clock Permissions for Individuals and Groups
To set up Time Clock permissions, you must have administrator rights to the application. Time Clock permissions are added to an employee’s existing User ID settings.
To add Time Clock permissions to an employee’s record:
1. Log in as an administrator.
2. From the Main Menu, choose Maintenance > Database > User ID to display the User ID Maintenance form.
3. From the User ID field, choose the ID of a person you want to add Time Clock permissions for.
4. On the Security Options tab, click the Permissions List Settings ![]() icon. The Permissions List Code Maintenance dialog box displays.
icon. The Permissions List Code Maintenance dialog box displays.
5. Scroll down to the Time Clock menu and select the check box beside it.
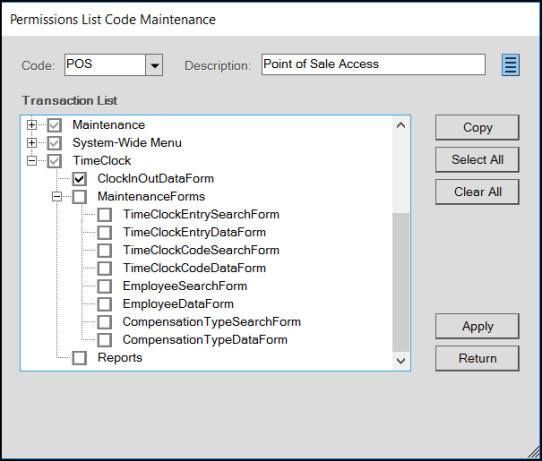
Permissions List Code Maintenance with Time Clock Menu Options
Note: The options you select for this user’s code type apply to all users with the same code type. For example, the POS code refers to users who have Point of Sale permissions. When you select Time Clock forms that this code has access to, all users with the POS code type will have access to the same Time Clock forms.
6. Consider the permissions required for this employee’s code type in the list. Then, select the check boxes beside the forms this user type needs access to. Options include:
-
ClockInClockOutDataForm
Select this check box for all user/user groups that need(s) to record their work hours using the Time Clock feature. -
MaintenanceForms
Select this check box if the user/user groups requiring access to these Time Clock Maintenance forms. Then, choose the appropriate check boxes beside any forms that this any user/user group needs to access: -
TimeClockEntrySearchForm
Select this check box for any user/user group that needs to search for an employee’s time clock entries. -
TimeClockEntryDataForm
Select this check box for any user/user group that needs to modify an employee’s Time Clock entry. -
TimeClockCodeSearchForm
Time Clock Codes refer to the type of Clock Out codes your business uses. Typically, there is a Clock Out at end of day and either mealtime or break options. Selecting this check box allows the user/user group to search the list of Clock Out Codes. -
TimeClockCodeDataForm
Select this check box to allow the user/user group to add/modify time clock codes that employees can select when they Clock Out of the Time Clock. -
EmployeeSearchForm
Select this check box for any user/user group that needs to search for employee records. -
EmployeeDataForm
Select this check box for any user/user group that needs to add/modify employee’s data records. -
CompensationTypeSearchForm
Select this check box for any user/user group that needs to search for compensation type records in the Compensation Types list. -
CompensationTypeDataForm
Select this check box for any user/user group that needs to add/modify compensation type records in the Compensation Types list.
-
Reports
Select this check box if this user/user group needs to generate Time Clock reports.
7. When the settings for this code type are complete, click Apply and then Return. The Database Updated message displays.
8. Above the Security Options tab, the Login Prompt Type list displays. This option allows you to choose whether your employees are prompted to login before choosing Clock In. Choose one of these options:
-
Choose Off to prevent the application from prompting your employees to login before choosing Clock In/Clock Out.
-
Choose System Settings to prompt your employees to log in before they Clock In/Clock Out.
Note: The Login Prompt Type is a per-user setting. The ECI team sets the global log in setting as you directed, but if you want this user to have different settings, set the permissions for the code group.
9. When you have completed these settings, choose Process (F12) to save your changes.
10. Repeat this process for each user group type to specify the access they have to the Time Clock features.
Editing Employee Records
You can edit employee records in the Time Clock area but you cannot delete them. Only associates with EmployeeSearchForm and EmployeeDataForm permissions settings as defined in Setting Up Time Clock Permissions for Individuals and Groups can access the Employees list in Time Clock. The ECI support team runs a script to create Employee records from User ID records already in the system when you sign up for this feature.
To edit an employee record in Time Clock:
1. Log into the application with your administrative rights.
2. Choose Time Clock > Database > Employees to display the Employees form.

Employees Form with Converted Entries
Note: This list displays alphabetically by first name by default. To sort the list alphabetically or numerically, click a column heading.
3. To search for an employee record, in the Search field, enter the employee number, the first, last, or full name, and press Enter. The application displays the records that match your search.
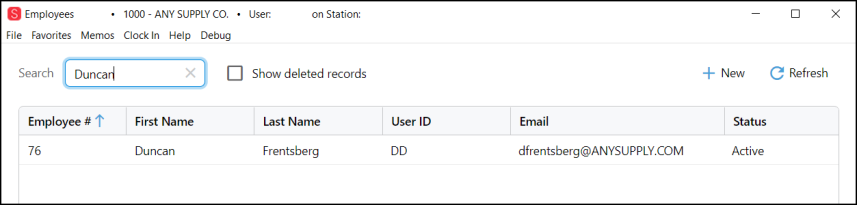
Employee Search Results
4. To edit the employee record, double-click it in the list to display the Employee record.
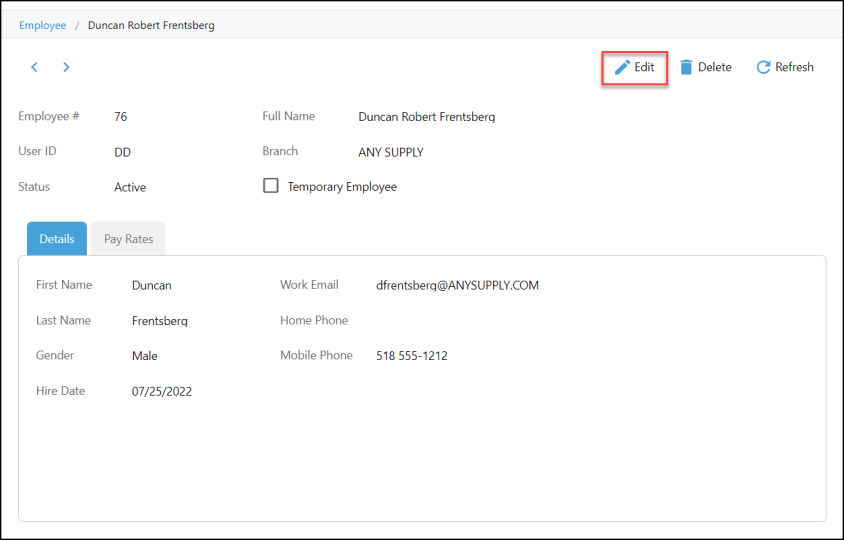
Employee Form
5. Select the Edit  button. The editable fields enable.
-
Employee #
This field requires a numeric entry only and is typically populated when the record is entered the first time. Once this entry is made, you edit it, but it will revert to the original entry when you save the change. -
Full Name
This field contains the employee’s full name, if you need more than their first and last name.
Typically, this is used when a person’s official name is not how they are known in the business. -
User ID
If this entry is not filled, select the employee’s User ID from the list. Typically, this information is imported from the User ID record when the employee record is created. -
Branch
If the employee’s branch has changed, select the new branch from the list. -
Status
If the employee’s status has changed, choose the new status from the list. -
Temporary Employee
Select or clear this check box if the employee’s temporary status has changed. -
Details Tab: First / Last Name, Gender, Hire Date, Work Email, Home Phone, Mobile Phone
Type over the entries in these fields if the employee’s personal information has changed. Typically, this information is imported from the User ID record, if available, when the employee record is created.
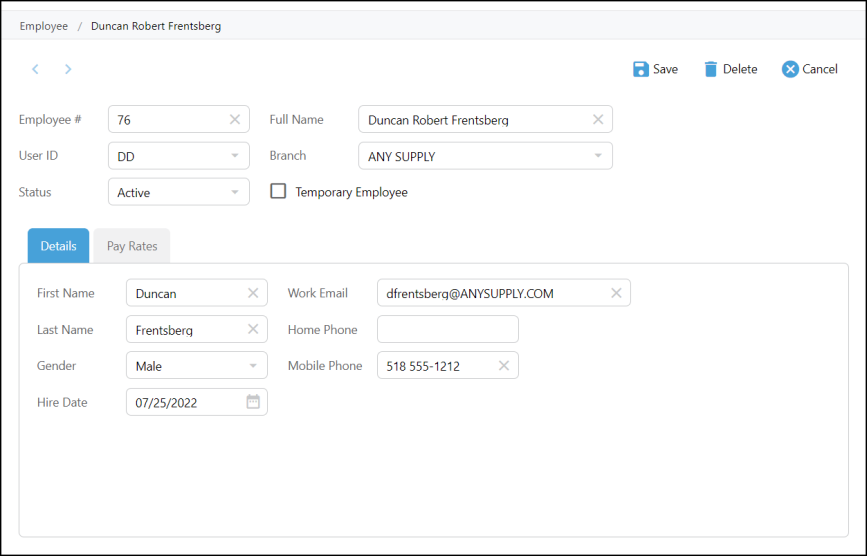
Employee Form (Details Tab)
If you decide you do not want to keep the changes, click Cancel. The application prompts you to confirm that you do not want to save the changes. Click Yes to confirm.
6. Click the Pay Rates tab to enter a new employee pay rate record. Choose this option only if the employee’s rate information has changed. This information is not required at this time.
7. Click the Plus  icon to add a new pay rate record. The New Pay Rate box displays.
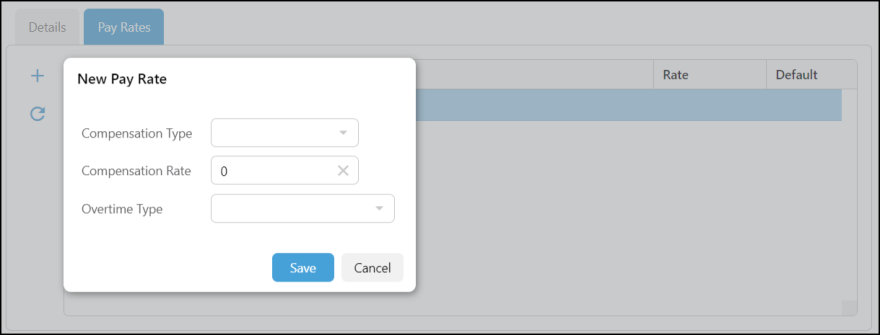
Pay Rates Tab with New Pay Rate Box Displaying
8. Choose or enter the following in each field:
-
Type
Choose the payment type from the list. This is the Compensation Type entry described in Adding Compensation Types to Time Clock. -
Rate
Enter the pay rate for this employee. -
Overtime Type
There are only two options in this list at this time. This will likely change over time.
9. When you have completed these entries, click Save. The employee record redisplays.
10. Edit or select the appropriate options for each editable field and choose the Save  button to save your changes.
Adding New Employee Records
To edit an employee record in Time Clock:
1. Log into the application with your administrative rights.
2. Choose Time Clock > Database > Employees to display the Employees form.
3. Select the New  button to display the New Employee dialog box.
![]()
Add Employee Dialog Box
4. Complete the fields in this box, using the information appropriate for the employee:
-
Employee #
Enter the company assigned employee ID number. (Required)This must be numeric only and can only be assigned once. -
Full Name
Enter the employee’s full name. Often this is the name they are known by rather than their official, given name. (Required) -
User ID
This is the ID the employee uses to log into the Time Clock.
Note: If an employee has more than one position at your business (for which they are paid different rates), they may have more than one user ID. -
Branch
Select the Branch they work in from the list. (Required) -
Details Tab: First Name, Last Name
In the Details tab, enter the employee’s official first and last name in these fields. -
Details Tab: Work Email
Enter the employee’s email address. (Required) -
Details Tab: Mobile #, Home #
One of these contact numbers for the employee is required. -
Details Tab: Gender
Enter the employee’s gender, if known. (Required) -
Details Tab: Hire Date
Choose the Calendar icon to and add the employee’s hire date. (Required)
5. Click the Pay Rates tab to enter the employee pay rate details information.
This information is not required at this time.
6. Click the Plus icon to add a new pay rate record. The New Pay Rate box displays.
New Pay Rate Box Dialog Box
7. Choose or enter the following in each field:
-
Type
Choose the payment type from the list. This is the Compensation Type entry described in Adding Compensation Types to Time Clock. -
Rate
Enter the pay rate for this employee. -
Overtime Type
There are only two options in this list at this time. This will likely change over time.
8. When you have completed these entries, click Save. The employee record redisplays.
9. Click the Save icon to save this new employee record.
Modifying Time Clock Code Records
The application comes with default Time Clock Codes that you can modify to meet the needs of your business. Only associates with TimeClockCodeSearchForm and TimeClockCodeDataForm permissions settings as defined in Setting Up Time Clock Permissions can add/modify time clock code entries. Once used in the application, Time Clock Codes can be disabled but not deleted. Deleted records till display in the list, but crossed out.
To modify Time Clock Code records:
1. Log into the application with your administrative rights.
2. Choose Time Clock > Database > Time Clock Code to display the Time Clock Codes form.
![]()
Time Clock Codes Form
3. To edit an existing code, double-click it in the list to display the record.

Time Clock Code (Edit)
4. Type in the change you want to see and click Save.
5. To add a new Time Clock Code, from the Time Clock Codes form, click the New button. The New Time Clock Code box displays.
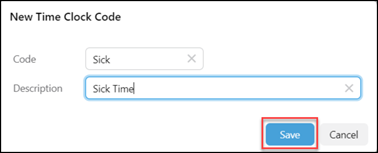
New Time Clock Code Entry
6. Enter the code and the description in the fields provided and click Save.
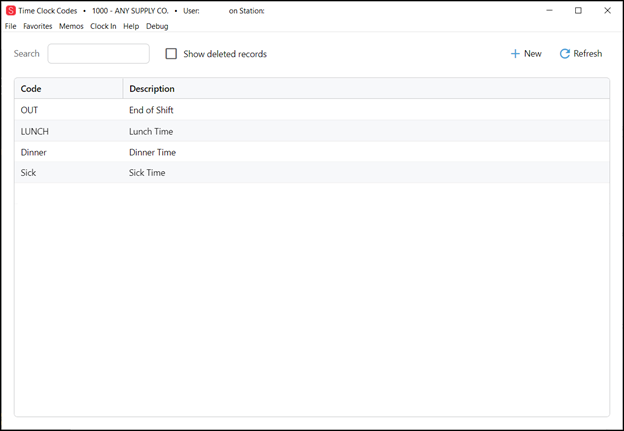
Time Clock List with New Entries
See Also:
Clocking In / Clocking Out of Time Clock
Managing Time Clock Compensation Records