Lost Sales Utility
The Lost Sales feature provides a way of recording products that your company could have sold but was not able to for one reason or another. The purpose of this feature is to provide the ability to track potential losses of business or new opportunities. Tracking lost sales will provide the ability to stock items frequently asked for or act as a flag if there are issues with inventory. A report to track Lost Sales can be created from Inventory > Reports > Lost Sales. Please contact your aftermarket sales representative to enable this feature.
Tracking Lost Sales
Lost Sales can be tracked from the Inventory > Utilities > Lost Sales utility form as well as from any Item selection grid or Catalog selection control anywhere in the application.
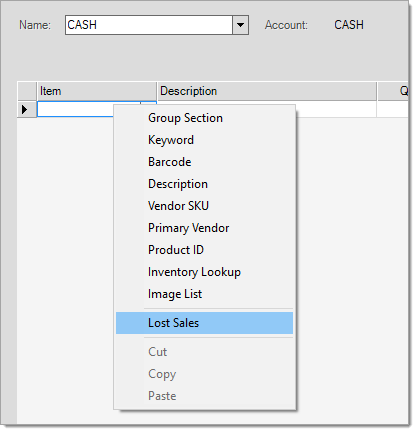
1.To access from Point of Sale (POS), enter an account if it is known, right-click in the empty item field and select Lost Sales, or enter the item number, right-click in the field, and select Lost Sales.
2.The Lost Sales dialog window will appear. It will be the same dialog window whether it is accessed via Inventory or the Item selection grid. Enter the information pertaining to the item in the fields described below. If the item number was entered in POS, the Item and Valuation sections will be filled out. Also, if an account number was entered, the Account and Contact fields will be filled out as well.
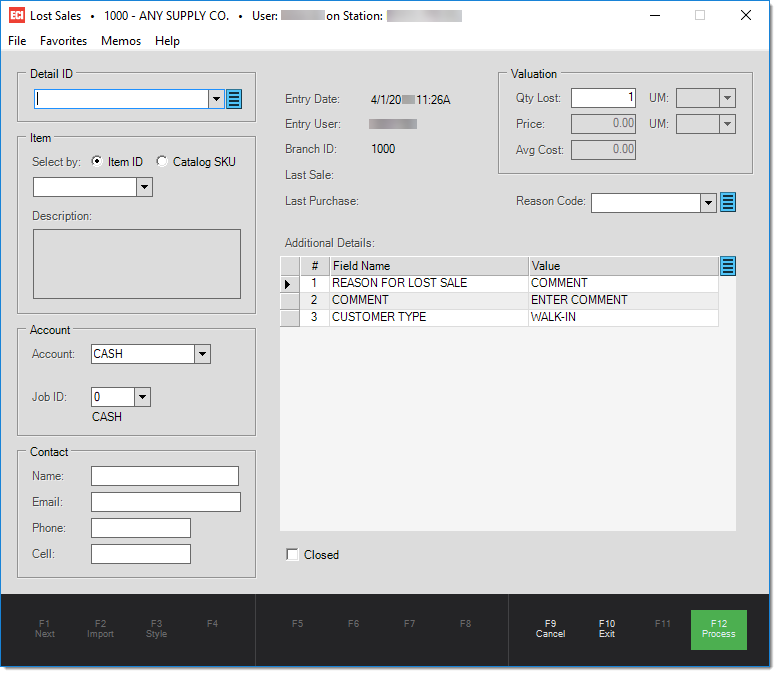
Detail ID: A unique ID assigned to the lost sale. Select New from the drop-list or select an existing one if lost sale is the result of the same missing items. Select an existing Detail ID from the drop-down list or select New. Depending upon how the form is opened, the detail ID may be disabled as a “new” entry is assumed.
Item: Select the item. You may search by item ID or Catalog SKU. If the lost sale is the result of not having the item in inventory, select a generic SKU item created to track lost sales. You may need to define a SKU, such as LOSTSALE, for cases when you don’t have a corresponding item.
Account: If the customer has an account and/or job you want to record, enter it. This information is automatically set when the form is opened from a Point of Sale transaction after customer selection.
Contact: If an account number is entered, the contact information will fill out. If not, you can optionally enter contact information. This information could be used to communicate with a potential customer if the lost sale situation is resolved.
Closed: Checking the "Closed" option will prevent the lost sale item to show in reporting.
Valuation: The valuation information (quantity, price, and cost) will fill out if an existing item is entered. If a generic item SKU is entered, the valuation will need to be entered manually. Valuation cost is only displayed to users who have permission to view costs and margins.
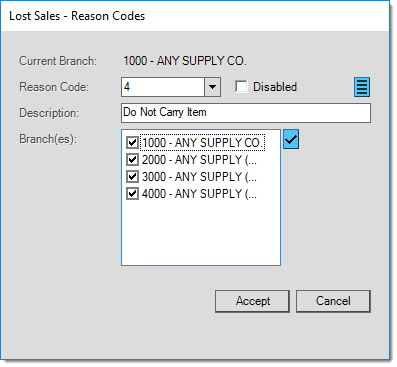
Reason Code: Select a reason for the lost sale by selecting an existing reason code from the drop-down list. Reason codes are customizable. Create a reason code by clicking on the blue menu marker ![]() and selecting Edit the Reason Code. Enter a new reason code in the field, enter a description and which branches can have access to the Reason Code. Press Accept. That reason is now available for selection.
and selecting Edit the Reason Code. Enter a new reason code in the field, enter a description and which branches can have access to the Reason Code. Press Accept. That reason is now available for selection.
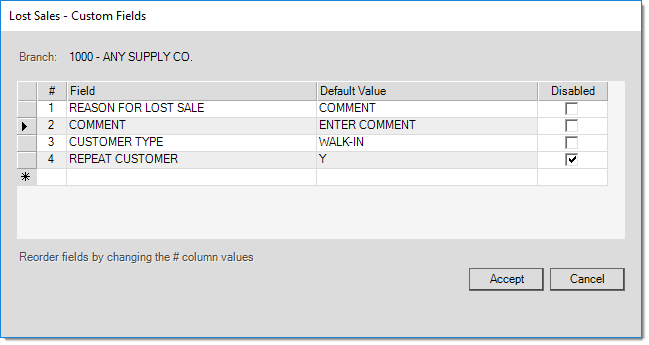
Additional Details: You can enter additional details to explain the cause of the lost sale. Enter details in the “Value” column. These details are customizable. Create or edit details by clicking on the menu marker ![]() and selecting Edit Detail Keys. Click in an empty row to create a new detail. The “Field” column will be a static value while the “Default Value” is editable by the user and can hold any text value. Rows can be reordered by changing the “#” column values. Press Accept once desired custom fields have been created or edited.
and selecting Edit Detail Keys. Click in an empty row to create a new detail. The “Field” column will be a static value while the “Default Value” is editable by the user and can hold any text value. Rows can be reordered by changing the “#” column values. Press Accept once desired custom fields have been created or edited.