Inventory > Utilities > Maintenance > Inventory Flags
This utility is used to create inventory flag codes and/or load images that you can add to customer documents when they purchase an item that has an inventory flag. This can be used for hazardous materials or other custom flags that you wish to use as an indicator. These Flag Codes and/or images can then be printed on the PS Customer Order and PS Sales Invoices documents. From within those two documents, the flags will also be visible/printed on documents using the following formats: Order,
Creating a New Inventory Flag
We recommend you create toxic/hazardous materials labels that you can add to customer documents before you begin this process.
To create a new inventory flag and add an appropriate label to it:
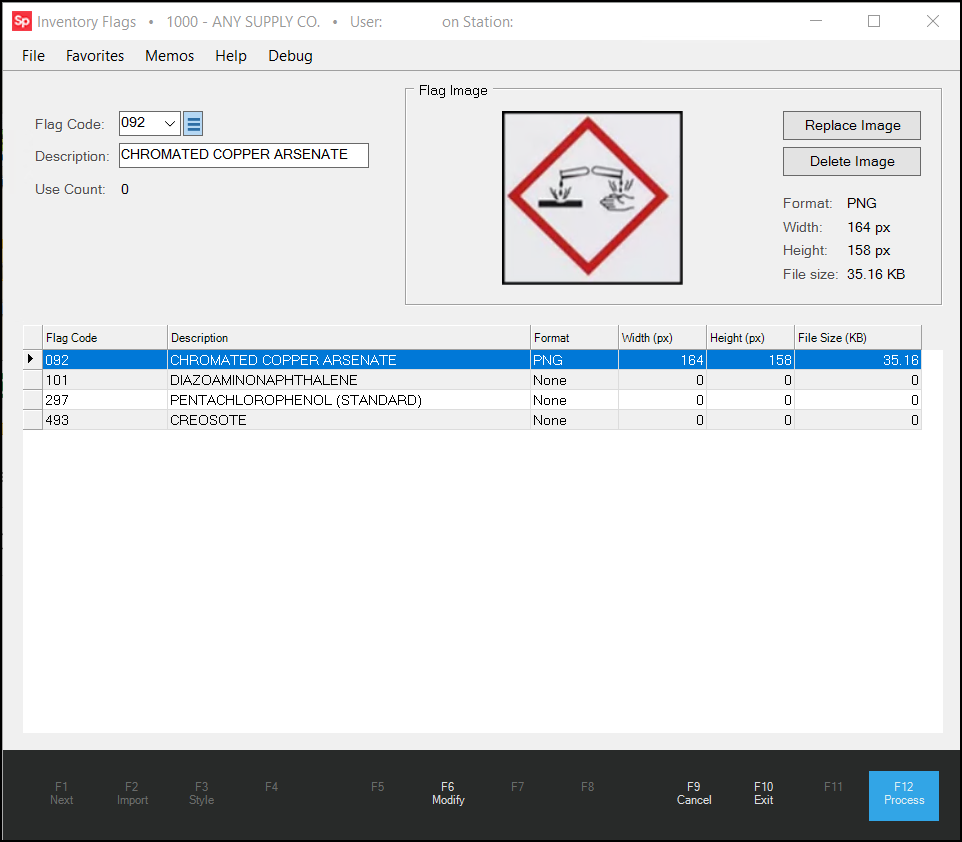
1. From the Main Menu, choose Inventory > Utilities > Maintenance > Inventory Flags. The Inventory Flags form displays.
2. In the Flag Code list, enter a three-character flag code (alpha-numerical only).
3. In the Description field, enter a description for the type of toxin/hazardous material label you are adding.

4. Choose the Load Image button and browse to the folder that contains the image you want to associated with this flag. Choose the item from the list and click Open. The application can save GIF, JPEG, JPG, PNG, and BMP file format files. File size is restricted to 25KB or less.
5. After you add the label, choose Save (F6) to save it. The dimensions of the image and the file size display in the row.
If you need to change the image in the future, double-click the record in the data grid and click the Replace Image button. Then click Modify (F6) to save the change.
6. Repeat steps 2 through 5 for each label you want to create.
7. To save all the labels to the database, choose Process (F12).
You do not have to associate an image to a flag code.
Adding an Inventory Flag to an Item
After you create an inventory flag, you can add it to an item's inventory record.
To add an inventory flag to an item:
1. From the Main Menu, choose Inventory > Database > Item. The Item Maintenance form displays.
2. From the Item list, choose the item you want to add the inventory flag to. The item details display.
3. Choose the Common > Codes tab.
4. In the Miscellaneous box, from the Inventory Flag list, choose the appropriate Inventory Flag for this item.
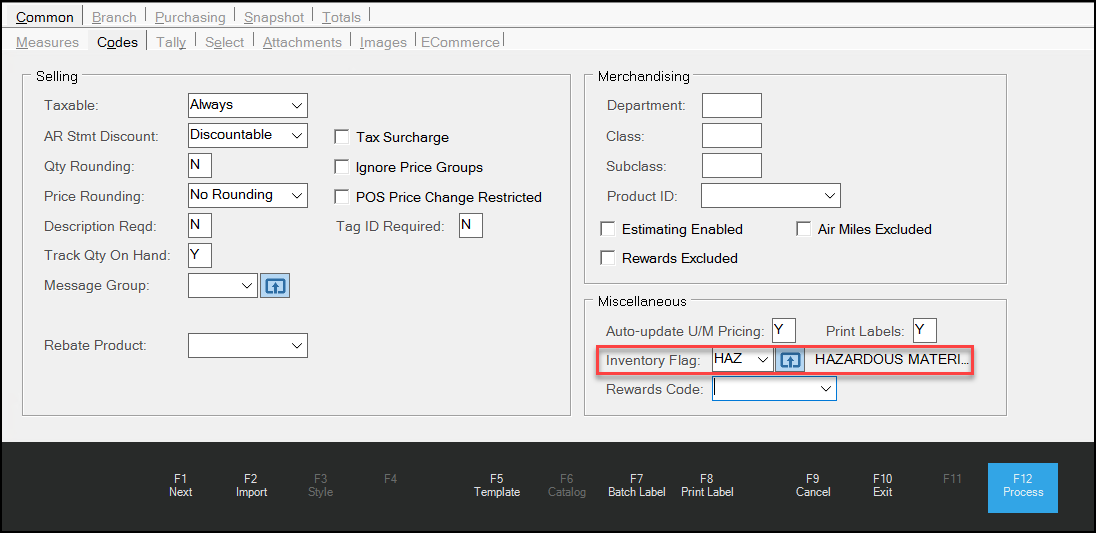
5. Choose Process (F12) to save the flag to the item record.
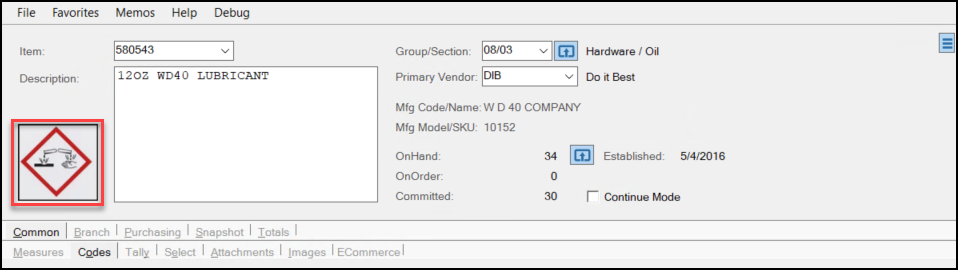
Note: After you save the Inventory Flag with the item, the image (if associated with the flag) displays above the tabs on the Item Maintenance form.
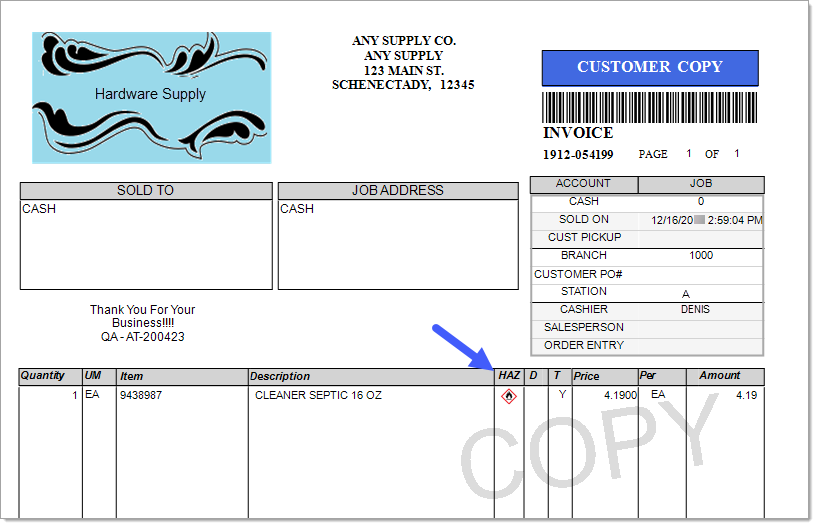
After you make this association, the application adds a HAZ column to the document and the flag codes will print on documents.
|
|
Edit Existing Inventory Flags
To edit an existing inventory flag, you can select the flag code in the data grid or use the drop-down arrow near the Flag Code field. The description and image can be modified. Press Modify (F6) after you complete the inventory flag change.
Use Count
This field indicates how many items are associated to the selected flag code.