Working with the Ecommerce Cash Drawer
We added new ecommerce-specific cash drawer settings to the Branch records to support the reconciliation of ecommerce payments for order deposits and account payments customers submit online. Ecommerce cash drawers cannot be used for non-ecommerce purposes, ensuring that you can track these amounts in one place. You can assign an ecommerce cash drawer to more than one branch. There are additional error validations to prevent ecommerce cash drawers from being assigned to users (in User ID Maintenance) or to other Stations (in Device Maintenance):
We have tested these settings to ensure that an ecommerce cash drawer cannot be saved by default to another user’s station. If someone attempts to add the ecommerce cash drawer to a User ID in User ID Maintenance, and selects Process (F12), an error message displays (as shown below).
Similarly, if you attempt to add an ecommerce cash drawer to a station in the Device Maintenance form, this error message displays:
-
Selected Cash Drawer is set as the Ecommerce cash drawer for branch <Branch ID>
After the ecommerce cash drawer setup is complete, the application will apply all incoming ecommerce orders with deposits and account and job payments, whether processed manually or automatically, to this cash drawer. This will distinguish the ecommerce payment stream from the in-store cash drawer business. You can use the Cash Drawer Maintenance utility to review these transactions when the process is complete.
Setting up an Ecommerce Cash Drawer
You use an Ecommerce Cash Drawer to track incoming online order deposits and payments on accounts. You should add an ecommerce cash drawer to each branch that processes ecommerce transactions both manually and automatically. After you add an ecommerce cash drawer, you cannot delete it.
After the ecommerce cash drawer setup is complete, the application will apply all incoming ecommerce orders with deposits and account and job payments, whether processed manually or automatically, to this cash drawer. This will distinguish the ecommerce payment stream from the in-store cash drawer business. You can use the Cash Drawer Maintenance utility to review these transactions when the process is complete.
To add an ecommerce cash drawer:
1. From the Main Menu, choose Maintenance > Database > Branches. The Branch Setup form displays.
2. From the Branch ID list, choose the first branch you need to add the Ecommerce Cash Drawer for.
3. Choose the Ecommerce tab.
![]()
4. To create a new cash drawer to track ecommerce payments, beside the Ecommerce Cash Drawer list, choose the Settings ![]() icon. The Cash Drawer Maintenance box displays.
icon. The Cash Drawer Maintenance box displays.
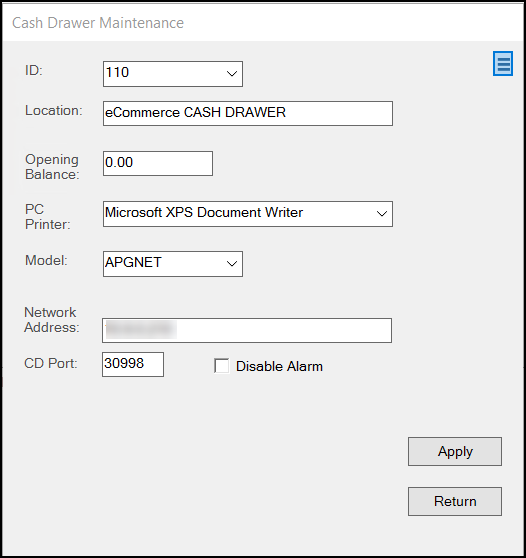
5. Complete the entries in this box to establish a cash drawer for managing online payments.
-
ID
Type a new ID number in this field for the ecommerce cash drawer. This must be an unique numeric entry. -
Location
Enter a cash drawer name that indicates it is for ecommerce payments only. -
Opening Balance
Enter 0.00 in this field. -
PC Printer
Use this field to specify the printer for the ecommerce cash drawer. -
Model
Use this list to specify the cash drawer device used to track the transactions. Options include APG, APGDC, and APGNET. -
Network Address
In this field, specify the cash drawer's network address. -
CD Port
Enter the port assigned to the drawer. -
Disable Alarm
Enable this check box to disable the security alarm (the drawer alarm sounds whenever the drawer is opened using the key or by forced entry).
6. Click Apply to save these settings. Click Return to return to the Branch Setup form.
7. Choose Process (F12) to save the new Cash Drawer.
When you complete this new cash drawer record, you can access the entries that are collected in the cash drawer using the Cash Drawer utility. After you process the ecommerce cash drawer entry, you cannot delete it; you cannot assign it to a user or a station record, and you cannot assign it to another branch.
Reviewing Ecommerce Order Deposits and Account Payments
After you set up your Ecommerce Cash Drawer, when a customer submits an ecommerce order deposit or payment (through Spruce eCommerce or using the Ecommerce API), you can review the transaction details using the Cash Drawer utility. You must have Cash Drawer access permissions to perform this review. This process assumes you have created an Ecommerce Cash Drawer and customers have submitted order deposits and or payments online using your website.
To review the transaction in the Ecommerce Cash Drawer:
1. From the Main Menu, choose Point of Sale > Utilities > Cash Drawer. The Cash Drawer Handler form displays.
2. From the Drawer # list, choose the Ecommerce Cash Drawer ID. The Location updates to reflect the name associated with the drawer.
3. In the Session Activated list, choose the session you want to review transactions for.
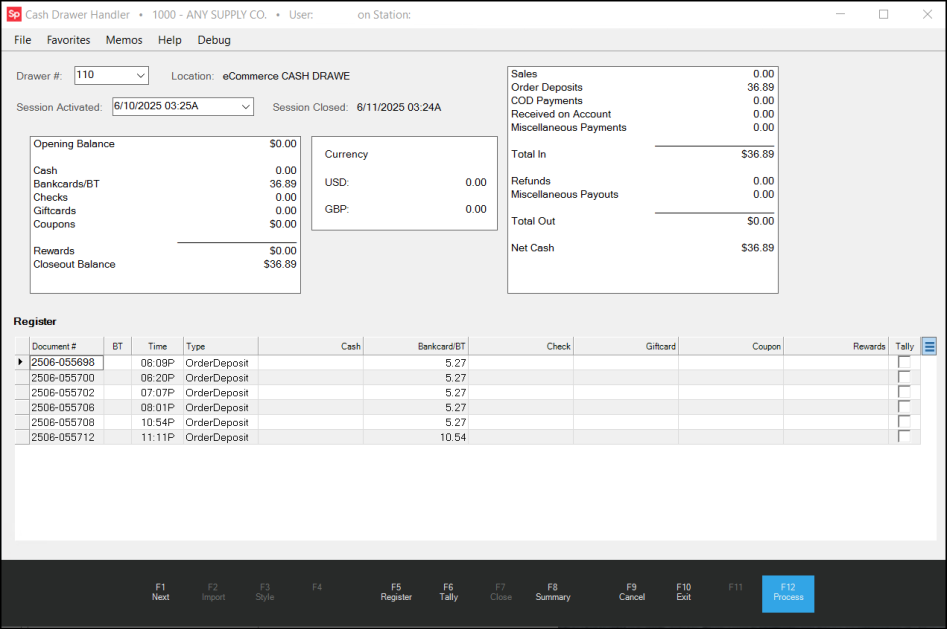
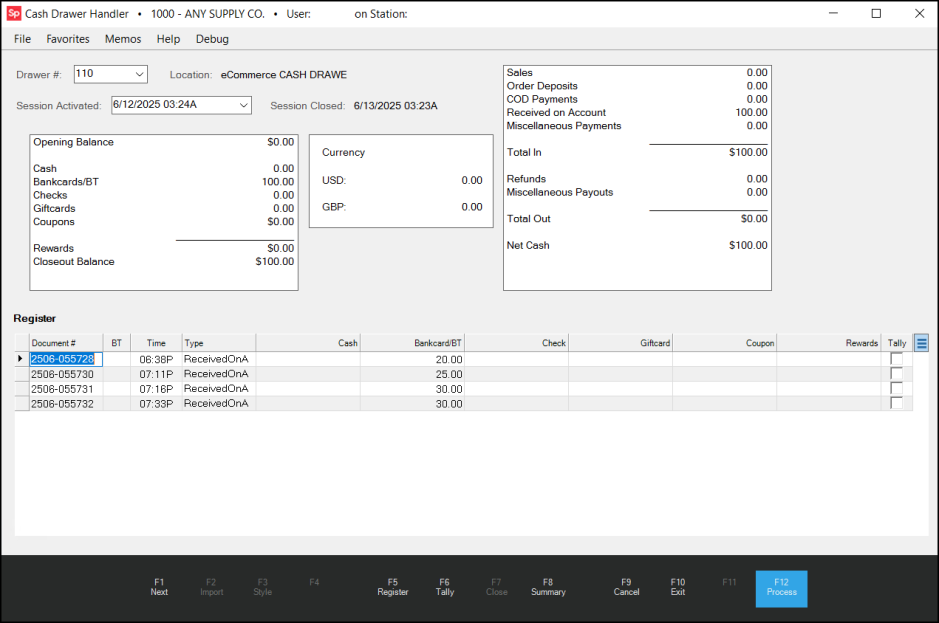
The data grid updates to show the transactions received for the selected session.
The current entries for the Ecommerce cash drawer assigned to the current branch display. Since these transactions have already been processed, there is nothing you need to do in this form.
Order Deposits and Payments on Account can appear in the same session.