Using General Ledger Detail Mapping
You can add or change detailed mapping for certain types of General Ledger entries to provide a more specific break down of your business's financial activity. Most detailed mapping is optional, except for Retained Earnings (Owner's Equity) and Net Income YTD (year-to-date) which have specific reporting standards. Otherwise, system journal mapping defines the default accounts the application will use to manage all transactions when no detailed mapping exists. There are many different types of detailed mapping available. In some cases, detailed mapping must also be assigned in other areas before it will be used (adjustment codes are one example).
Detail Mapping types can include Inventory (various transaction types, transfers, shrinkage, purchases, costs, adjustments, etc.), Credit and Debit Adjustments, Adders of many types, Sales Tax tracking, various payment types, Manufacturing costs, Branch AR Accounting, and of course, Retained Earnings and Net Income YTD.
General Ledger > Detail Mapping (Group Only)
General Ledger > Detail Mapping (Group and Section)
Adding or Changing Detail Mapping
You can use the steps below to add or change existing detail mapping for a wide range of reasons. You can change any of your entries and start over by selecting Cancel (F9) before processing.
To add or change detailed mapping:
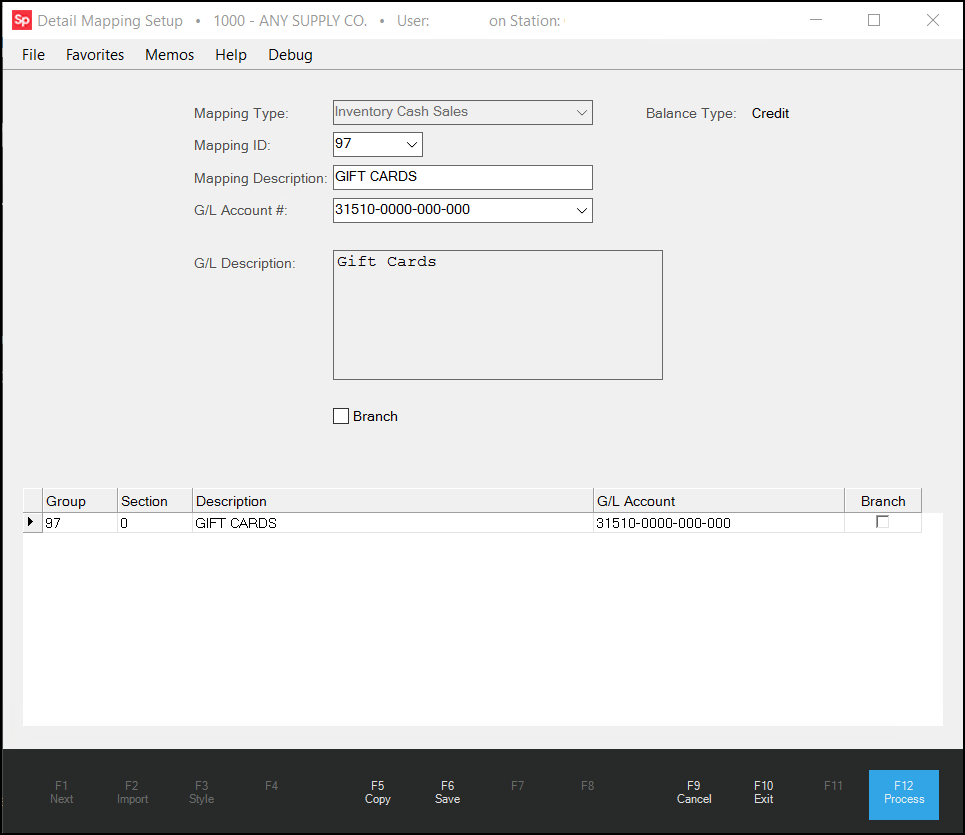
1. From the Main Menu, choose General Ledger > Database > Detail Mapping to display the Detail Mapping Setup form.
2. From the Mapping Type list, choose the mapping type you want to add to or change.
Note: If there are one or more existing Map IDs associated with the mapping type you selected, they display in the data grid at the bottom of the form.
3. Continue based on your task:
-
If you are changing the mapping of an existing mapping type, make your changes to the entries in the data grid. Then continue to step 8.
-
If you are adding a new detailed mapping, continue to the next step.
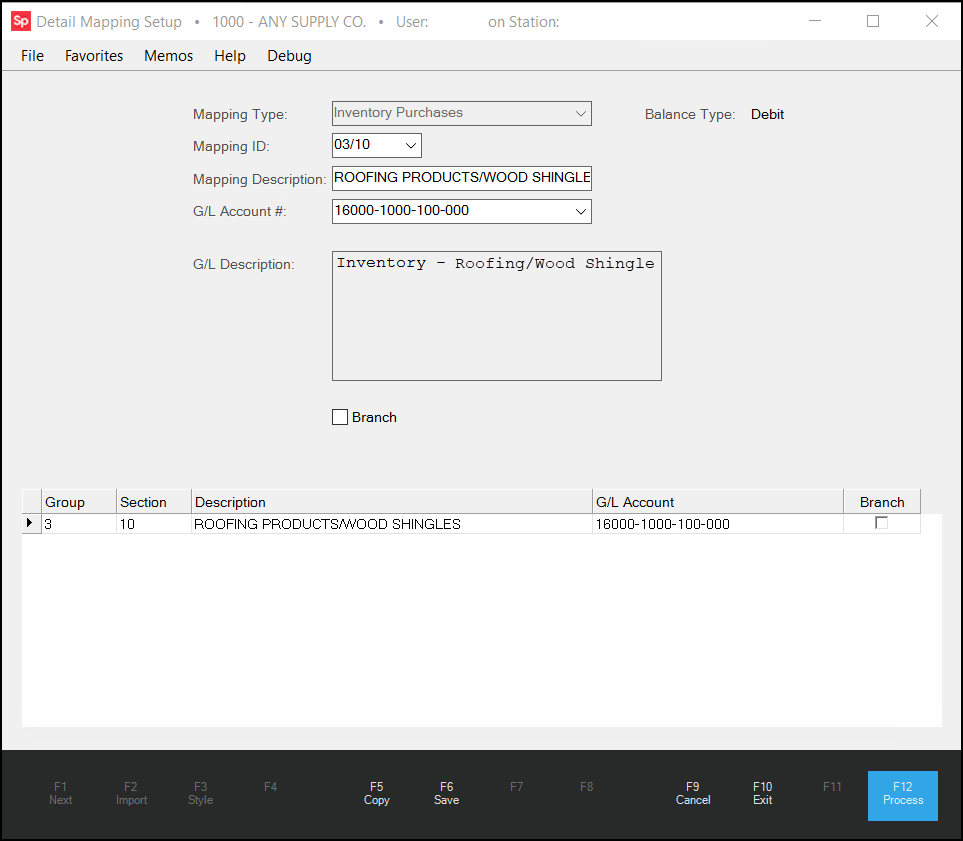
4. From the Mapping ID list, choose the appropriate Mapping ID based on what you want to create the mapping to track.
This can be a wide range of items (group and section), a transaction type (for adding adjustments), or branch-specific settings. It really depends upon what you are adding the mapping to accomplish. The entries in the Mapping ID field change based on the type of detailed mapping you chose in the Mapping Type list.
5. Click the Mapping Description field to populate the description based on your Mapping ID selection.
6. From the GL Account # list, choose the account you want to associate with this mapping type.
The G/L account's description updates in the G/L Description box. You cannot change the description manually.
If you decide you want to change the account number before saving, delete the entry in the G/L Account # field and choose again.
7. For some detail mapping types that are not specifically branch-related, there is also a Branch check box. Consider whether the mapping you are adding should be tracked by branch an select the Branch check box, if applicable.
Note: The Branch check box does not display if the mapping type is branch-specific already.
8. When you are ready to confirm your settings (either by editing an existing mapping or adding a new one), choose Save (F6).
Note: If you decide not to process this change, you can delete it from the data grid by highlighting the row and selecting the Delete key.
9. To process this mapping and save it to the database, choose Process (F12).
Important! Before selecting Process (F12), make sure that new entries or changes are saved using the Save (F6) function. Only changes or additions appearing in the grid in the lower section of the screen are processed. If process before you save, your changes and additions will be lost.
A Note About Branches
Branches can be distinguished using departments. A "department" is the second set of numbers (from the left) in the GL account number. You can define branch offsets in Maintenance > Database > Parameters on the General Ledger tab. These department numbers can reflect the branch codes that should be used for each branch's accounts. Offsets are added to the department code of the base account listed in the mapping area, so if an offset for branch ABC is 0001 and the base account in the mapping is 10010-0000-000-000, the application is going to look for an account numbered 10010-0001-000-000 to use for branch ABC. Branch accounts must exist in the chart of accounts to be used, they are not created automatically.
|
If your company has more than one branch, we suggest only mapping accounts for the BASE department and designating these as "branch" accounts when branch "department" accounts exist. The base accounts will use the appropriate branch account when journal entries are generated (assuming those branch accounts exist). Doing this will prevent users from choosing accounts assigned to departments for other branches. |
Manage Detail Mapping Messages Using Task List Validation
In the past we added detailed mapping messages to support customers in making more informed decisions about changes they are making to journal entries and general ledger mapping. We have expanded this support to allow management to choose the severity of the message or even to hide a message if they choose.
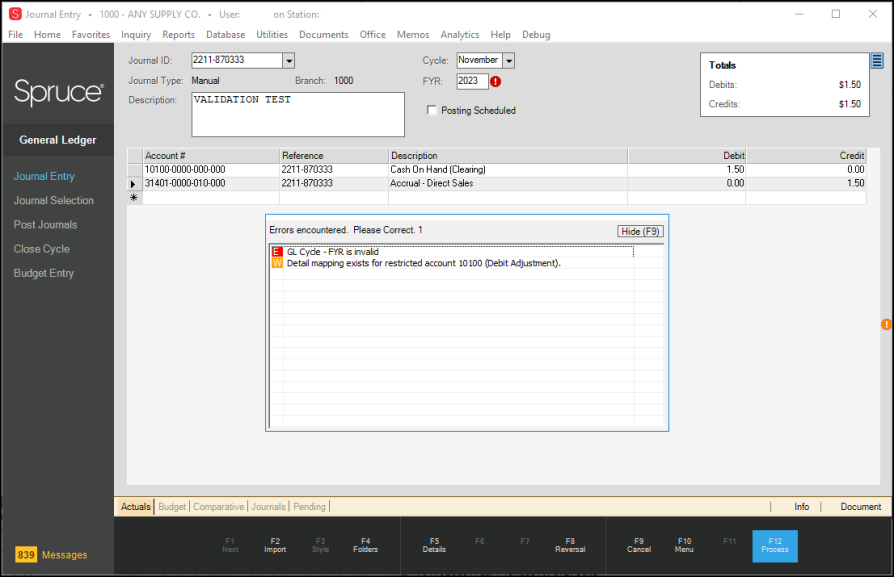
Journal Entry Form with Warning Message
To make this change, when a Journal Entry warning message occurs, right click the W icon next to the warning message to display these message severity options:
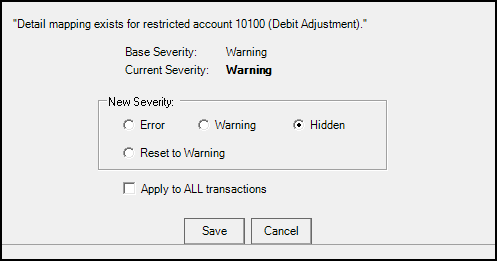
Severity Message Options
Choose this message severity option that is right for this message and choose Save:
-
Error
Select this option to prevent the user from completing the action associated with the message. -
Warning
Select this option to show the warning message to the user. This allows the user to accept the message and choose to continue or make a change. -
Hidden
Select this option to display the current message for admin users only. -
Reset to Warning/Error
Resets the message type to either the Warning or Error status, depending upon the current setting.