Card Contracts (Tokenization)
This feature allows your company to associate a customer’s card information with their receivables account. This is done without actually maintaining any of the customer’s card information in the application's database. In place of the customer’s card information, a token is used. The token is transmitted to the PAYware Connect gateway and is used to retrieve the customer’s card data. This process can be used with both Verifone PAYware Connect as well as Verifone Point.
|
Card on File with Multiple Branches Each branch location has its own separate merchant account with Verifone. For this reason, the customer and card contract information must be entered for each branch's merchant account independently. You can use the same customer and contract ID so that the tokenized contract can be used across branches; however, the Verifone setup must be duplicated for each location's merchant account. Currently, Verifone is not offering any Import/Export functionality. |
Setup involves adding the customer through the VeriFone PAYware Connect portal creating a contract (via the console) which includes their card information, and then assigning the contract to the customer in Account Maintenance in the software.
This feature is only available with VeriFone SIM versions 2_0_4_7 and later. It's best to use the most recent version (2_0_4_12 is the highest version available as of November 2016).
The software allows one card contract per account-job. You can create a “consolidated” contract that is available for use with jobs that have not been assigned their own individual contracts. There is no capability to select from multiple card contracts for the same account and job.
Adding a Customer via the PAYware Portal
To begin, open your browser and navigate to the VeriFone PAYware Connect website (https://storeportal.vfipayna.com/). You will need your merchant key, user name, and password.
Once logged in, choose “Recurring Billing” and “Customer MGR” from the menu.
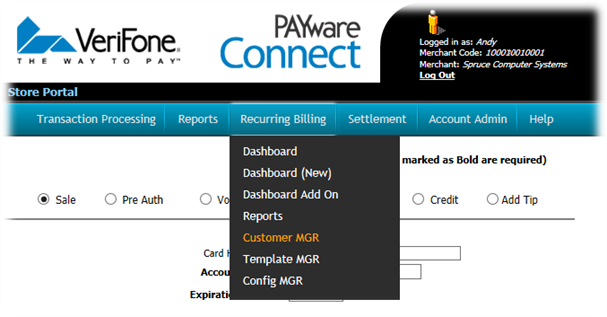
This opens a form where you can add and edit customers as well as associate contracts (cards) with the account.
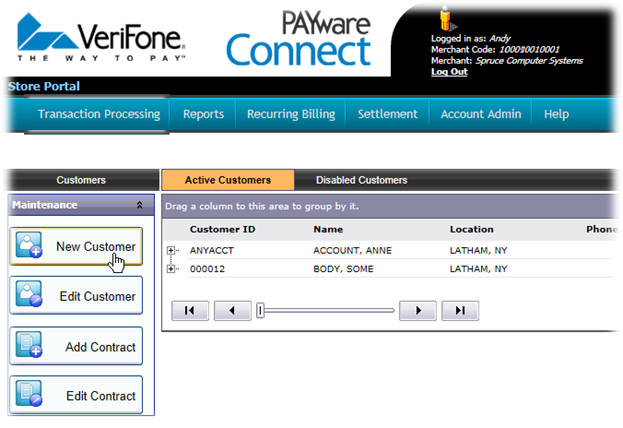
For a new customer, choose the “New Customer” button; otherwise, select the customer row in the grid (right) then click the “Edit Customer” button. Customers may be disabled if at some point they no longer want their card(s) used.
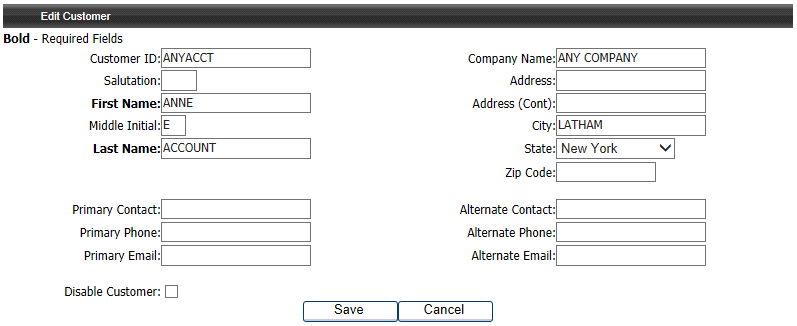
The customer record includes some basic information about the account and should match the customer’s billing information for the card(s). Most of this is optional except for the name fields; however, the more information you enter about the customer, the better. We suggest setting the “Customer ID” to match your customer’s account number.
Email information can be completed if you want to assign the addresses to one or more contracts after adding the customer. This can be used to send notifications to the customer when their card is charged.
Choose the “Save” button, once all entries are completed. After saving a customer, you can then associate one or more contracts (cards) with that customer.
Adding a Contract to a Customer
To add a contract, you must first select the customer in the data grid (right) and then choose the “Add Contract” button on the left (or “Edit Contract” if making changes to an existing contract).

You will need to determine some type of Contract ID. Since each contract must be either consolidated (for all jobs) or job-specific, it is best if the ID indicates this in some way. You might want to use the Account # - Job # or something similar. The card number cannot be used as the contract ID.
The Payment Type should be “Add On.” The recurring and installment options don't tie-in or otherwise affect the software or data if used. Leave the initial payment fields blank. Enter the customer’s card number, the name on the card, and the card’s expiration date. The card type (Visa, etc.) will populate automatically based on the card number entered. Only use the Primary card number fields. The email address can be selected if the customer would like to receive notification when their card has been used.
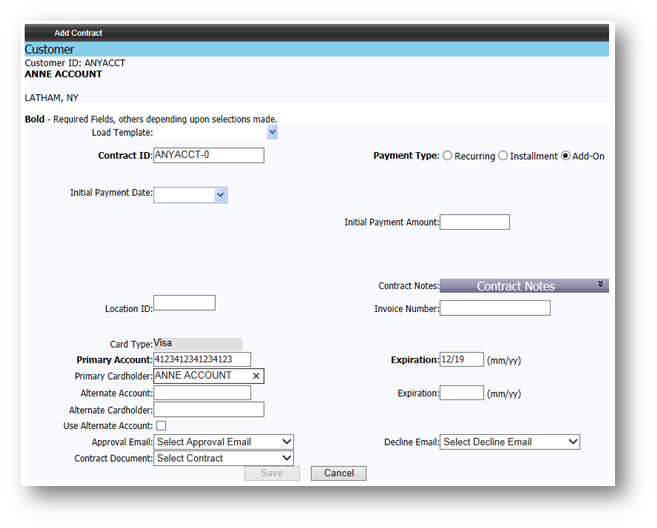
The “Save” button will become active once any required information has been entered and as long as the customer’s card number is valid. Choose “Save” to complete the contract.
Associating a Contract with an Account
After the customer has been added and a card contract saved using the VeriFone PAYware Connect portal, the remainder of the setup is done through the software.
•From the Main Menu in the software, go to either the Point of Sale or Receivables area, choose Database, and Account from the drop down menu.
•Select the customer and then click on the Maintenance Form icon found on the Receivables tab next to the text “No Bankcards on file” (Note: this will say “Bankcards on File” if you have previously associated any card contracts with the account).
•The PAYware Add-on Contract form will open. For a new contract, enter the customer’s PAYware Customer ID, Contract ID, and a text description for the card contract. Until certain information has been entered, some fields will remain disabled.
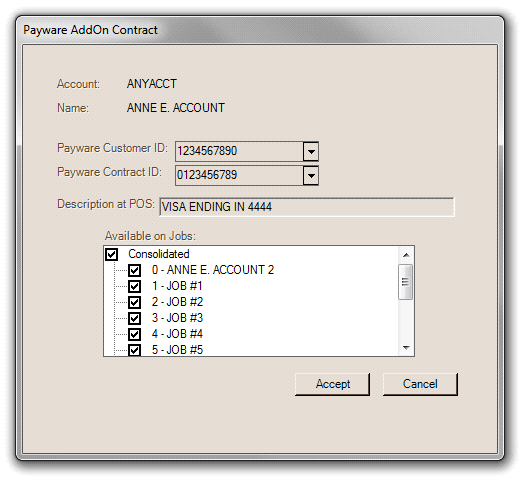
•If the contract should be available to all jobs (or any jobs without a specific contract), click the “Consolidated” check box; otherwise, check the specific job. If you have a consolidated contract, you will be able to specify additional job-specific contracts in the future; however, if not, you will only be able to save one contract per job. A warning appears if you attempt to associate the same contract with multiple jobs (other than as “consolidated”). A job contract is used in place of any consolidated contract in cases where both exist.
•Choose “Accept” once you’ve completed a card contract.
•Before closing the Account Maintenance form, choose Process (F12). Card Contract changes won’t be saved unless this is done.
Card on File (Verifone Point)
When doing certain transactions for a customer (or customer-job) that has a contract on-file, a prompt appears when you choose Process (F12). This currently occurs in the Sales and Direct Ship transactions as well as the Payments form when processing either an Order Deposit or Received on Account. Returns don't trigger the prompt. Card on file cannot be used for refunds, returns, or voids. In addition, the software intentionally does not prompt in Orders since not all orders involve a deposit and amounts can vary. A prompt won’t appear in any area where card payment would not apply. In areas where the prompt doesn’t automatically appear but card payment is allowed, use the “Card on File” menu marker selection when offered (continue reading for more information).
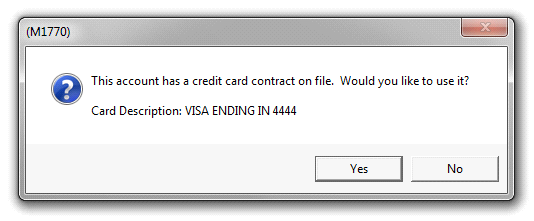
To use the card contract as the method of payment, answer “Yes” by clicking the button; otherwise, answer “no.” If you responded “no,” you can still select the card contract as payment by using the menu marker found in the bankcard payment panel on the Process form’s Invoice tab. The menu marker offers a “Use Card on File” option. To use some other payment method after choosing “yes,” use the Reset button on the Invoice tab of the Process (F12) form to reset the payment methods and selections.
Due to the nature of how this works, the Point of Sale user won’t see any card information displayed. The card number and expiration date text-areas will display the number/pound symbol (#) in place of any digits. To reiterate, none of the customer’s card information is actually being used or stored in the data or software.
Card on file processing uses a web service (Internet), not the card device. The card device is not required and is not involved or activated during "card on file" processing.