APG Cash Drawer® Setup
We support any APG Cash Drawer Series 4000 model with the 480 NetPro® Ethernet Interface (model 1317 is not available with this interface according to the manufacturer's web site). Drawer dimensions and optional features can vary by model. We usually suggest the 1816 model (part number: JB480-1-BL1816-C) which is an 18" x 16.7" dimension drawer and comes with the coin roll storage till unless other options are selected. For additional information about the drawer, please visit the manufacturer's web site www.cashdrawer.com. When ordering, make sure you select the 480 "interface type."
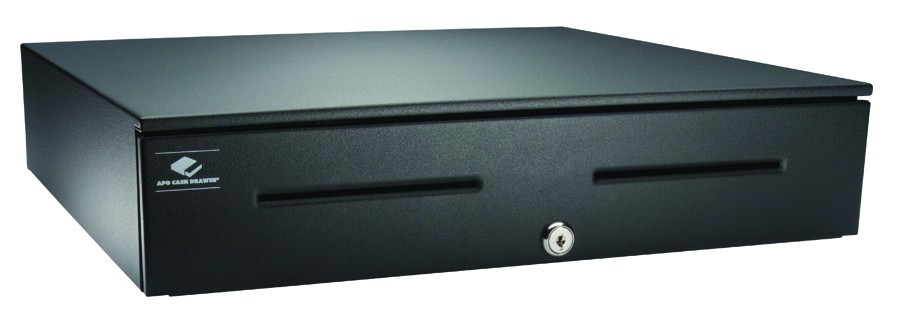
This cash drawer is a network device that can be directly connected to your network using a standard CAT-5 network cable. The cable is connected underneath the drawer.
Note: We recommend that you check the latest General System Requirements (GSR) document for your region to verify that the version of the equipment you are looking for has been verified for use with ECI applications. You can access the GSR at any time on the Customer Portal.
Setup
If you are installing more than one drawer, install the drawers one-at-a-time rather than all at once. This is necessary since the IP (network) address of new drawers all use the same default address. It is necessary to assign a static IP address to each drawer using the APG Release Utility.
To download this utility visit: www.cashdrawer.com.:
1. Select "Support" from main menu.
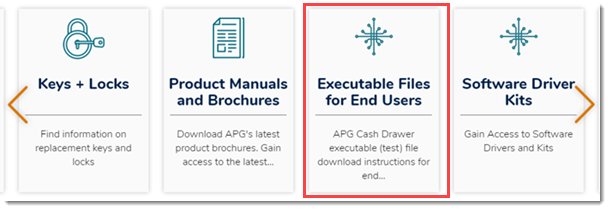
2. Select "Executable Files for End Users".
3. Follow the remaining directions.
4. After you have downloaded the archive, unzip (extract) the contents of the archive (zip) file and run the utility (exe) program. The utility is not a product of ECI Software Solutions, Inc..
|
Please note: We have had some reports that of the APG utility not working with computers running Microsoft Windows 10 operating system. If you have any issues, and have another computer running and earlier version of Windows, please try that. |

APG Release Utility
5. Plug in the drawer and network cable for the first drawer.
6. Choose "scan" once the utility window opens. Once scanning completes, any existing cash drawers plugged into the network should be listed.
If the scan doesn't list any cash drawers, try again. It may take a moment for the cash drawer to obtain an address once plugged in.

Scan Complete
7. Locate the cash drawer you want to assign an address to, click the row to select it (indicated by a blue background), and choose Details.

Network Details
8. In the Network Details box, choose Configuration.
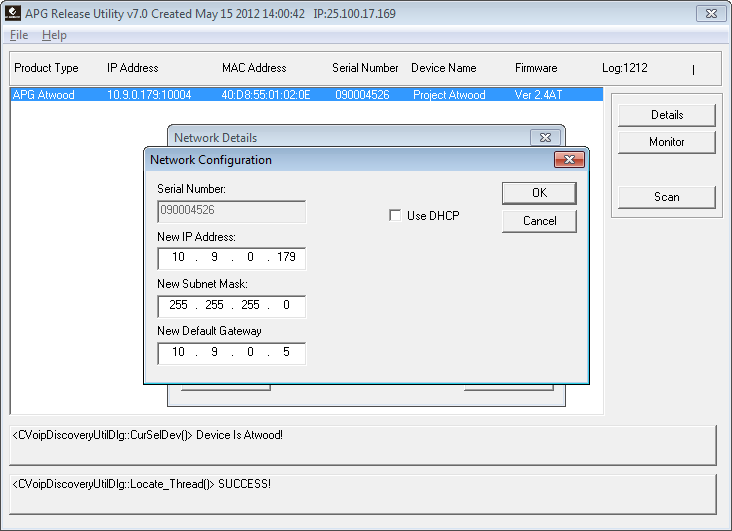
9. Enter the IP address you want to use for the cash drawer in the New IP Address area.
The IP address must match your network scheme and should fall within the range of "static" addresses. Static addresses are not determined automatically.
Dynamic addresses (DHCP) are usually assigned to a specific range as are "static" addresses. DHCP addresses should not be used with cash drawers. Do not choose (check) the Use DHCP check box.
The subnet mask and gateway should match those used by your network. You can find these by running ipconfig from a command prompt on a previously networked PC or by looking at the network adapter settings for IPV4 addresses through your Microsoft Windows operating system.
10. Choose "OK" and the following dialog should appear.

11. Click OK and the utility should rescan the network for drawer devices. After the scan completes, the cash drawer should be listed with the new IP address.
The next step is software configuration.
Configuring a Cash Drawer for a Station
To assign the drawer to a station, do the following:
1. Open the application using your administrative permissions.
2. From the Main Menu choose Maintenance > Database > Devices. The Device Maintenance form displays.
3. From the Device Name list, choose the station you want to add the cash drawer to.
4. Beside the Cash Drawer # list, choose the Settings ![]() icon.
icon.
-
If the drawer is already assigned to this station, choose the ID you added for the station.
-
If you are creating a new cash drawer entry, add a new cash drawer ID for the new drawer.
5. From the Model list, choose APGNET. New fields display.
6. Set the Network Address to the IP address for the cash drawer that displayed in the APG Utility.
7. Set the CD Port to 30998.
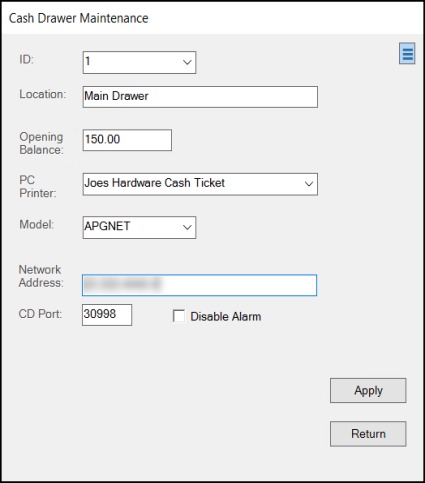
8. Choose Apply.
9. Choose Process (F12) to save these settings.
10. Close the application on the station.
11. Re-open the application and test the new cash drawer.
(From the Main Menu, choose Point of Sale > Payments and choose Open CD (F8) to open the cash drawer.
Repeat these steps for each drawer you need to add.