Finding Items using the Item List
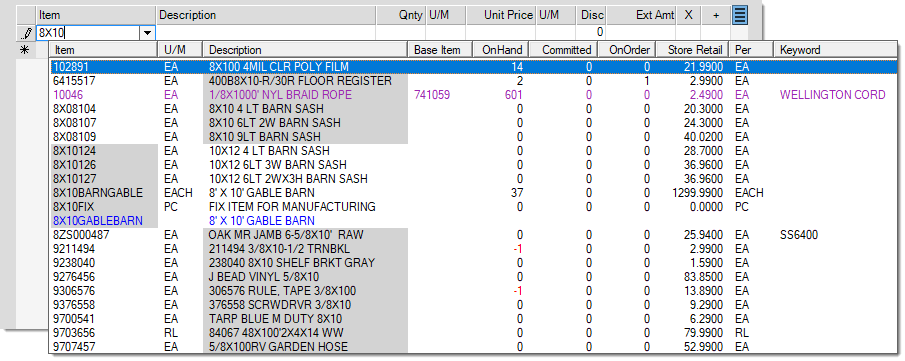
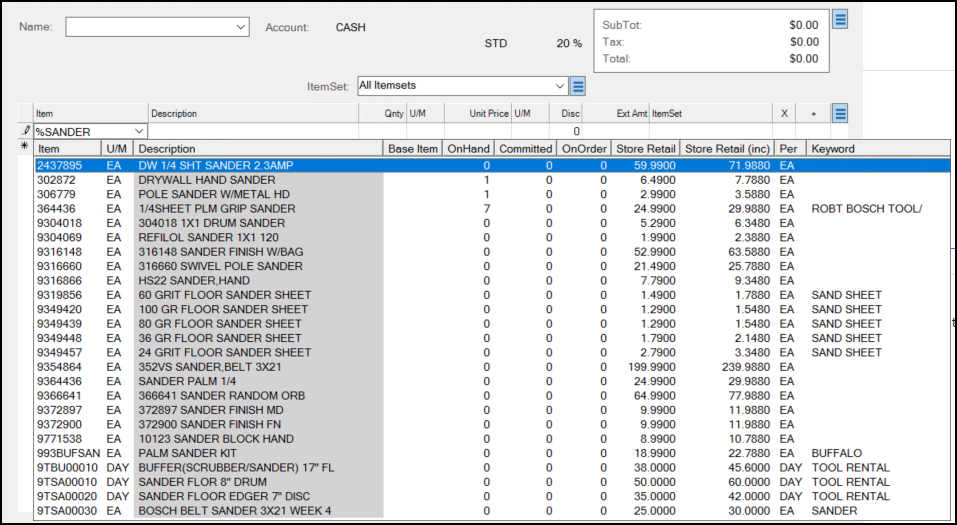
One of the most important features of a retail software solution is Item Entry. When the item is physically present, scanning the item's barcode is the easiest and fastest way to enter it into the application. If you don't have a scanner or the item has no barcode, you can always enter a full or partial item number if it's available. When entering text that partially matches existing item codes, the application displays a list of items that match. Items in selection lists are color coded to help distinguish between item numbers and alternate SKUs (in purple). On-hand quantities in a selection list are also color coded when an item has a negative on-hand (red).

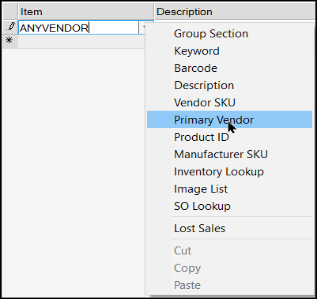
There are cases when you may not be working with any physical item, such as when you are building an order or quote, so scanning or manual item entry isn't always a realistic option. For these situations, you can enter the information you want to search for and right-click the Item list icon to display a list of search options.
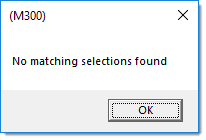
All of the following alternate selection choices are used to build a selection list matching the criteria you either enter or select. Based upon your selections, you can wind up with a list that contains a few items, many items, or one item. In addition, it's possible for your selection to produce no matches.
Selection listings are assigned a set "page" size. Usually, this initial listing or page is limited to the first 25 records. When more items match the criteria than the page size, a "<<<MORE>>>" option is displayed at the bottom. Clicking "more" populates the selection listing with the next page of items. Previous records (items in this case) remain in the listing and can be viewed by moving the scroll bar on the right-hand side of the listing.

|
Multi-Line Item Selection Tricks If you want to add more than one item in the list to the data grid, you can hold down the CTRL (Control) or SHIFT key and click the items you want to add as follows:
After you select the items you want, press the Enter key. Then, use the Next (F1) key to add the items you selected to the data grid one-at-a-time. |
Selecting Items using Group Section
Since all items must be assigned to a group and section, you can use the Group Section settings to find an item. Groups and sections are numbered (1-255), but are also assigned a text description. In almost all cases, the text description is shown along with the numbers. Numbers are used because they take up less space and also makes sorting and searching data more efficient in the database. Each company can choose how it wants to organize its inventory.

Group/Section Selection List
Group and section selection uses an expandable navigation "tree." Each group listed in the tree can be expanded to display the sections within the group. You can make multiple selections. For example, you can create a selection list of all the items in three different groups -- or -- just a few sections within one or more groups.
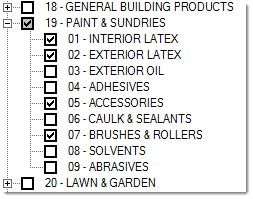
When all the items in either a group or section are selected, the check box background is displayed in white  . If you select some but not all sections within the same group, the group's check box background is changed to gray
  . Use the Select All button to select all groups and sections. Use the Clear All button to clear all check boxes. Choose Accept to build a selection list based upon the groups and/or sections you have chosen (checked). Or, click Cancel to close the window and not build a selection list.
Selecting Items using a Keyword
Items may be assigned up to five keywords. Keywords are meant to be a common and intuitive word that generally describes the product. It's best to use a word rather than a phrase and to not get overly specific. Keyword matches are not case-sensitive (you can type them using upper and/or lowercase letters). Some examples of good keywords are: TRUSS, PAINT, SINK, DRILL, BRICK, etc. The more specific the keyword, the less intuitive, and less likely that it will be used. Keywords are not required on items. Try using the Description search as an alternative if you are unsuccessful.
There are two ways to use the Keyword selection to find an item you are looking for:
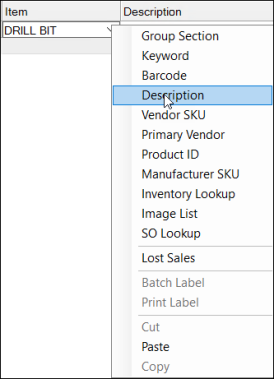
1. In the Item column, type in the word or number you want to search for and right-click the drop-down arrow. Choose the Keyword option to display a list of items that contain the word or number you entered.
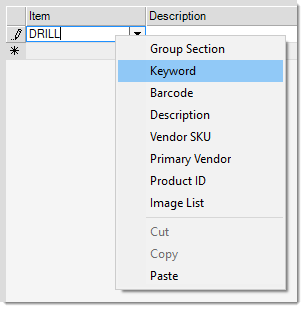
2. In the Item column right-click the down arrow and choose the Keyword selection option first (before you type anything in the Item field). The application displays a Keyword Select list where you can specify up to three keywords at the same time. You can choose to match on either ALL or ANY keywords. If you choose "Contains All", only items assigned to all the keywords will be included in the selection list. If you choose "Contains Any", items with any of the keywords specified will be included.

Selecting Items using a Barcode
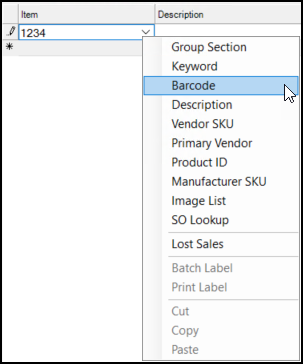
You can assign up to five different barcodes to each item. You can use these different barcodes to distinguish different units of measure (BOX vs. EACH, for example), so it's important to pay attention to the unit of measure that displays when entering quantities. This selection tool can be used with either a full or partial match on an item's barcode. Partial matches are made beginning with the first non-zero number in the barcode. Leading zeros are not considered.
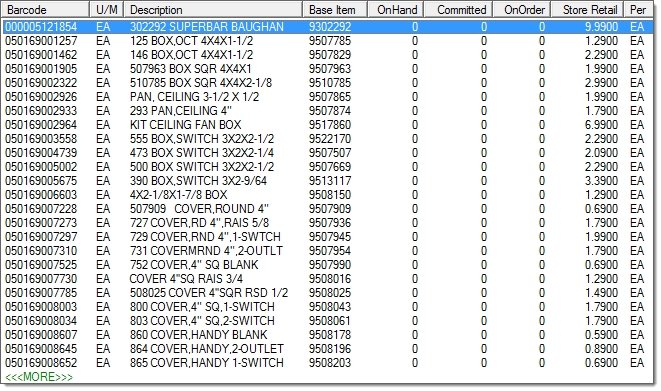
When using the barcode selection option, products are listed in order of barcode. The "base item" column contains your company's SKU for the item.
Selecting the Item using the Description
Use the Description search to find items using the words or numbers in the item's description. Matches are not case-sensitive (so it doesn't matter whether you use upper or lower case letters). The text can be located anywhere in the item's description (beginning, end, or middle); however, the entire text is matched together as a phrase, not as independent words. For example, if you type in "FAN KIT" but the item's description is "KIT CEILING FAN BOX," the application would not find the match, despite the fact that both words do exist in the item's description.
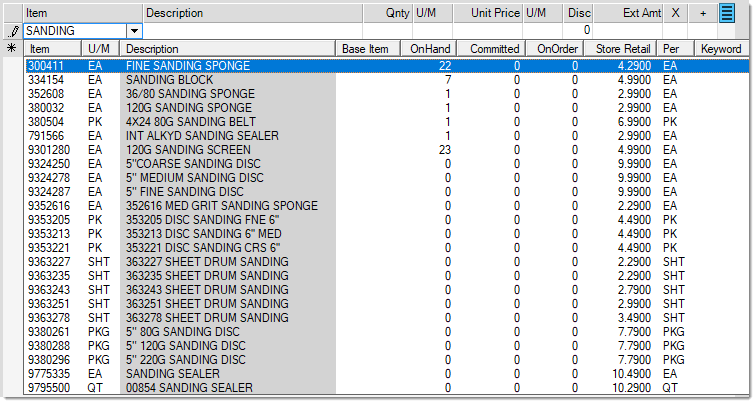
You may notice that some items populated in the selection listing don't appear to include the word you typed in the "description" column. Why is this? Items may have very long descriptions (up to 1088-characters, including spaces); however, we use a shorter truncated description for selection lists that is only 32-characters. This is done to keep selection listings a reasonable size and for database performance. The description used for locating matches is a special "search" description that is essentially the item's full description with any sequential spaces between words removed (this description also doesn't include line feed, carriage return, and other non-printing characters that might prohibit matches).
Pro Tip: If you type the character % and then the text your are searching for in any text field in a data grid, the application will restrict the search results to the records that contain that text.
Selecting Items using a Vendor SKU
Use the SKU (Stock Keeping Unit) to describe the numbers or identifiers assigned to products. Your company may use its own item numbers (codes), it may use the same codes as a supplier/wholesaler, or a mix of both of these. Each item can be assigned up to three different vendor items (or SKUs). These identifiers are used when ordering products from the vendors (wholesalers, manufacturers, buying group, co-op, etc.).
Enter in the vendor's item number (SKU) in the item drop down and choose Vendor SKU from the alternate menu. If a match is located, the matching item (or items) will display. This option only works if an exact match is located. Partial matches are not returned.
Selecting Items using the Primary Vendor
Each item may be assigned one primary vendor. The primary vendor can be different for each branch (store location). To use this selection option, enter the full vendor code associated with the vendor. This option only accepts an exact match for an existing vendor code. All items in the current branch assigned to the vendor as a primary vendor will be included in the selection listing.
Selecting the Item using the Product ID
You can use the Product ID as a classification tool to either create custom product IDs (groups) for your related items or, if you are a Do it Best® member, you can use them to mirror the Do it Best product departments, categories, sub-categories, and product groups. You can use a combination of both custom and Do it Best product IDs; however, only one ID may be assigned per product. The same product ID may be associated with as many items as you like.
If you want to define your own product IDs, this is done from the Code Definitions form (Inventory > Database > Code Definitions) (select the "Product ID" tab from this form). To use Do it Best product categories, you must first retrieve the classifications using EDI (from the Purchasing area, choose the Vendor EDI transaction, Extras (radio button), and choose "Classification Maint."). Once this information has been populated successfully using EDI. Once completed, a "DIB" check box will appear on the Product ID selection form. This check box is hidden unless the categories table is populated with data.

Do it Best Product Classifications
If checked, the form allows you to choose either a department, category, sub-category, or product group to produce an item selection listing. If you pick a department, all items assigned to the categories, sub-categories, or product groups within that department will be included in the selection listing, for example. Items may be assigned to any level; however, it's usually best if they are assigned to a product group (the lowest level). To choose a level in the tree, double click on the node to select it.
Do it Best is a registered trademark of Do it Best Corp. in the United States and other countries.
Selecting the Item using the Manufacturer SKU
When you search for a particular item and you know the item’s manufacturer's SKU, you can use that SKU to find the item. We call this enhanced search. The enhanced search feature must be set up before you use this feature. We have added the Manufacturer’s SKU to the default enhanced search options as well.
To search by the Manufacturer SKU, enter the SKU in the Item field, select the down arrow beside the item field, and choose the Manufacturer SKU option. The application displays the list of items that match the SKU you entered.

Sale Entry Form with Manufacturer SKU Search Results
Selecting the Item using Inventory Look up
Selecting Inventory Look up will open a Utility that searches for items by Group-Section or Department - Class - Fineline.
Note: This listing includes Disabled Items.
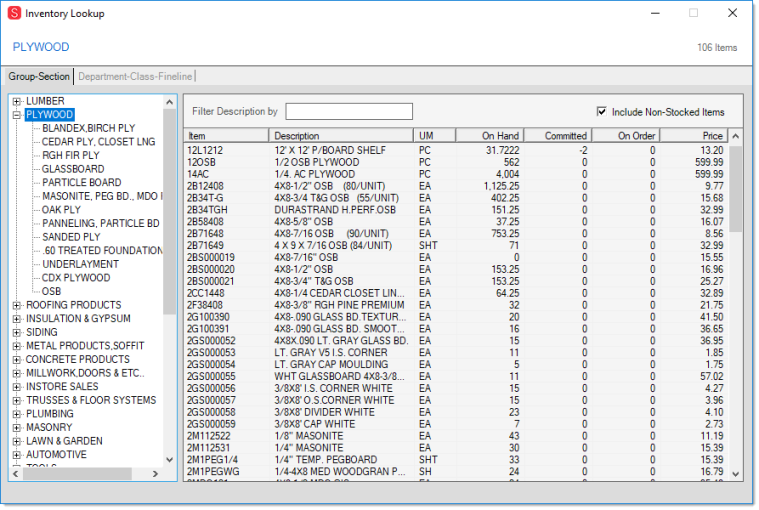
Inventory Lookup : Group-Section
In order to search by Group-Section, all items must be assigned to a group and section. Your company may define between 1 and 255 groups and also between 1 and 255 sections within each group. Groups and sections are numbered (again 1 - 255), but are also assigned a text description. In almost all cases, the text description is shown along with the numbers. Numbers are used because they take up less space and also makes sorting and searching data more efficient in the database. Each company can choose how it wants to organize its inventory.
Select a group to view all item within that group. You may then narrow down the list by selecting the section. Click on an Item to add it to the data grid. The main dialog window will become active as soon as you select an item, at which point you can adjust quantity and price as well as continue adding items. The Inventory Lookup Utility window will remain open in the background, facilitating navigation between the windows.
You may also use the "Filter Description by" field by typing in the item number or Description. The list will narrow down as you type in more characters in the field. Check the "Include Non-Stocked Items" to include all items, included items you don't currently carry.
Inventory Lookup : Department - Class - Fineline
There are three merchandising classes available: class, department, and fineline (sometimes named "subclass"). These can be used as a selection tool. Merchandising codes are typically reserved for codes provided by vendors and may be updated by EDI processing or when adding items using a vendor's catalog.
Select a Department to view all item within that department. You may then narrow down the list by selecting the Class and then the Fineline. Click on an Item to add it to the data grid. The main dialog window will become active as soon as you select an item, at which point you can adjust quantity and price as well as continue adding items. The Inventory Lookup Utility window will remain open in the background, facilitating navigation between the windows.
You may also use the Filter Description by field by typing in the item number or the description. The list will narrow down as you type in more characters in the field. Check the Include Non-Stocked Items box to include all items, included items you don't currently carry.
Selecting Items using the Image List Selection
The Image List feature provides a visual method for item selection. Before using the Image List feature, your company must define an Image List from the Image List Maintenance form available from the database menu in the Inventory area. There is one consolidated image list for your company. This list can have many different categories and sub-lists, however. Up to five layers of organization are permitted from the "start" location. The list should be organized from less to more specific categories and ending with items as the last level. Once a user opens the list, the list remains open in the background and retains the user's last location in the list if they re-open the list again. This is done until the user logs off, closes the application, or changes branch locations.
There are two types of content in the Image List: lists and items. Lists are indicated by either a yellow or an antique-white (light-yellow) background color. Items are indicated by a light or dark green color. The darker colors indicate the current selection. Keyboard navigation can be used as well as the mouse (single click) and touch screen if available.
Along the top of the form, navigation links are provided. Click on these to return to the "start" location or a prior list level.

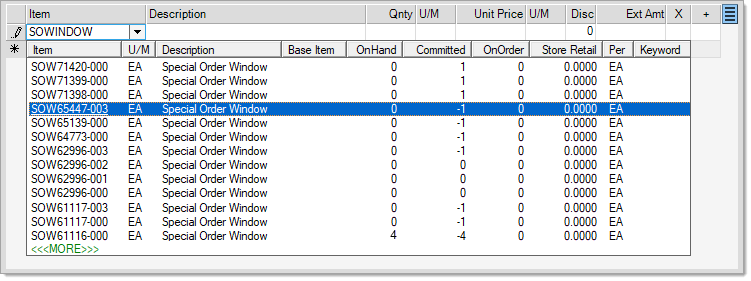
Selecting Items using SO Lookup
Search for renumbered Special Order (SO) items by entering a full or partial SO item number in the data grid, right-click and select SO Lookup. In the example below, we are searching for an item called "SOWindow". A list of all "SOWindow" items will be returned; click on the <<<MORE>>> link to view additional items of the special order renumbered SKUs. Item are listed in descending order.
Selecting Items using Lost Sales
You can track your Lost Sales using the Inventory > Utilities > Lost Sales utility form as well as from any Item selection grid or Catalog selection control anywhere in the application. Search for the Lost Sales search to find out more about this functionality.