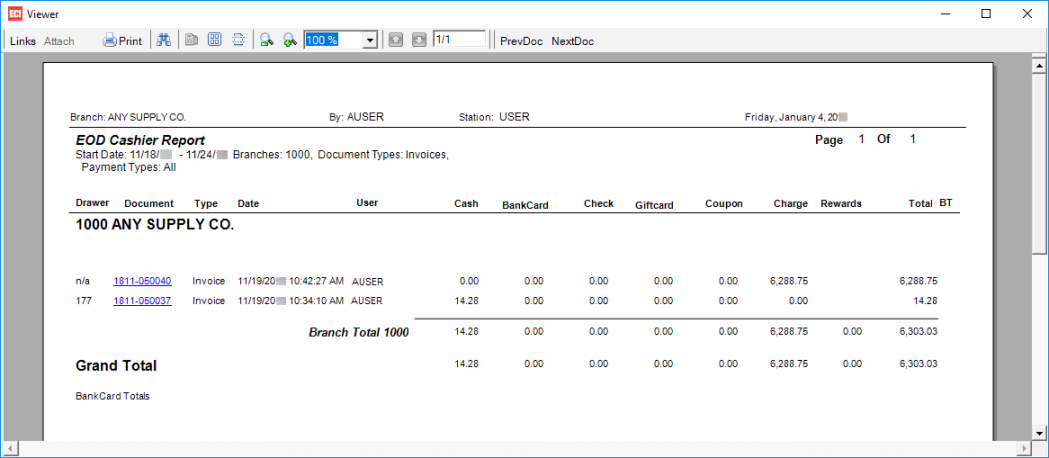
The Preview (F8) function can be used to display a report in the Viewer form. Viewing a report is strongly suggested before choosing to either print or process a report as a file since this can be used to both see the printed length in pages and also to check the report format based on the options you have selected. In addition, reports can be printed directly from the viewer itself which also allows for the added benefit of printing only selected page or pages and well as additional options your printer may offer.
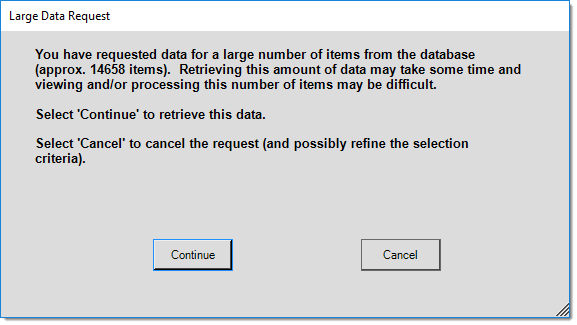
Each time preview is selected, the report will be generated which requires a retrieval of data. In some cases, and based on the criteria selected, you may be warned about the quantity of data being retrieved. Often, receiving a message such as this indicates that your report's selection criteria are too broad.
Despite the fact that most reports can be run at any time and usually for any period, the data used for reporting is rarely static. Anytime you want or need to retain a "snap shot" at a particular point in time, the only reliable way to do so is by saving the report as a file (PDF, etc.) or printing a hard copy for your records. Later changes such as merging, renaming or renumbering, deletions, and other changes can all affect whether data appears on reports or where it appears in some cases. For example, if you ran a sales analysis for inventory group 11 at the end of the year, and then modified one item in that group to now belong to 62, future reports would no longer show the same total for group 11 or 62. For the most part, changes such as those described here only affect data when viewed in parts rather than as a whole. Using our previous example, viewing total entire sales for all inventory wouldn't be affected by a change to one item's group at a later time.
The same viewer is used for both reports and documents. The primary different between viewing a document and a report is that reports don't have document links. Some reports offer dynamic links to documents (within the report) which indirectly provide access to links for those documents. The same viewer window is shared by reports and documents. When more than one report and/or document is viewed (without closing the viewer in between), the prior reports (or documents) can still be viewed by toggling the current document using the "PrevDoc" and "NextDoc" buttons. This is not true when viewing more than one version of the same report or document, however. Although you can change the page size and quantity of pages visible in the viewer (side by side or tiled, for example), you cannot view different documents (or reports) at the same time or side-by-side. The only way to do this would be to open a second viewer from another application session or to save one or more reports/documents prior to viewing and open them as PDF (Portable Document Format) or some other type of file.
For additional information about tools available in the viewer, please  click here.
Document Viewer Toolbar
The following table lists icons and options used on the Document Viewer toolbar and explains what they do:
 Print Print
The Viewer's Print button opens the standard Microsoft Windows® print dialog. This can be used to print a copy of the current document or report. It also provides the ability to print selected page, pages, or a range of pages (these options are only enabled for multi-page documents and reports). Printer selections are determined by the printers available in Microsoft Windows for your computer (server, PC, client, etc.) and are neither dependent upon or determined by the application. Any issues printing or questions regarding individual printer options would need to be resolved or handled by your company.
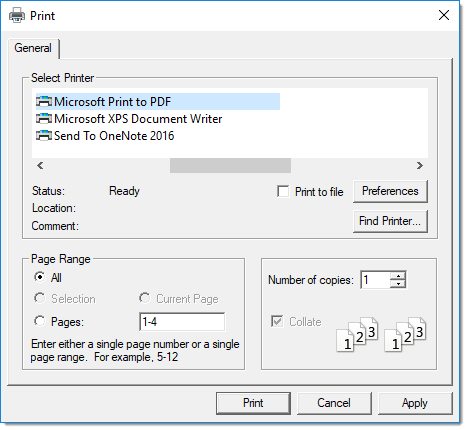
Microsoft Windows Print Dialog
This is a standard Windows dialog, not an application control, so it is subject to change and may appear differently based on your Microsoft Windows operating system.
|
 Find Find
The Find tool is used for searching text within the current document or report. The control allows you to search either up or down from your current location in the document. Choose the "Find Next" button to begin your search or to look for additional matches within the displayed document or report. Matching text is highlighted with a blue background color. The "Cancel" button can be used to close the Find dialog (or click the "X" button in the upper right-hand corner of the dialog).
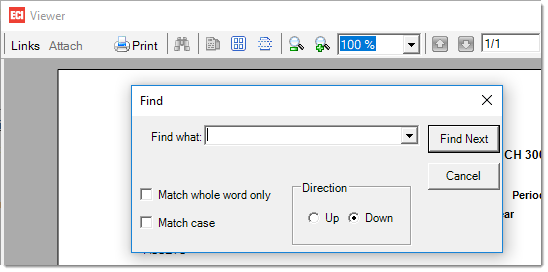
Find Dialog
Find what
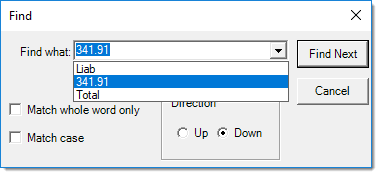
This combination text-area and drop down allows you to enter your search text as well as reference any recent search (find) text you may have entered. Past search text is only saved temporarily and if you actually choose "Find Next" after entering the text.
Match whole word only
This option, if selected (checked), treats the entire text entered as a single phrase rather than individual words. This really only applies when a space exists between text characters in the "find what" text area. For example, if you wanted to search for "BOB SMITH" but not find all occurrences of either the words "BOB" and "SMITH," you would check this option.
Match Case
This option, if selected (checked), only looks for matches with the exact same case structure as the text typed in the "find what" text area. If checked and the search text was "Bob," the words "BOB" and "bob" would not be recognized as matches.
Direction (Up or Down)
Use these radio buttons to change or indicate the direction of the search.
|
 Single Page Single Page
The Single Page Mode button changes the Document Viewer's scroll mode back to a single page view from continuous scroll. In "single page" mode, the vertical scroll bar on the right-hand side of the Viewer can only be used to scroll through the current page. Continuous Scroll (another option on the Viewer toolbar) allows the use of the vertical scroll bar for all pages of a document.
This option is not enabled when the Viewer is first initialized (opened). Single page view is the default, so until continuous scroll is indicated, this option won't be available.
|
 Multiple Page Multiple Page
The Multi-Page Display button changes the Document Viewer's display so that multiple pages can be viewed in the Viewer panel. Options allow the users to select the number of pages to display up and down in the viewer panel. The more pages selected, the smaller the size of the images. Click and drag the mouse across the page icons to expand the page display to the desired format.

|
 Continuous Scroll Continuous Scroll
This only applies to multi-page documents. When selected, this allows the vertical scroll bar to be used to scroll across pages instead of requiring use of the previous and next page buttons. Choose the "single page" icon to return to single page view (the default).
|
 Zoom Out Zoom Out
This magnifying glass icon decreases the scale of the document displayed making it appear smaller. The scale is decreased to the next lower preset percentage value (as listed in the Zoom "Combo" drop down control).
|
 Zoom In Zoom In
The magnify icon increases the scale of the document displayed making it appear larger. The scale is increased to the next highest preset percentage value (as listed in the Zoom "Combo" drop down control).
|
Zoom Combo
The Zoom Combo is a text-area combined with a drop down control listing preset "zoom" values. Selection or entry of a value either increases or decreases the scale that the document or report image is displayed using. Select from preset sizes to resize the document in the viewer. Choices include the percentages: 10%, 25%, 50%, 75%, 100%, 200%, 400%, and 800%.
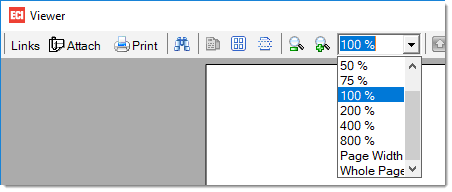
The "Page Width" sizes the document to the maximum possible width matching the current size (width) of the Viewer's display area but allows for vertical scrolling.
The "Whole Page" sizes the document so that the entire document fits within the current dimensions of the Viewer's display area.
|
 Previous Page Previous Page
For multi-page documents, use this button to move to the previous page. This is particularly useful when continuous scroll is not enabled. If the document only contains one page or you are viewing the first page, this button is disabled.
|
 Next Page Next Page
For multi-page documents, use this button to move to the next page. This is particularly useful when continuous scroll is not enabled. If the document only contains one page or you are viewing the last page, this button is disabled.
|
 Page Number Page Number
This text-area has two (2) functions: (1) it displays the current page number as well as the total number of pages for the current document/report and (2) it allows the user to type in a specific page number to display.
|
 Previous Document Previous Document
The "PrevDoc" (Previous Document) button is provided for use when you have loaded multiple documents into the Viewer. One way documents are considered as "loaded" is when they have been displayed in the Viewer (linked documents are not considered a "view" unless the link has been selected and the document shown). Another way documents are considered loaded is when multiple selections are made from the Documents form and the View (F7) function is used to open or refresh the Viewer. Previously "loaded" or viewed documents are not retained when you close the Viewer.
|
 Next Document Next Document
The "NextDoc" (Next Document) button is provided for use when you have loaded multiple documents into the Viewer. One way documents are considered as "loaded" is when they have been displayed in the Viewer (linked documents are not considered a "view" unless the link has been selected and the document shown). Another way documents are considered loaded is when multiple selections are made from the Documents form and the View (F7) function is used to open or refresh the Viewer. Previously "loaded" or viewed documents are not retained after you close the Viewer.
|
|


![]() click here.
click here.


