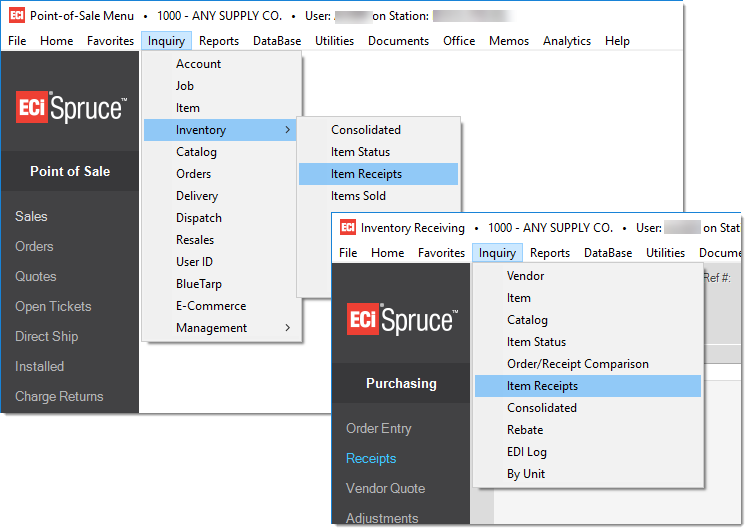
Inquiry > Inventory > Item Receipts
The Item Receipts inquiry feature lists the Inventory Receipts documents for the selected item and date range. This inquiry form is available from both the Point of Sale (Inquiry, Inventory, and Item Receipts) and Purchasing (Inquiry and Item Receipts) application areas.
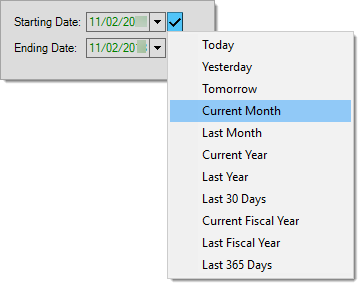
Some fields contain preset dates, particularly when the circumstances require a date range. When saving and scheduling reports, preset dates are the only date selections that automatically update when you save a report or process a scheduled report (manual date selections only run for the original date selected). The Check Mark icon ![]() indicates that preset values are available. Click the icon to review a menu of preset date selection options.
indicates that preset values are available. Click the icon to review a menu of preset date selection options.
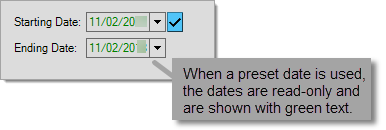
After you make a date selection, the date fields become read-only (disabled) and you cannot change them manually. The application displays the dates in green.
Preset values are based on the current date by default or use the current date to determine the "current" period (such as the current month or year). Fiscal year values may consider the current date as well but also use parameters for your financial (fiscal) year to determine the starting and ending months.
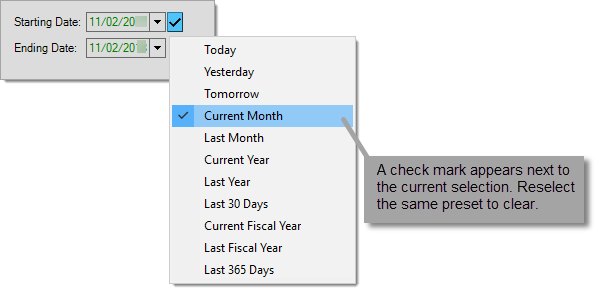
To clear a preset, reselect the same preset from the context menu. The date values may remain but the application will allow you to modify them after you clear the preset dates.
Receipts are displayed for the selected item and dates immediately following changes to either the item or dates. The item's current quantities (on-hand, committed, on-order) and current costs (weighted average, market, and last receipt) are displayed in a panel in the upper right-hand area of the form.
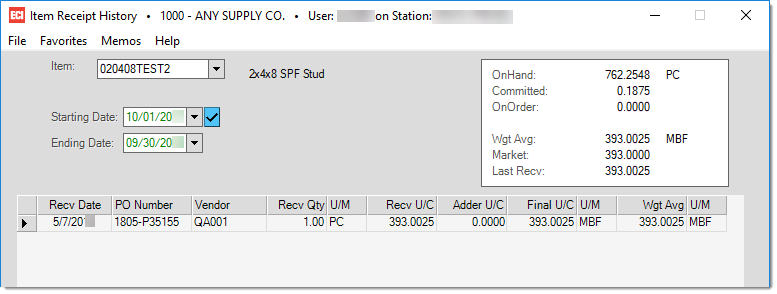
When a Purchase Order document was referenced by the receipt (this is optional), the "PO Number" column will display that document's identifier. Double-click on the document to open it using the Document Viewer. To find the receipt document, click on the Links and expand the selection tree.
Functions
Use the Next (F1) function to select the next item from the selection listing. Choose Cancel (F9) to clear the form back to its original state. The Exit (F10) function closes the Item Status inquiry form. Process (F12) populates the grid for the selected item and date range.