Custom Library (General Ledger)
You can use the Custom Report Library feature, located at the bottom of each application area's Reports menu, to create reports written using third-party report writing software. These custom reports use the data you have collected in Point of Sale transactions, Purchase Orders, and other application areas to provide information about how the business is doing and the status of particular processes.

Currently, you can import both Crystal Reports® and ActiveReports® templates for use in these libraries, but we are no longer updating Crystal Reports, so we recommend you move over to the updated ActiveReports versions. ActiveReports support requires no special licensing and is the report format we will be using to create new report templates in the future. The library form lists reports matching the application area that the form is being accessed from (Inventory or Purchasing, for example).
*Crystal Reports and ActiveReports software are not products of ECI Software Solutions, Inc. nor is the maker of ActiveReports or Crystal Reports software, Business Objects® SA, or GrapeCity associated or affiliated with ECI Software Solutions, Inc. in any way.
We use specific prefixes for the custom reports saved in the your report directory to identify the application area the report is intended for. Reports that are to be accessible in Point of Sale, for example, have the prefix PS. Reports for Receivables have a prefix of AR instead. The naming convention has nothing to do with the function of the report. You can make copies of a report with a new name to allow access across application areas. This is a list of the report prefixes:
| Prefix | Application Templates |
|---|---|
| PS | Point of Sale |
| PO | Purchase Order |
| IN | Inventory |
| AR | Accounts Receivable |
| AP | Accounts Payable |
| GL | General Ledger |
| MI | Miscellaneous |
| MN | Maintenance |
Setting up the Custom Reports
Access to the Custom Report Library forms are limited to:
-
Stations that have the Custom Reports Access check box enabled (in Maintenance > Database > Devices > Station). And
-
Users who have a specified Custom Reports Folder for their user ID (in Maintenance > Database > User ID > Custom Reports tab).
Note: User ID records must also have the application-area specific Custom Report Library option enabled in the Permissions List settings to display these report templates in the Report Menu list. If you see a Custom Report Library option but it is disabled, check the Permissions List settings for the application area that you need to see if the relevant check box is enabled.
After you enable Custom Reports, an application-area specific list of Custom Reports is available to you:
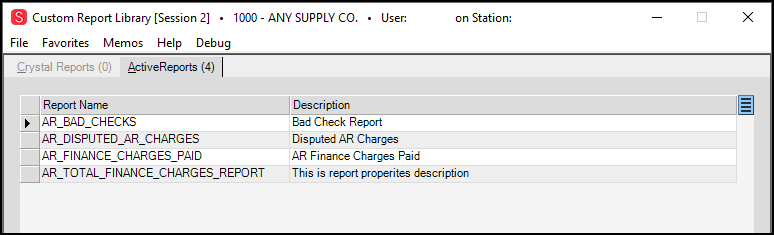
Custom Report Library > ActiveReports tab with Account Receivable Reports Imported
Assuming the setup is done properly, you can click the report files in this list to open them and select the report parameters as specified below to create the report you need based on the data saved in the application.
Note: ECI does not provide support for third-party applications including reports software.
Running a Custom Report
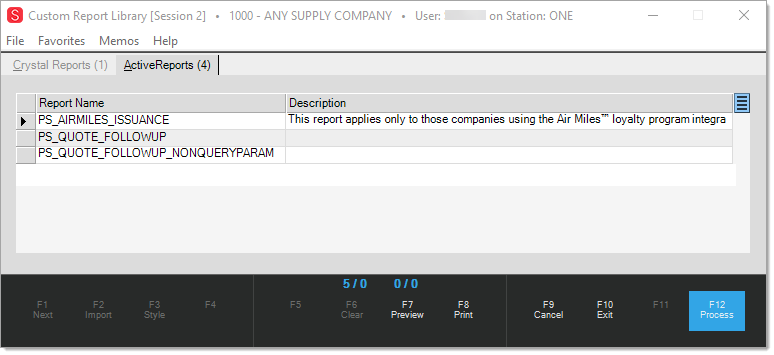
The Custom Reports Library feature is located at the bottom of each Reports menu. ActiveReports are created, imported or exported onto your system by an ECI team member or downloaded by a person on your staff with administrative permissions. Reports on the “ActiveReports” tab match the application area that the form is accessed from (for example, POS or Purchasing). Additional report templates are available from the Customer Portal.
Previewing a Report
To run a custom report and preview the results:
1. From the Main Menu, choose the Application Area (Point of Sale, Purchasing, Inventory, etc.) you want to create the report from.
2. Click the Reports option in the Toolbar and choose the Custom Report Library option at the bottom of the menu.
A list of reports displays.
3. Choose the report from the list and choose Preview (F7).
If the selected report requires parameter entries, the Report Parameters form displays.
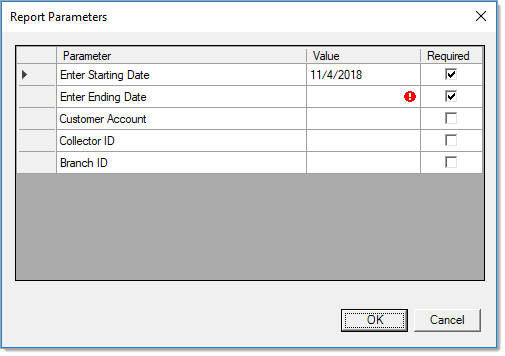
4. Enter the appropriate report values for each parameter in the Value column. (Required fields are indicated with a check mark in the Required column.)
5. When you have completed your entries, choose OK to generate the preview.
If a required value is missing or incorrect, a red exclamation will appear next to the missing/incorrect field. If no parameters are required, the report will appear in the Viewer.
Printing and Saving a Custom Report
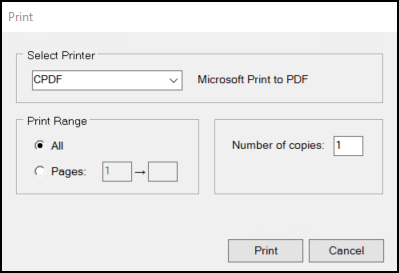
You can print a Custom Report or save it to a PDF after you preview it.
To send a report to a printer from the Viewer form, choose Print.
The Document Print form displays.
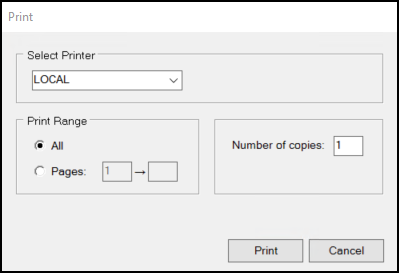
Choose the printer from the Select Printer list and click Print.
To save the Custom Report to a PDF (and save it to your Custom Report folder), use the process above and select a Save to PDF printer option from the Select Printer list and choose Print.