Adding New Attachments: Step-by-Step
Adding a new attachments begins by assigning a "reference" in the Item Maintenance > Common > Attachments tab.
The reference is simply some text that describes the attachment. For example, the reference for a scanned copy of the customer's credit application might be "Credit Application - 5/3/2015," for example. Keep in mind that whatever reference you choose may be visible by others, so it's a good idea to clearly describe attachments especially when they will be shared.
1.Click in the next available reference cell.
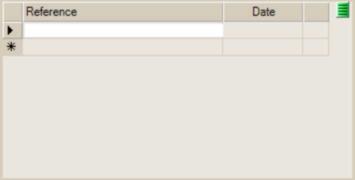
2. Begin typing a description for the attachment...
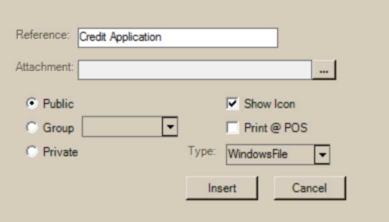
You will notice that the form changes immediately as soon as you begin to type.
3.There are a number of different attachment types, so we want to make sure the "type" matches the kind of attachment we want to add. Attachments that are saved as files on your local computer are "Windows File" type attachments, so we won't change our type.* In this case, use the browse (...) button to open the explorer window and find the file you want to attach.
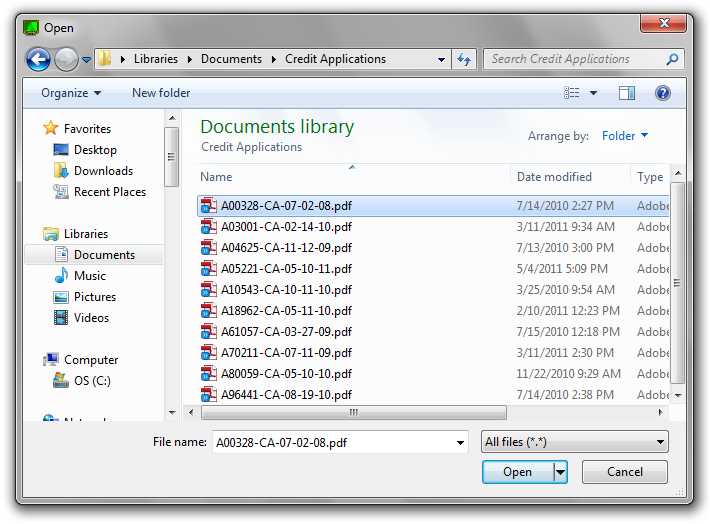
*Other types include map links, documents, and web addresses.
Once you have located the file, click the Open button to continue. The full path name (location) of the selected file will be listed in the "Attachment" text box.
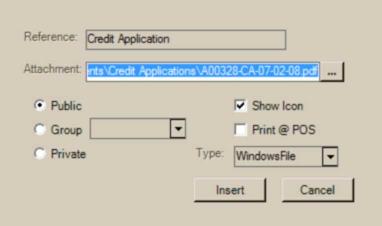
4.Next, determine who should have access to the attachment. There are 3 settings: public, group, and private.
•Public attachments are visible and available to everyone at your company. This should only be used for information that doesn't contain personal information. There may be privacy laws in your area that determine what information may and may not be shared or made publicly available on your company's network. It is your company's responsibility to understand and follow any legal requirements in your area.
•Group attachments are assigned to a "message" group. These user groups may be defined from the User Group Maintenance option available on the
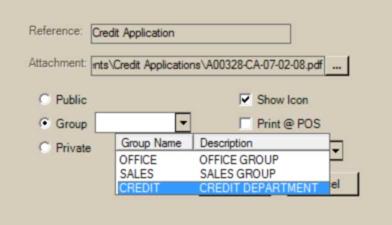
•Private attachments are made available to only the user who adds (or modifies) the attachment (the "current" user who is logged on).
When a user does not have permission to access a group or private attachment, the attachment won't be displayed. This rule also applies to any "system administration" type users defined by your company.
5.After choosing who can access the attachment, you can decide whether the attachment should display an icon when applicable and whether or not the attachment should be available for printing at Point of Sale.
The Show Icon check box determines whether this attachment triggers the display of the Info
 icon in areas where the attachment would be listed in folders. When a record (account, etc.) is assigned more than one attachment, the icon would be displayed if any of the attachments have this setting checked.

The Print @ POS check box determines whether or not this attachment will be listed, and also available for printing, from the "attachments" tab provided with Point of Sale Process (F12) forms. The "attachments" tab of the process form allows users to select and print attachments prior to processing.
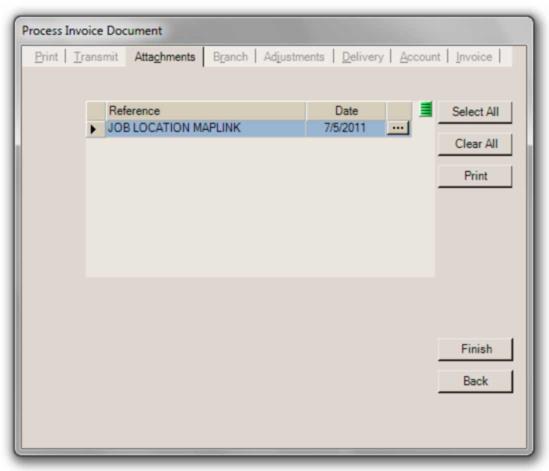
This setting does not limit a user from being able to print any attachment they are allowed to view (open) as a Windows file. For example, if a PDF file is attached to an account and the PDF is opened from the "Info" folder tab, the user can print the PDF from Adobe® Acrobat® Reader® application. This cannot be prevented because it is being accessed outside the software.
6.At this point, we are ready to complete our attachment. To do this, click the Insert button.
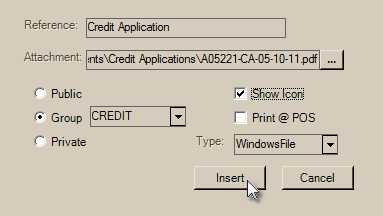
It's equally important to choose Process (F12) to update the customer's account for attachment additions or changes.