Updating the Primary Vendor for an Item
When you need to choose a new primary vendor for an inventory item, you can add them in Item Maintenance. The application preserves the current vendor as the secondary vendor record and moves any other vendor records to a successive tab.
Note: When you choose a primary vendor for an item in a branch, if you do not fill in the Vendor SKU#, this vendor will become the primary vendor in the Primary Vendor tab. When reloading the item, the information that loads is based on the entries in the vendor record.
To change the primary vendor for an item:
1. From the Main Menu, go to Inventory > Database > Item to display the Item Maintenance form.
2. From the Item list, choose the item you want change the primary vendor for and press Enter.
3. Click the Purchasing subtab.
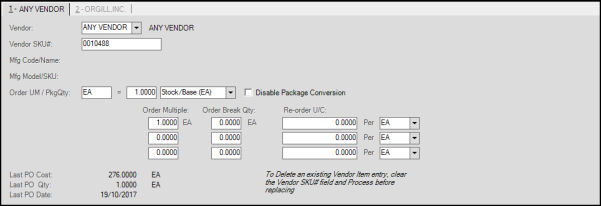
Item Maintenance Form > Purchasing Tab with Original Primary Vendor
4. In the first tab, go to the Vendor field and type the vendor ID for the new primary vendor and press Enter.
You can update the available fields with the relevant item data associated with the vendor record.
5. To save the changes, click Process (F12). The Branch List displays.
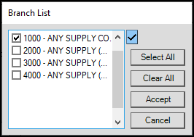
Branch Selection List
6. Select check boxes beside the branch(es) for which the primary vendor ID should change or click Select All.
7. Click Accept. The application updates the Primary Vendor tab and moves the previous primary vendor to the next tab.
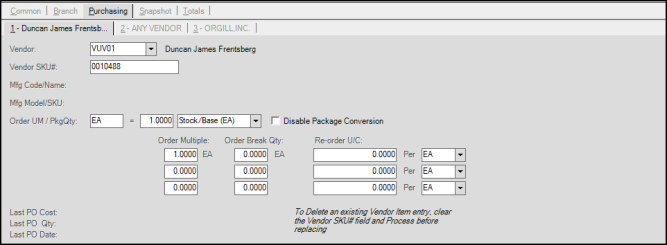
Item Maintenance Form > Purchasing Tab with Updated Primary Vendor
8. Press Process (F12) to save the changes. Update the purchase amounts as needed.