Drypowder
We are expanding our Accounts Receivable strategy using a new ECI acquisition, Drypowder, which can transform how you get paid and manage your cash flow! Currently, Drypowder payment services apply to Open Item, not Balance Forward posting type accounts.
Making a Partial Order Deposit using the Drypowder Method
You can use the Drypowder application to find an order in Spruce and request a partial order deposit from the account. Work with the ECI Payments Account Manager about the payment and setup requirements. The Drypowder team will provide an initial log in so you can establish a username and password. You can use the Drypowder app to generate a payment request for the customer and send them a copy of the order document directly from Spruce.
To send a partial order payment request to a Cash or Charge account from Drypowder:
1. Log in to Drypowder using your user name and password. The Drypowder Order Deposits form displays.
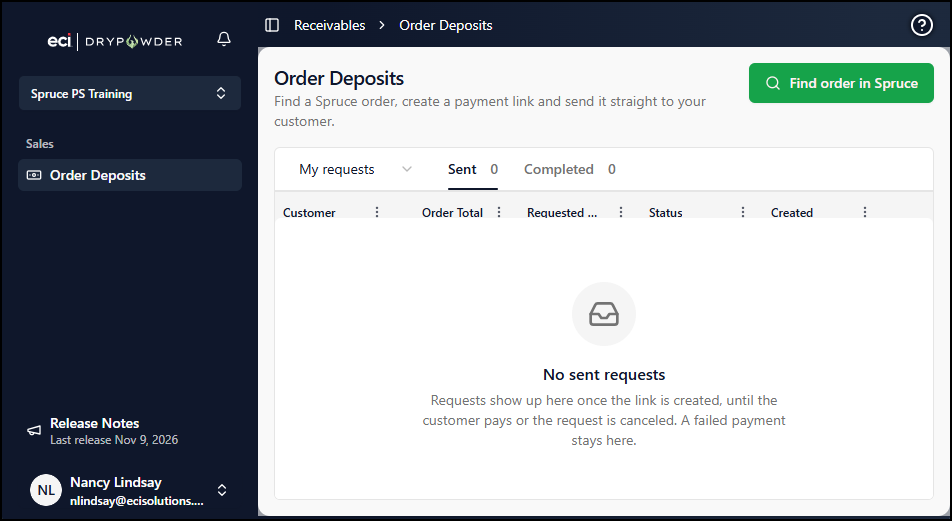
Drypowder > Receivables > Order Deposits Form
2. Click the Find order in Spruce button. The Find a Spruce order list displays.

Drypowder > Find a Spruce order > Order Results
3. Based on what you are looking for in the list, continue as follows:
-
If you see the order you want to request a partial payment for in the list, click the item in the list.
-
If you do not see the order you want to request a partial payment for, enter the Order ID in the field provided and click Go.
Using either option, the details of the transaction displays.
4. Review the order transaction and verify that this is the order you want to request a partial deposit for. The details of the transaction display. You can click the Order PDF document to review the transaction document.
Click Back to search if you need to find a different order.
5. In the Deposit To Request section, choose one of the pre-set deposit percentages or enter a percentage for the deposit request manually in the % field.
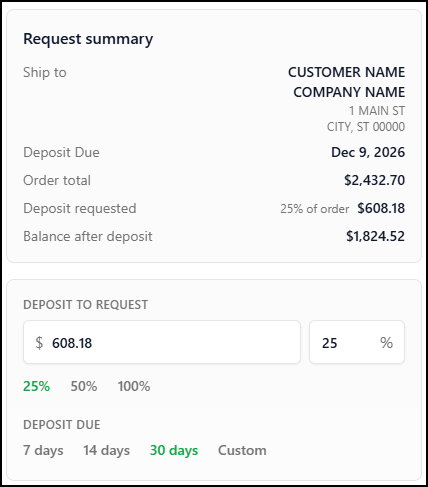
Drypowder > Deposit Request > 25% Requested
When you choose a deposit percentage, the Deposit requested field updates to reflect your choice.
6. From the Deposit Due list, choose the due date for the deposit:
-
Choose 7 days, 14 days, or 30 days (30 days is the default), or
-
Choose the Custom option and select a due date from the calendar.
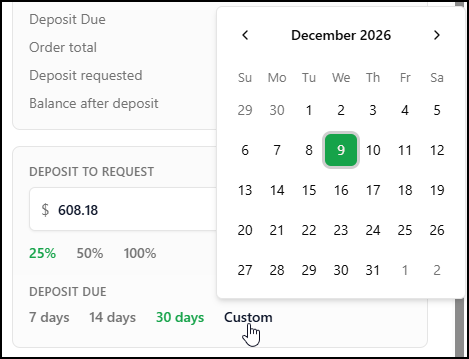
Drypowder > Deposit Request > Due Date > Custom
7. When you have completed these selections, choose Generate Link.
The Copy Requested Link message displays and the updated form displays.
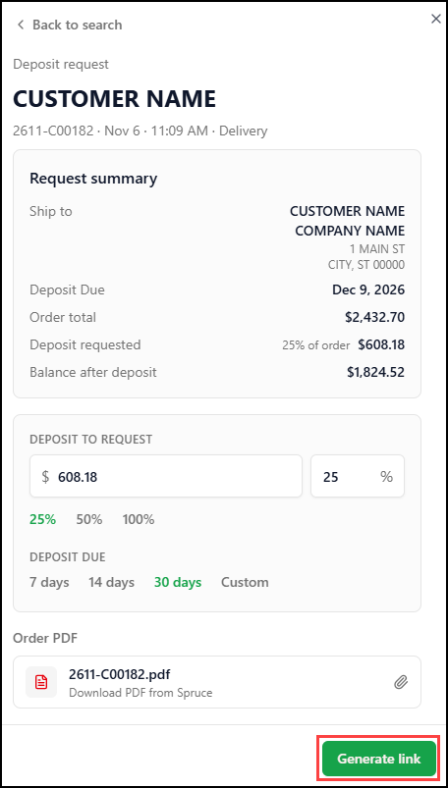
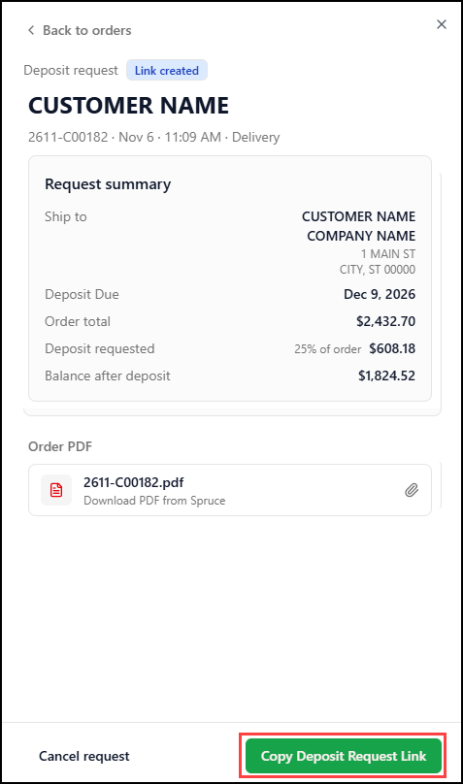
Drypowder > Deposit Request > Generate Link and Copy Deposit Request Link Boxes
8. We recommend you download the Order PDF and so you can attach it to the payment request email.
9. Click the Copy Deposit Request Link and paste it into an email message to the customer.
10. Open your email app. Write the email to the customer and attach the PDF document.
11. Paste the Drypowder link in the email.
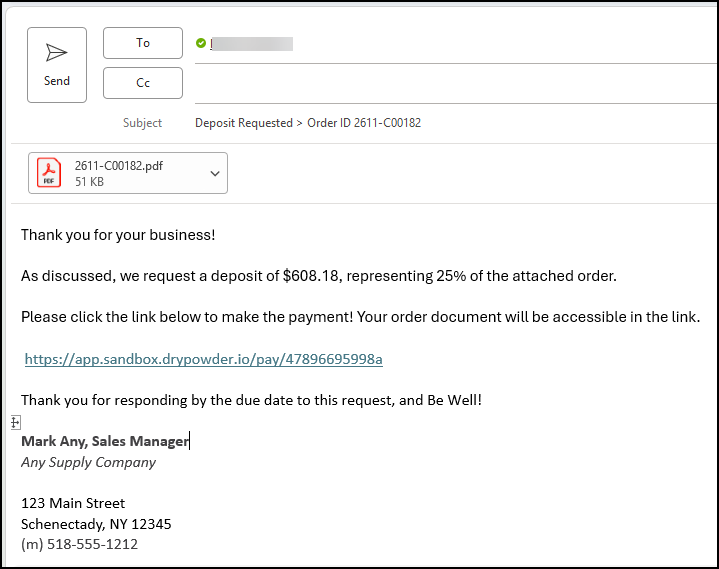
Email to the Customer with Order Transaction PDF and Drypowder Link
12. Send the email to the customer for payment.
When the customer receives the email, they click the pay link and the payment options display:
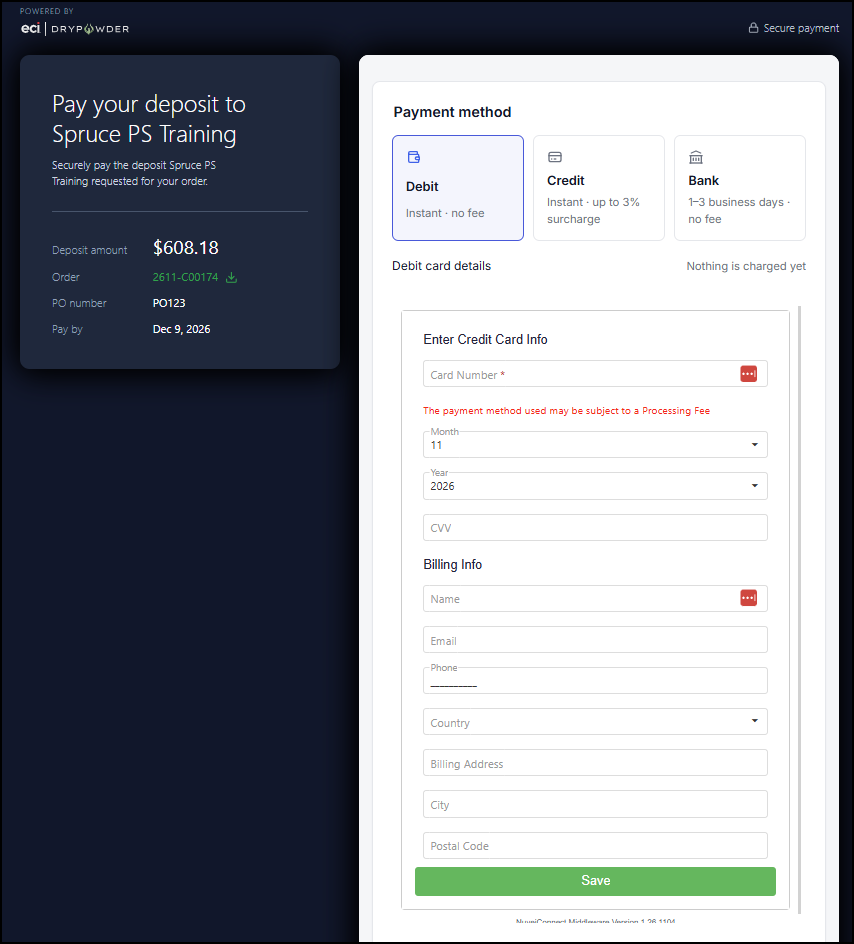
Drypowder > Payment Options
13. Customers choose a payment option (Debit, Credit, and ACH transaction) and enter payment credentials in the fields provided. They click Save to save these settings for future payments. The system evaluates the payment settings to determine whether the payment is subject to convenience fees or surcharges and updates the transaction accordingly.
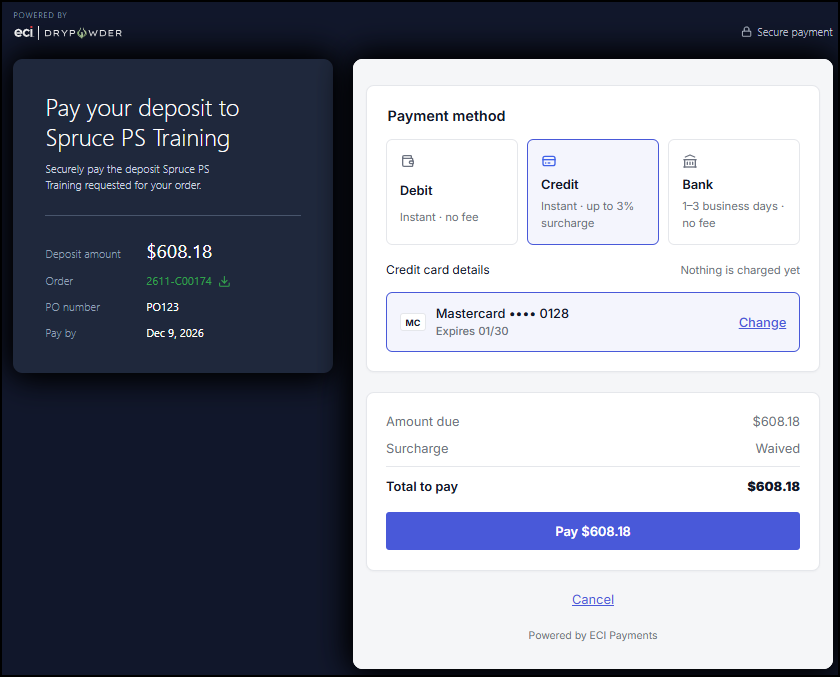
Drypowder > Finalizing the Payment
14. The customer clicks Pay to pay the transaction amount or clicks Cancel to start again.
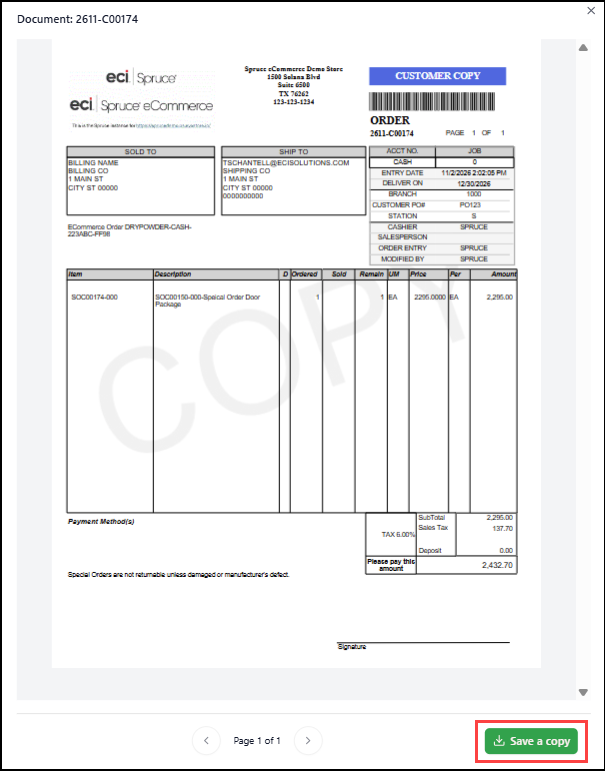
Customers can download the order document by selecting the Order download link in the box on the left. The Order Document displays.
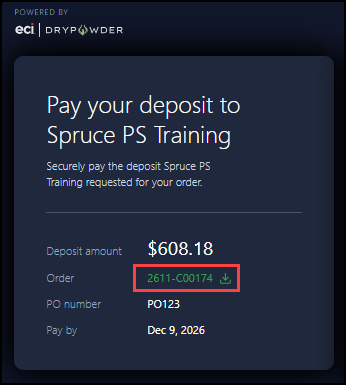
Drypowder > Download Order Document Link
15. Customers can save the document locally in PDF format by clicking Save a Copy.
The document saves to the Download directory by default, but they can choose a different folder.
16. When the customer clicks the Pay button, a confirmation message displays:
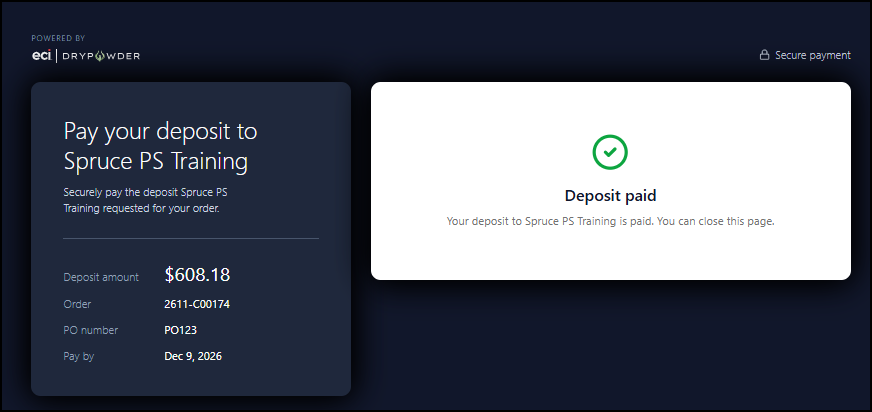
Drypowder > Payment Confirmation
17. The customer also receives a receipt via email:
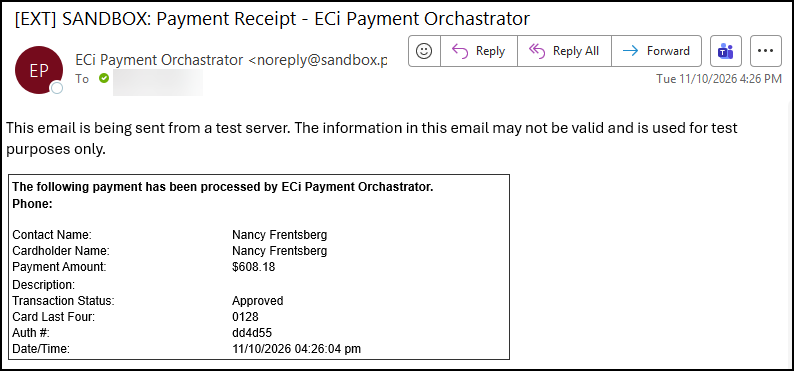
Drypowder > Email Receipt