The Account Global Modify utility allows users with account-specific permissions to make broad changes to the account records. This utility should be used with caution and restricted by user ID. Only accounts that are selected or entered in the grid area are updated during processing (F12). You use the filters to collect accounts and apply the selected changes to each account.
How does the Account Global Modify Utility Work?
There are key fields in all account records that affect how the application handles the account management processes. These fields affect account pricing, statement handling, tax location, and ecommerce payment handling among many other processes. When we add or update features that affect accounts, it is useful to have a tool that can modify groups of accounts records to change these field entry so you can take advantage of these new features we offer. The Account Global Modify utility lets you specify the field that needs to change, add the old entry and the new entry, and then gives you tools to collect the accounts you want to change. After you review the list carefully, you can apply the new setting to each account you verified. Because this utility is very powerful, this feature is restricted to system administrators to use. If you do not see the Point of Sale > Utilities > Maintenance > Account Global Modify option in the list, you cannot use this utility.
When we make these kinds of changes to the Account features, we provide specific instructions for making the Account Global Modify changes. Ask your ECI Support team about this feature or review the instructions below for more information.
Understanding the Filters
Filters are one way of adding accounts to the grid and are used in combination with the View (F8) function key. After setting filter criteria, press or select View (F8) to populate the grid with accounts matching the filter. After you click the View key, a message displays showing the number of accounts that were collected using this filter.
Only the accounts displayed in the grid will be modified during processing. Filtering can be used over and over (using different criteria) to build the list of accounts you want to modify. Accounts that are currently entered in the grid are not removed when additional filter selections are used. You can add and remove (delete) accounts to the data grid manually in addition to/instead of using filters. The presence of the account in the data grid determines whether the account will be modified, filters don't. Carefully review the accounts in the entire data grid before you choose Process (F12)!
Making Changes to Account Records Globally
To access the Account Global Modify utility, from the Main Menu, choose Point of Sale > Utilities > Maintenance > Account Global Modify. The Account Global Modify Utility form displays.
Note: You can also access this utility from the Receivables Menu option.
![]()
To apply a new field setting to one or more accounts:
1. From the Field Name list, choose the field entry you want to change for the accounts you are going to select.
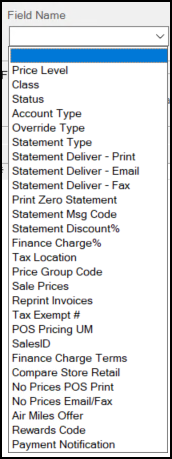
Note: The entries in this list may vary depending upon the features you have enabled.
2. If the field you chose could have more than one original value and you want to change all existing values to the New Value, select the Apply to all current values check box. If not, continue to the next step without selecting this check box.

3. In the Current Value field/list, enter or choose the existing value that you are changing.
Depending on the value you are changing, a standard current selection may already exist in a list form.
4. In the New Value field/list, enter or choose the new value you are changing the existing value to.


Important! If accounts that you select do not meet the Old Value entry you select, the application still updates the account value to the New Value entry/selection. Accounts in the grid are always modified during processing to match the New Value listed regardless of the Old Value setting.
5. In the Filter box, choose from the following options to collect the accounts you want to modify.
Note: You can only choose one filter at a time.

-
All Accounts
This option is selected by default and would add all accounts in the Account Maintenance list to the data grid. Unselect this check box to choose another filter option. -
Class
When you select this option, all of the accounts with the class you choose from the list will be added to the data grid. -
Acct Match
Use this field to enter the account ID of a single account you want to add to the data grid. -
Acct Type
From this list, you can choose either Cash or Charge-type accounts to add to the data grid.
6. When you have completed this selection, choose View (F8).
When you choose a filter with a lot of accounts associated with it, a confirmation message displays. Choose Yes to continue or No to choose another filter option.
When you choose Yes, the data grid updates to show the accounts you specified in the filter and the existing value for the field you are changing and the new value that will be added.
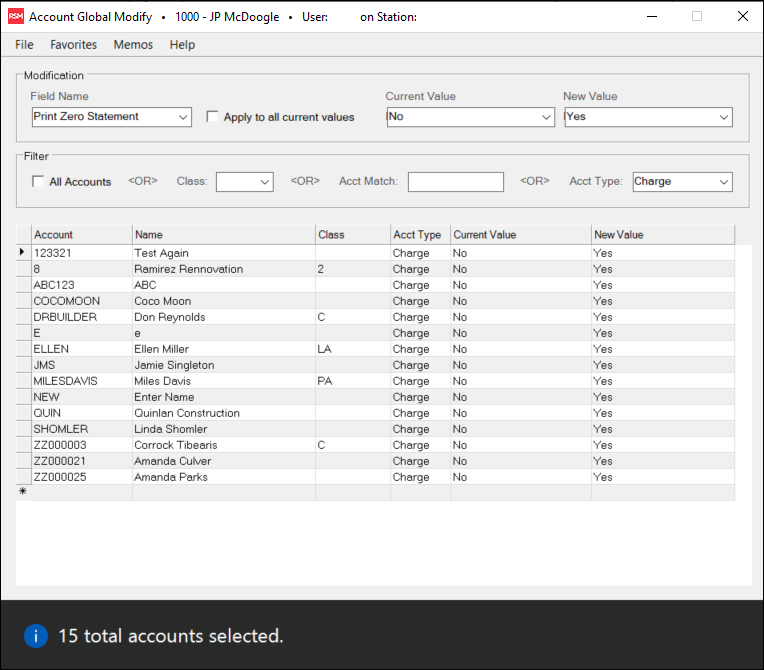
Account Global Modify with Accounts Matching the Selected Filter
7. Review the entries in the data grid carefully to ensure that each of these records should be modified in the way you have chosen. Continue based on what you find:
-
Delete any accounts that should not be changed by clicking the cell to the left of the row the account is on to highlight it, and click the Delete key or right-click the row and select Delete from the context menu.
-
Add additional accounts you want to change by selecting a new filter option and choosing View (F8) again.
8. When you are sure the data grid list is complete, and you have verified that the Current and New Values meet your needs, choose Process (F12) to change the account field records in the database.
IMPORTANT NOTE: There is no Undo button for this process! If you make this field change and it causes issues later, it may be possible to back out changes using a SQL database restore. The application does not document this change when you make it.
Pro Tip: Make an External Record of this Change
To make a list of all the accounts you modified and save it externally:
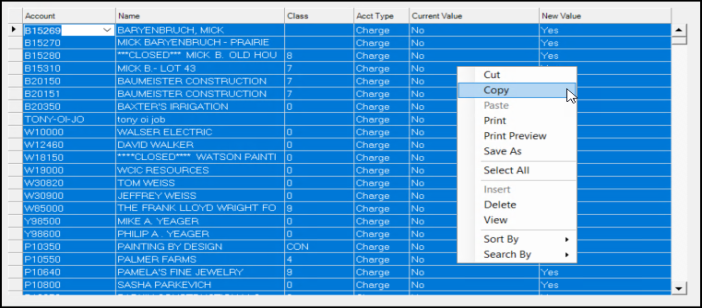
1. Right-click the list and choose Select All from the context menu. The application highlights all the entries in the data grid.
2. Right-click the list again and choose Copy. This copies all of the entries in the list, including the account IDs, the account names, the class assigned to each account, the account type of the selected accounts, the current and the new values you chose.
3. Open a text editor or a spreadsheet application and paste the entries into it.
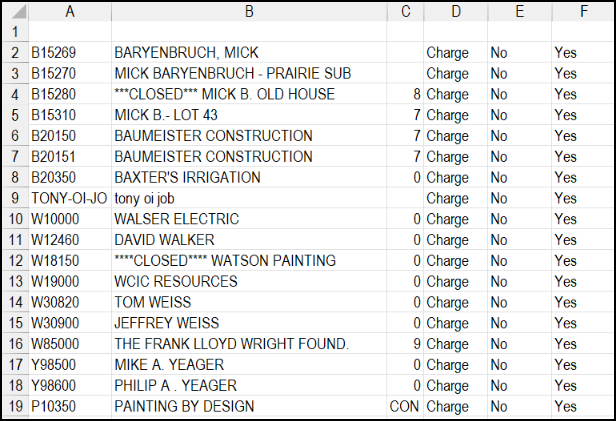
4. Save the file for future reference.
Example: Using Account Global Modify to set up Online Account Payment Automatically
If your business allows online payments, when customers submit their online payments, the application can process those payments automatically if you authorize it using the Account Global Modify process. You can set this option globally and, for particular accounts, you can specify whether the payment is applied as the customer requests or not.
To take and process orders and payments online, you must have the Ecommerce parameter enabled and your Manage API Keys setting in the Support Utilities must be set to Active. You can check with your ECI Support team to verify that these options are set for your business if you are unsure.
Setting the Online Account Payments Globally
The Payment Posting Rule allows you to apply the customer’s payment to their account as submitted. You can use these instructions to apply this rule to multiple accounts or use the instructions in the next section to apply the Payment Posting Rule differently to a specific account.
To set the online payment posting rule for many accounts:
1. From the Main Menu, choose Receivables > Utilities > Account Global Modify. The Account Global Modify form displays.
2. From the Field Name list, choose Payment Posting Rule.
Note: If this feature is new, there are no existing values.
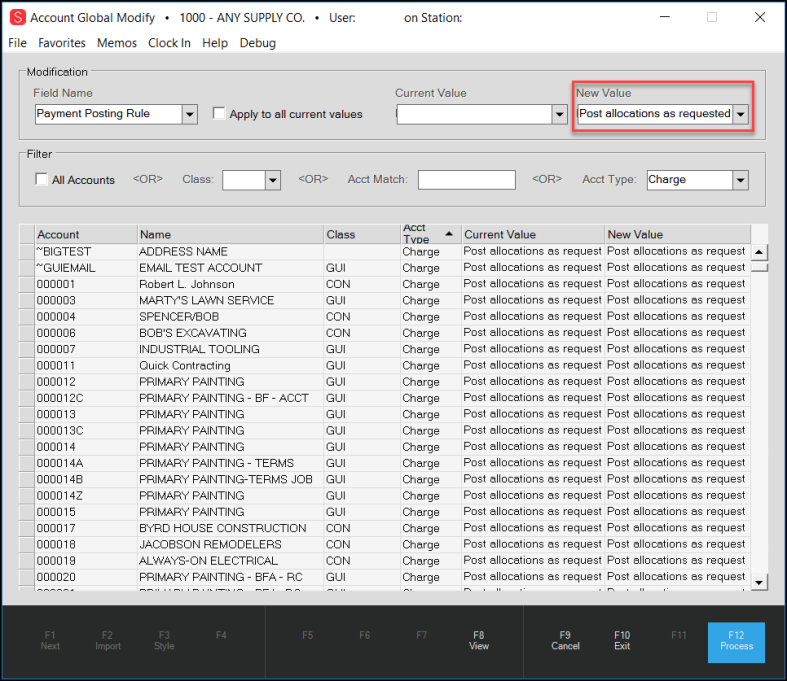
Account Global Modify with New Value Selected
3. In the New Value list, choose the value you want to apply to the selected accounts. Options include:
-
Post allocations as requested
Choose this option to post online payments to the selected accounts automatically. -
Post ignore allocation request
Choose this option to post online payments to the selected accounts manually.
4. In the Filter box select the criteria to find the accounts to which this value should apply. When you collect them, they display in the data grid. You can delete accounts from the data grid that are not appropriate for the change by highlighting the row and clicking the Delete key on your keyboard.
-
All Accounts
Select this check box to collect all of the account records in the application and display them in the Account Global Modify data grid. You may want to do this if the change you are making applies to all accounts or most accounts. -
Class
If the change you are making applies only to accounts of a particular Class, select the Class from the list.
Note: If the change applies to more than one class, it makes sense to follow this process twice, selecting one class at a time. -
Acct Match
In this field, enter the Account ID of a single account you want to change. -
Acct Type
Using this list, you can collect all the accounts that have either a Cash or Charge account type.
In this example, we select all of the Charge accounts for this change.
5. Choose View (F8) to collect the accounts that match the filter criteria you selected.
When you select criteria that has a significant number of records as a result, a confirmation message displays. Click Yes to continue.
6. Review the list to ensure that the data grid includes only the accounts you want to modify.
If you see an account in the list that you do not want to include in this change, you can delete the entry from the list using one of these methods:
-
Highlight the row and select the Delete key, or
-
Highlight the row and right-click it; then choose Delete from the context list.
7. When the list of account is right, choose Process (F12) to save this setting to each account.
If you set this option for a group of accounts and decide later that it should not apply to a specific account, you may be able to change the settings on the account manually in the account's Account Maintenance form. In this case, you can reset the automatic account payment posting rule in the Ecommerce tab of the account record.