Item Maintenance
Use the Item Maintenance form (Inventory > Database > Item or (ALT-I) selection) to add, modify, or delete items that are in your company's inventory. Item Maintenance is available from the Database menu in a number of application areas including Point of Sale, Purchasing, and Inventory.
There are two components to an "item" in your inventory: common and branch. We use the term "branch" in the software to indicate an independently operating retail location maintaining its own inventory as well as certain other data.
Common Data
Common information (data) is shared for the item across all branch locations. Common information includes the SKU (item code or number), group/section, description, units of measure, and other settings. Changes to common information can be restricted by user security. Most common information is listed in the upper area of the form and on the "Common" folder tabs.
Branch Data
Branch data is specific to a particular location. This information would include quantities, pricing, and purchasing preferences. For multi-branch companies, items can be added to any branch location that the user has permission to access. When entering an item that exists in another branch location, the form completes using the item's master branch settings automatically. Changes (if any) can be made to the copied settings prior to processing with certain exceptions (the base unit of measure must be the same for all branches, for example).
You can add new items with quickly by using the Template (F5) or Catalog (F6) functions. The Import (F2), Wizard option can be used to add items using data from an outside source file such as a spreadsheet.
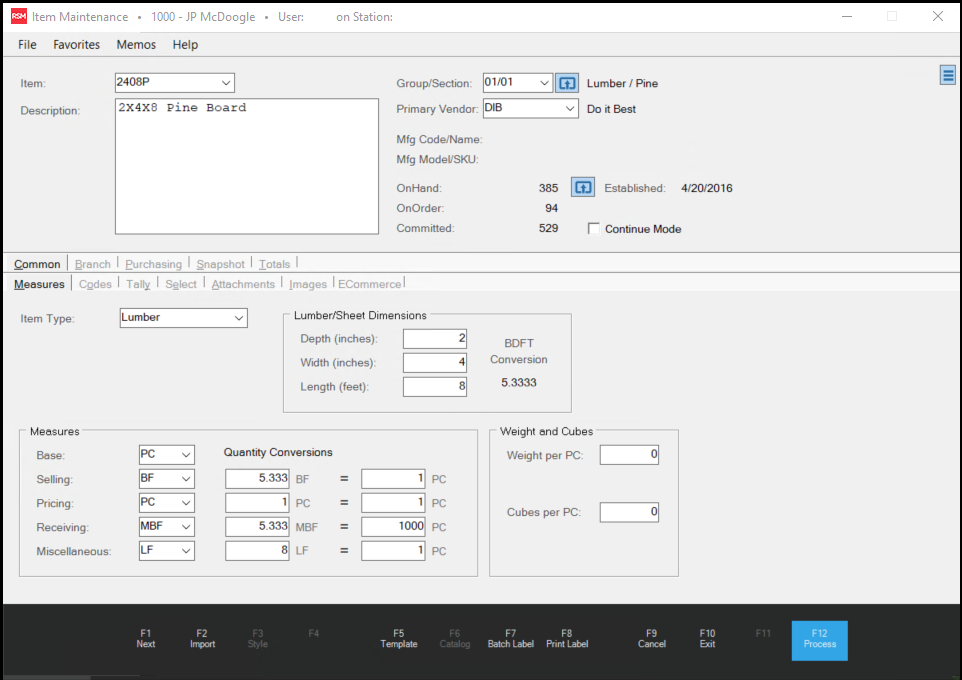
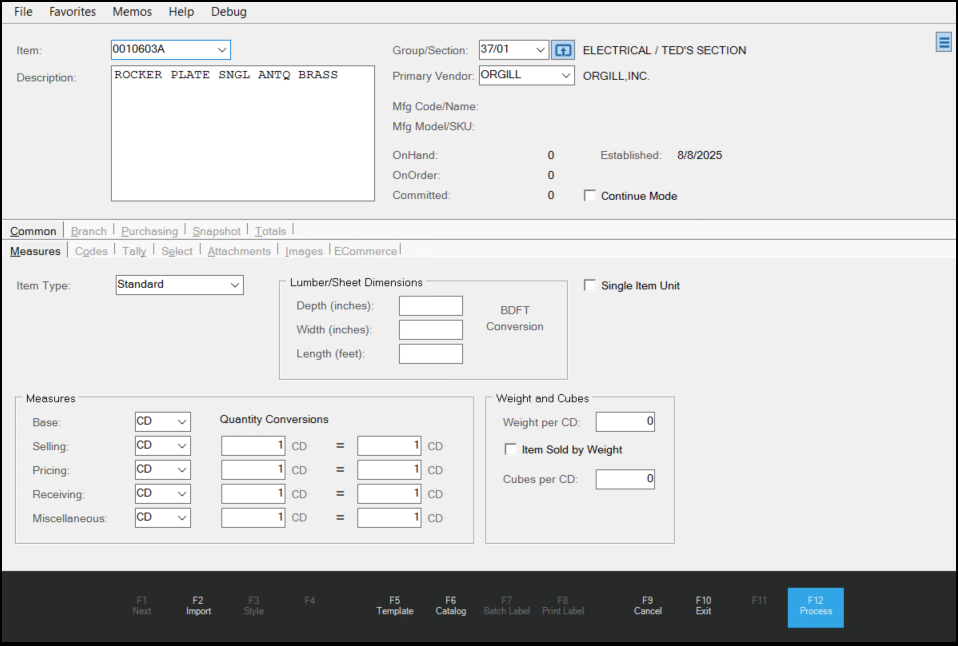
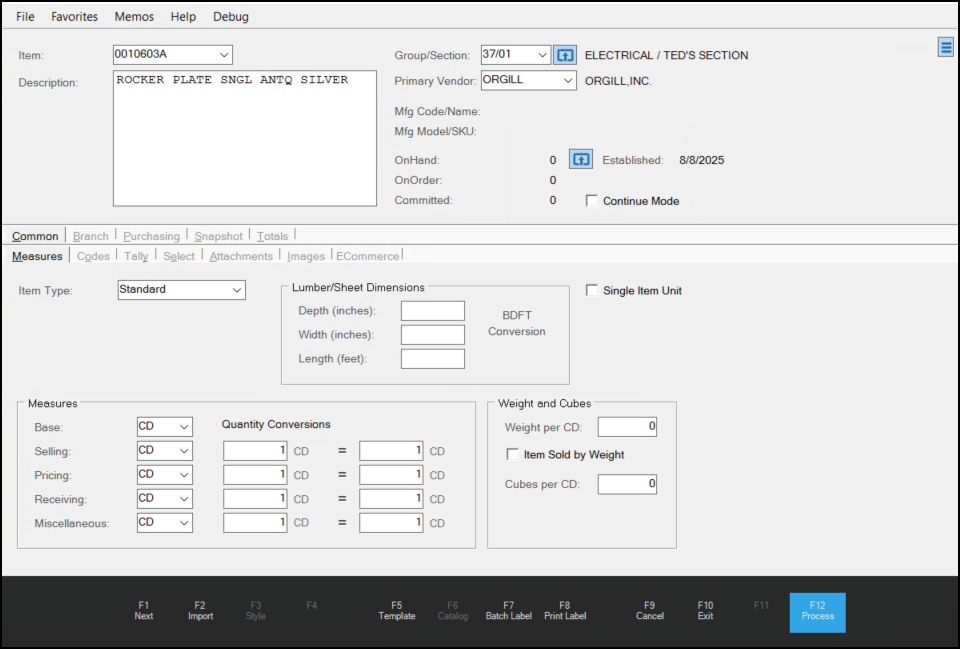
The form area (above the folders) has basic information about the item. This includes the item's code, text description, group/section (used for organizing inventory), and primary vendor. On-hand, on-order, and committed quantities are displayed as well as the item's established date.
Note: To learn more about Cubes as a way of managing volume information, see Using_Cubes_to_Calculate_Volume_for_Delivery_and_Storage.
Continue Mode
In Item Inquiry or Item Maintenance, the Continue Mode feature allows you to choose Next (F1) to move through similar items when performing a partial search. We have updated this feature to retain the item currently being viewed or edited when you choose Cancel (F9). When the form clears, immediately choosing Next (F1) will now load the previously viewed item rather than the first item from the search. In speaking with customers, this made more sense than the previous behavior.
Adding an Item from another Branch
To add an item to a branch where it doesn't already exist, sign into the desired branch location (or change your branch) and then enter the item's SKU in Item Maintenance from the Item field and press the TAB key (you won't be able to select the item until it's been added to the new branch). This references the "common" item and uses the first "store" record located to be used for any branch information. If you save the item, using the Process (F12) function, it will add it to the branch. You may want to first review and adjust item settings to match the needs of that location.
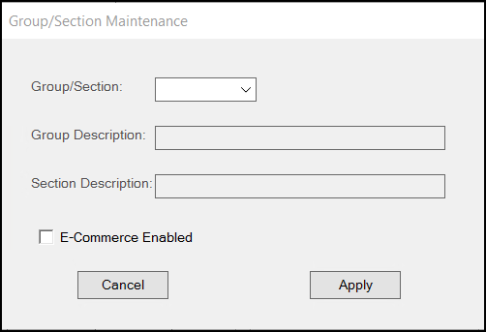
Group/Section
Inventory is organized into groups and sections. "Groups" are the primary level of organization, and "sections" are a sub-level within each group. Up to 255 groups may be created, and within each group, up to 255 sections may be defined. This provides tens of thousands of potential sections. Groups and sections have both a number (01-255) and description associated with them. When displayed, a slash "/" is used between the group and section numbers (group on the left, section on the right).
Consider how your company's current inventory is organized. Inventory might be organized based upon location (retail space vs. yard), vendor, type of product (paint, lumber, plumbing, etc.), or how it's ordered (hard goods, commodities, seasonal, etc.). Groups and sections are used in many areas of the software.
Here are a few ways groups and sections may be important:
-
Groups and Sections are used along with Automated Purchasing. It's a good idea for items that would be ordered together to be organized the same way in specific groups and/or sections.
-
Groups and Sections are used with Inventory Global Modifications. It's a good idea for groups and/or sections to represent items which share similar settings and preferences.
-
Groups and Sections can be used with many inventory reports. The importance of this depends upon how extensively and often such reports are used. Other considerations can often outweigh this.
-
Groups and Sections can be used along with E-Commerce (on-line, apps, etc.) to organize your product listing.
Use the special form ![]() , located next to the group/section selection box, to add, modify, or delete group and section codes. For more information, click here.
, located next to the group/section selection box, to add, modify, or delete group and section codes. For more information, click here.
Group/Section Maintenance
|
 displays as well.
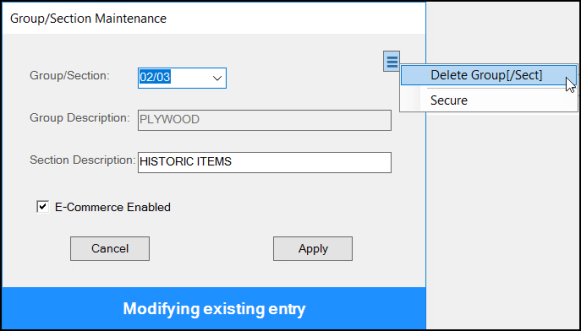
On-hand, On-Order, and Committed Quantities
The on-hand is the current quantity in stock for an item. On-hand is not necessarily the quantity that is available for sale as some of the stock may be reserved for customer orders (see the "committed" quantity). On-order quantity represents the amount of the item that is currently ordered on purchase orders which have not yet been received. Purchase orders can be "saved" without marking items as ordered, so an item's inclusion on a purchase order is not necessarily going to mean that the on-order quantity has been affected. Committed quantity is the amount of this item that has been allocated to open customer orders.
These quantities are all represented using the item's BASE unit of measure. It's important to consider this when assigning units of measure to an item.
Purchase Order builds don't use on-order or committed quantities directly. The software also maintains the portion of the on-order and committed quantity that is due within a time period based on the item's days supply and lead time settings.
Important. Note: On-hand, on-order, and committed quantity amounts are not impacted by negative orders. This is by design, because if the item is returned, meaning there is something wrong with the product, the business would return the item to the vendor. Therefore, you would not include it in your on hand, on-order or committed quantities counts.
Description
This text area is used for entering or modifying an item's description. Descriptions can be a maximum length of 1088-characters. Every item actually maintains 3 separate descriptions: full, short, and search. The full description maintains the description "as entered" including special hidden characters such as line feeds and carriage returns. This description is usually divided into an array of individual lines of text that is used for either printing or display when all or most of an item's description is needed. The short description is the first text line of the full description and contains a maximum of 32-characters. This is used whenever a full description isn't idea such as in selection listings. The search description is the full description optimized for use with description searches. By optimize, we mean that the description is altered when necessary to remove anything that might prevent accurate matches on a word or phrase in the description. This requires removing sequential space characters as well as stripping out any non-printing characters such as line feeds and carriage returns.
Item descriptions are not branch specific. If you modify an item description and the item belongs to a material list, the description used in the material list will also be updated.
Primary Vendor
When applicable, it's possible for each branch (location) to assign a different primary vendor to the item. When initially adding a new item, however, the primary vendor designated will be the default for all branch locations at that time. After an item is saved, changes to the primary vendor can be saved for one or more branches. Primary vendor is useful as a reference but is also used by the Order Entry (Purchase Orders) transaction. Purchase Order builds can be processed so that only items with a primary vendor matching the Purchase Order are included. In addition, primary vendor is used when copying non-stocked items that were not previously ordered to a new purchase order.
Established Date
This date usually indicates the date when the current item was added to the database. This date is not specific to when the item was added to a particular branch (location), however. In some cases, if your inventory data was converted/loaded from a previous software/database, the date may originate from the converted data (established date may not be available in all cases).
Folders
Item Maintenance, like many utility maintenance forms, has a set of static folders. These folders cannot be minimized like the folders found in transaction areas. Greater detail about each folder tab is discussed in the following set of topics. Use the links below for additional information.
Common
Measures
Codes
Tally
Select
Attachments
Images
ECommerce
Branch
Codes
Pricing
Purchasing
Snapshot
Totals
See Also:
Using the Import (F2) Wizard to Add Inventory
Using Cubes to Calculate Volume for Delivery/Storage
Disabling or Deleting an Item
Adding Items using the Catalog Feature
Adding Items using the Item Template Feature
Using Cubes to Calculate Volume for Delivery/Storage
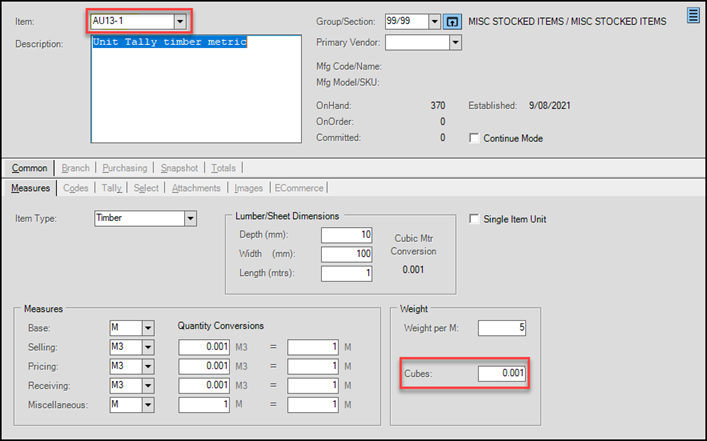
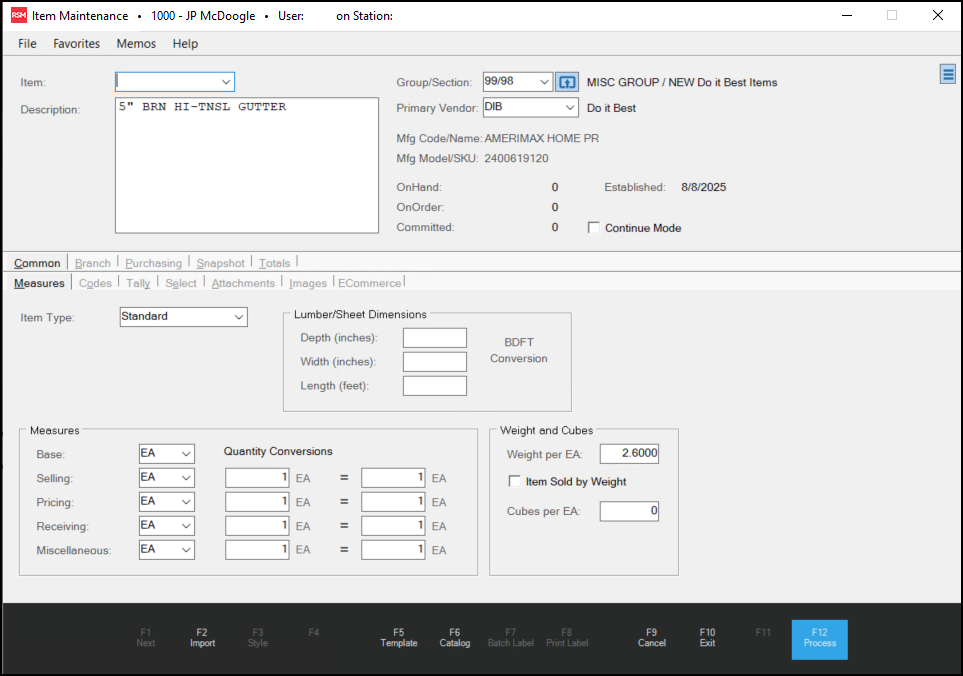
There is a measurement type, Cubes (cubic unit of measure), which you can use for delivery, purchasing, and storage calculation purposes. It gives you a way to estimate the amount of space a product will take up. You can use weight and cubes together to determine whether an order is sized appropriately for a delivery vehicle, or to determine whether the amount of storage space you have is sufficient for the items you are purchasing. Using Cubes can give you visibility into the dimensions of materials for Point of Sale and Purchasing so you can predict and adjust quantities for specific delivery vehicles and for your available storage space.
Cubes calculations are based on the base unit of measure for each item, calculated using the regional settings appropriate to your region (inches, feet, centimeters, meters, etc.). You use the same calculation method to determine cubic measurement: length x width x height (including packaging) to determine the cubic value per item. If you have already populated the Lumber/Timber/Sheet Dimension fields in the Measures tab of the Item Maintenance form, this calculation is provided:
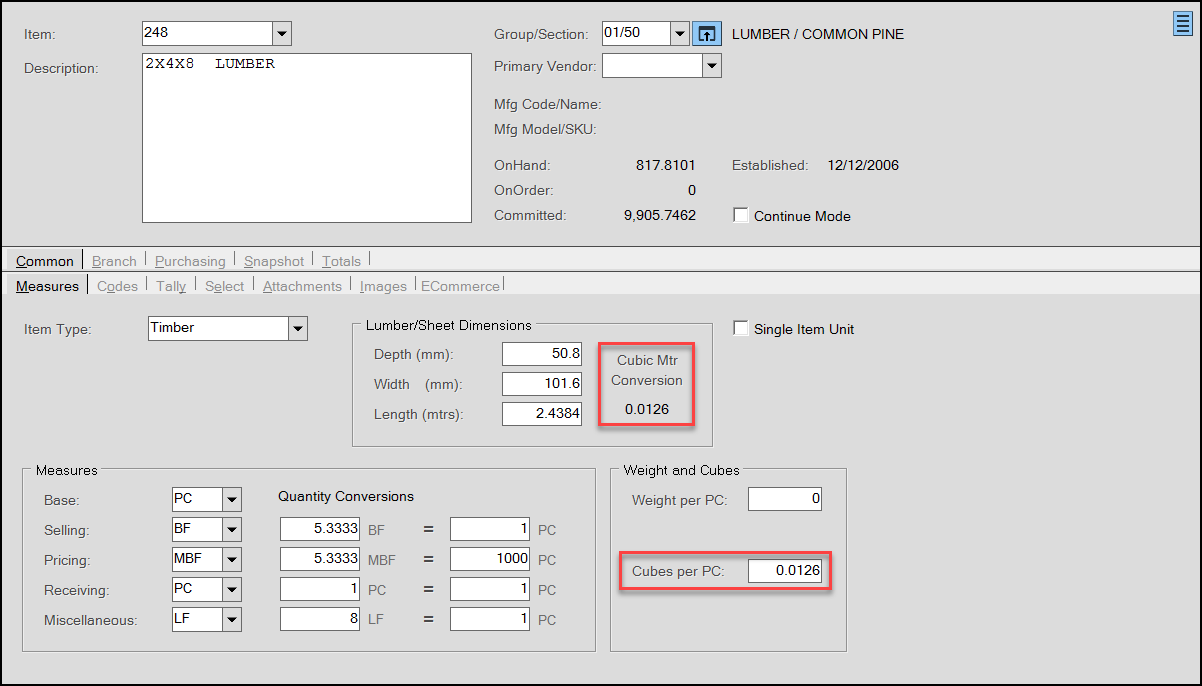
Item Maintenance Form with Cubes Field Highlighted
Important Note: We do not enter this information for you, as only you can determine the appropriate measurement process for your business and products. We recommend that you consider this calculation carefully.
After you add a Cubes entry to an item in Item Maintenance, the application uses it to determine the cubic volume of the items you add in Point of Sale (data grid, folders, and documents), Purchase Order Entry, Delivery, Load Scheduling, and Truck Maintenance, whenever you use these features. We cover these updates in this section.
Note: You do not have to update every item in your inventory with this information. Small items (and you can decide what that means), may not affect storage or transportation that much. Consider the items you transport or purchase in large quantities for this feature.
Defining Cubes Entries
To include Cubes values in Point of Sale, Delivery, Purchasing, etc. you need to add the information to the item records first. The Cubes information you add there is used throughout the application to calculate the volume of the items you sell. It makes sense to use the same measurement unit (feet, meters, etc.) for all inventory items so the application can compare like values when evaluating space. Consider this scenario:
ABC Building Supply decides to use cubic feet (or meters) as the appropriate Cubes measure for their business. When considering the products to sell, they could look at how they measure their inventory to determine the appropriate cubic measurements and use a variety of strategies:
-
for lumber, if you use a base unit of measure of EA, you could divide the board footage for an item by 12 (feet) or 10 (meters)
-
for insulation, you could use the cubic foot/meter value directly from the supplier
-
for sheet goods, which may also use EA as the as the unit of measure, you can use an online calculator tool to define the cubic measurement, like https://everydaycalculation.com/wood-cft.php or https://www.thecalculatorsite.com/misc/cubic-meters-calculator.php
-
for any item type, you can do the math: Length (ft/m) x width (ft/m) x depth (inch/mm) /12 or /10
It makes sense to use the same “units” of measure for all your items that you want to quantify by cubes.
Before you get started, consider these guidelines:
-
Base your cubes calculations on the Base UM of the item.
-
In general, the cubes calculation is Length x Width x Depth of the base unit of measure plus any packaging that may affect the dimensions of the item for storage or delivery
Using a uniform measurement type allows the application to apply the same measurements when you request space assessment for delivery or storage.
When adding Cubes for Unit Tally items, set the Cubes entry to include the Cube values that tally item is based on.
Item Maintenance Form > Cubes Entry for Unit Tally Item
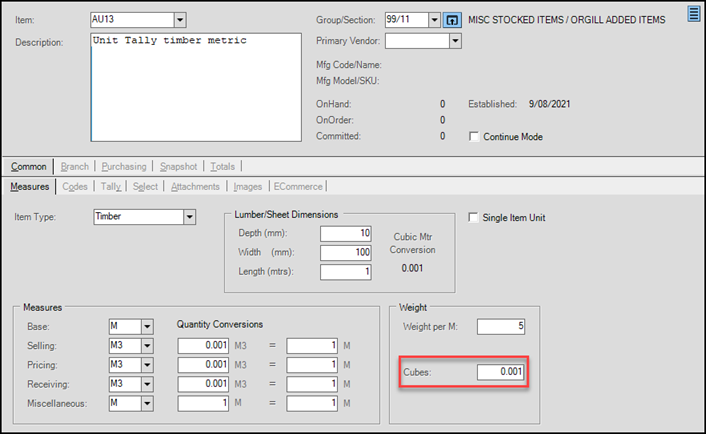
Item Maintenance Form > Base Unit Tally Item with Associated Tally Item Cube Entry
Adding the Cubes Values to Items in Item Maintenance
After you decide how to calculate the Cubes values for your inventory items, you can add them to the Cubes field in the Item Maintenance form. Anyone with inventory entry permissions can add Cubes entries.
To add Cube values to an item:
1. From the Main Menu, choose Inventory > Database > Item to display the Item Maintenance form.
2. In the Item field, select the item you want to update.

Item Maintenance Form > Cubes Field Highlighted
3. Using the length, width, and depth values of the base item, calculate the cubes value for the item.
4. In the Cubes field, enter the result of the cubes calculation or use your own process to quantify the Cubes entry.
5. Choose Process (F12) to save the Cubes value.
Disabling or Deleting an Item
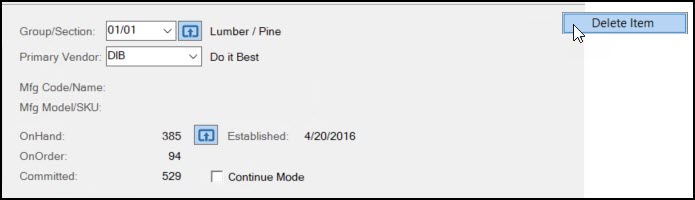
You can use the Menu Marker  (if it is enabled) to access the Delete Item feature to either change the status of an item to Disabled or delete it. We recommend that you disable an item rather than delete it if the item has Point of Sale activity associated with it. Disabled items don't appear in selection lists or reports (except in the database area).
You can delete an item safely when an item either has no activity or no recent activity. Deleting an item removes the entire record from the database.
Rules for Deleting an ItemTo delete an item from Inventory, the following must be true for All Branches where the item exists:
|
Restrictions are in place in order to maintain the integrity of the database and to prevent issues accessing current data by users. Deleting an item removes the item from the inventory tables (InventoryStore and InventoryCommon), but doesn't remove the item from most other tables that may have references to the item. Documents should not be affected unless the document references data from the inventory tables directly. It is more likely for reports to be affected since they use current data and do tend to reference inventory data directly. Deleting items shouldn't cause errors; however, in the unlikely event that it does, you can temporarily re-add the item.
It is also possible to rename and merge items using the Merge/Rename Item utility.
Adding Items using the Template (F5) Feature
You can use existing items as templates for new items to set field values by default in the Item Maintenance form. This updates most, but not all, fields found in the form. Some fields, which would normally be unique to an item (or must be), are not set and must be manually changed if needed. A few examples of fields that are not set by the Template (F5) function are the item's report sequence (Select tab), vendor item SKUs (Purchasing tab), and Tally member items. It is a good idea to consider the settings you want the new item to have when selecting the template item. Find an item that has those characteristics before you get started.
To create a new item using an existing item as a template:
1. From the Main Menu, choose Inventory > Database > Item. The Item Maintenance form displays.
2. Enter the new item ID in the Item field.
3. Choose the Template (F5) key to display the Default using as Template box.
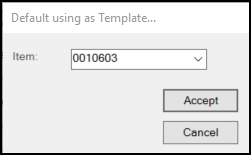
4. From the Item list, choose the item you want to use as a template for the new item you are creating and click Accept. The item you selected displays in the Item Maintenance form without the Item ID.
5. Type over or select new settings for the item you want to create in the fields and lists provided. Be sure to check all the tabs to ensure the data you are adding is right for the new inventory item.
|
CAUTION!The Template function overwrites most field values in the form, even if previous selections or values have been specified. This is true when you modify an existing item as well. For new items, it's best to use the template before specifying any settings for the new item. There is no "undo" in this case. For existing items, any fields changed by the template will be saved if you choose Process (F12) permanently replacing the saved values. Choosing Cancel (F9) before choosing Process (F12) prevents the template changes from being saved. |
6. Choose Process (F12) to save the item information. If you have not completed all the required fields, a list displays to help you complete them. Complete the required fields or choose Accept Warnings (F12) to continue. The Branch list displays.
7. Choose the branch check boxes beside each branch this item will be sold from and click Accept.
Adding Items Using the Catalog (F6) Feature
The Catalog (F6) function allows you to add an item to inventory that is in the Vendor's catalog. You need to know the vendor's SKU to add this item to your inventory.
To look up an item's ID in the Vendor's catalog, from the Main Menu, go to Inventory > Inquiry > Catalog and choose the Vendor and look for the Vendor's SKU for the catalog item you want to add.
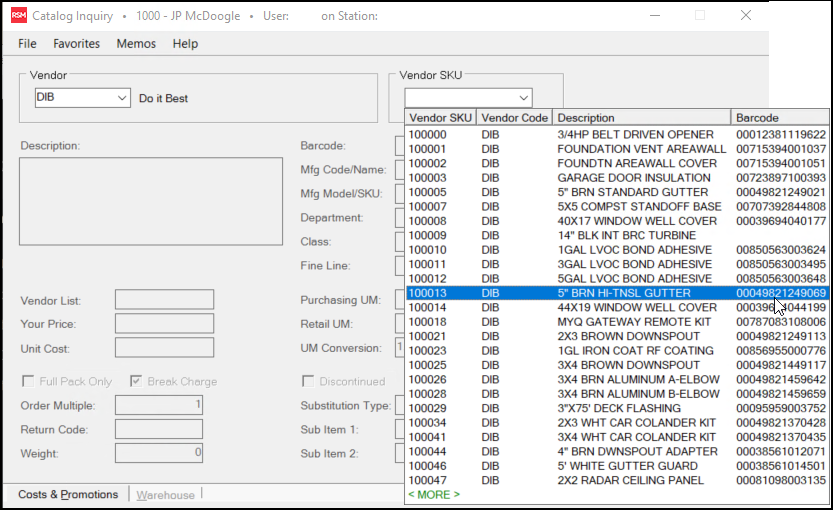
Catalog Inquiry with Vendor and Vendor SKU Displaying
When you have the Vendor ID (in this case, DIB) and the Vendor SKU (100013), you can add this item quickly to your inventory. You can also search for the vendor catalog entries using the process described in the Note in step 3 below.
To add an item to inventory using the Catalog (F6) option:
1. From the Main Menu, choose Inventory > Database > Item to display the Item Maintenance form.
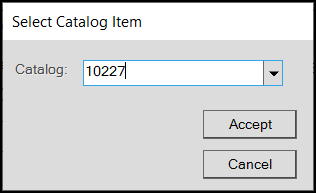
2. Choose the Catalog (F6) option to display the Select Catalog Item box.
Select Catalog Item Box
3. From the Catalog list, enter the vendor's SKU and click Accept. The Item Maintenance form updates with the details from the catalog.
Note: You can also enter the vendor ID in the Catalog field, right-click the list and choose Vendor from the context menu to see a list of items from that vendor's catalog. From there you can choose the item you want to add to inventory from the list.
 Item Maintenance Form with Catalog SKU Displaying
4. From here, you can enter the SKU you want to represent this item in your inventory and update the tabs with the other required entries as needed.
5. When you complete your entries, choose the Process (F12) option to add the item to your inventory.