Tags & Labels > Batch Maintenance
The Batch Maintenance Utility allows you to consolidate and manage your tag and label batches and batch items, which you specify in the Item Maintenance and Inventory Receipts forms. When you add an item to a batch list, that setting is saved by branch, date, and user ID so that each user with batch permissions can create their own batch list. Special permissions are required to access this utility. If you log into a different branch, you can save the items to a different batch, even if it is tied to your User ID.
See Also:
Adding Items to a Batch (Item Maintenance)
For users who have Batch Maintenance permissions, we have updated the Item Maintenance form to add two new features. These users can add items to their Tags and Labels batch list and print labels for a specific item directly from this form.
To add an item to a batch and/or print tags/labels for an inventory item:
1. From the Main Menu, choose Inventory > Database > Item to display the Item Maintenance form.
2. From the Item list, select the item you want to add to a batch or print a tag or label for. The item details display.
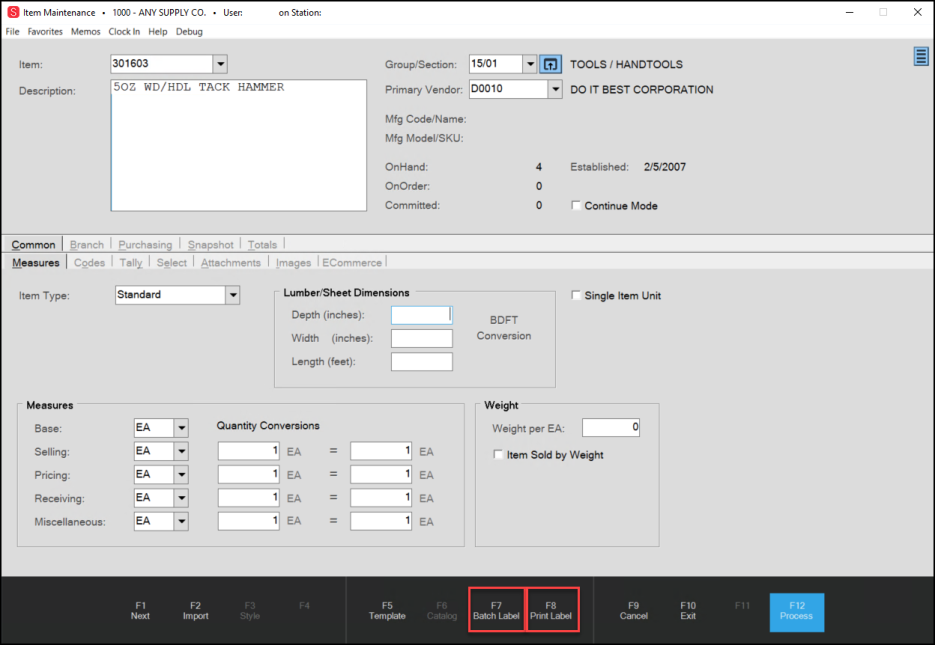
Item Maintenance Form with Tags & Labels Features Highlighted
3. To add this item to your current batch, click Batch Label (F7).
A confirmation message displays when the item is successfully added to the user’s batch list.
Note: You can also select this option by right-clicking the Item drop-down arrow and selecting Batch Label from the list.
4. To print a label for this item, choose Print Label (F8).
Note: You can also select this option by right-clicking the Item drop-down arrow and selecting Print Label from the list.
One of the following happens:
-
If the station does not have a default label template selected, the application displays the Label Template Selection box.
From the list, choose the default label template you want to use to print this item label and click Accept. The application saves this template as the station’s default template and uses it to print the label for the item. -
If the station has a default label template selected, the application prints the label using that template setting.
A confirmation message displays when printing has completed successfully.
Adding Items to a Batch (Inventory Receiving) and Printing Receipts
You may want to create labels or add items you receive to a batch during the receiving process. Ensure your station has correct label printer settings before you start, or the Print Labels check box may not display.
Note: This feature was not designed to create Special Order labels. Please use the Tags & Labels Utility for printing Special Order labels.
To add a received item to a batch and/or print tags/labels for a received item:
1. From the Main Menu, choose Purchasing > Receipts to display the Inventory Receiving form.
2. From the Vendor list, choose the vendor whose items you are receiving.
3. Import or receive the appropriate Purchase Order to display the received items in the data grid.
4. Choose Process (F12) to process the receipt. The Process Session Document displays.
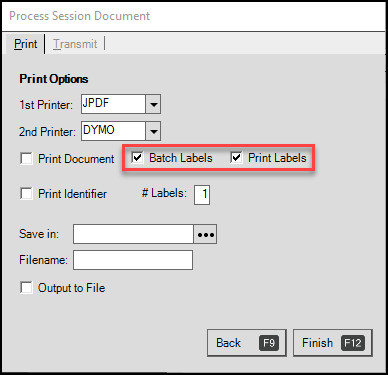
Process Session Document with Batch Labels and Print Labels Check Boxes Selected
5. To add the items in the data grid to a batch, choose the Batch Labels check box and in the # Labels field, enter the number of labels you want to add to the batch.
6. To print labels for the items in the data grid, click the Print Labels check box and in the # Labels field, enter the number of labels you want to print.
7. When you have completed these selections, choose Finish (F12).
Preventing Items from Batching and Printing
If you do not want to batch and print an inventory item, there is also a setting in the Item Maintenance form to prevent that.
To prevent the application from batching and printing an item:
1. From the Main Menu, choose Inventory > Database > Item to display the Item Maintenance form.
2. In the Item list, choose the item you want to prevent the batch and print settings for.
3. Choose the Codes tab.
4. Enter N in the Print Labels box to prevent this item from being added to a print batch.
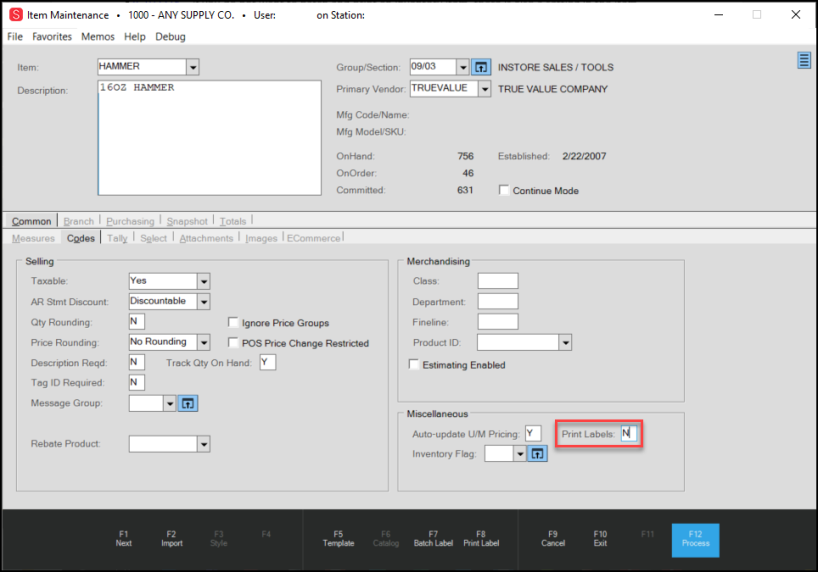
Item Maintenance Form > Codes Tab > Print Labels Box Highlighted
5. When you have completed this setting, choose Process (F12) to save this change.
Working with and Printing Tags and Labels Batches
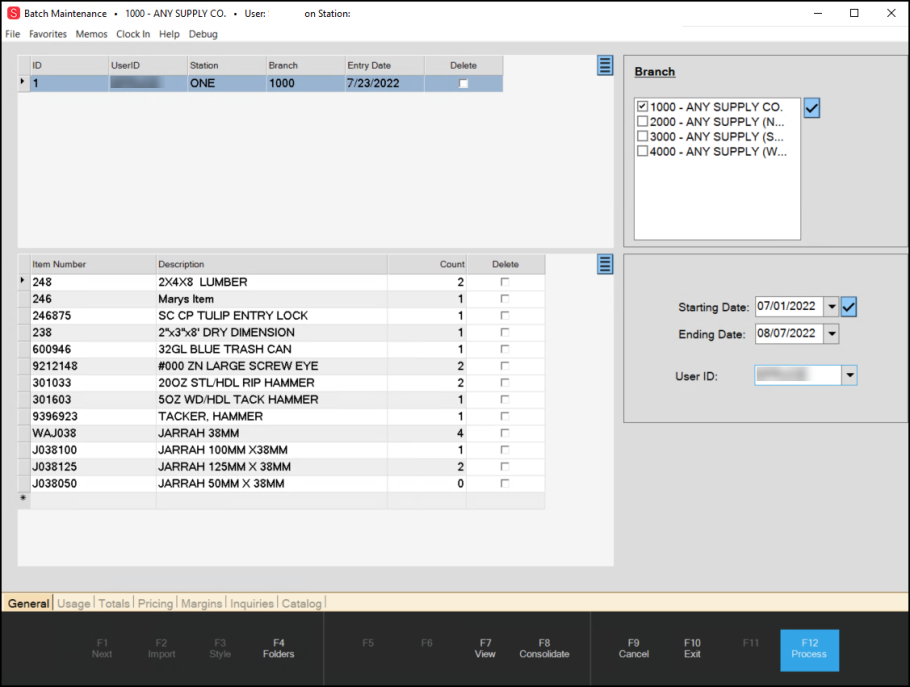
After you have created your batches and are ready to work with them, use the Batch Maintenance Utility. Batches are tied to your User ID and are typically restricted by branch.
To work with your tags and label batches:
1. From the Main Menu, choose Inventory > Utilities > Tags & Labels > Batch Maintenance to display the Batch Maintenance form.
![]()
Batch Maintenance Form with Some Entries
The application selects Branch 1000 by default.
2. Choose the following depending upon the batch items you want to display:
-
Branch
In this list, select a check box beside the branch that contains the batch(es) you want to view. You can choose any branches you have access to and save batch items to. No items display if you do not have items associated with a selected branch or do not have access to that branch. (Required) -
Starting Date, Ending Date
Enter/select the date range of the batch in the fields provided. -
User ID
Choose your user ID from the list to display your batch items, or leave this field blank to show all selected batch items for that date range and selected branch(es).
3. Choose View (F7) to display the saved batch items.
Batch Maintenance Form with Entries
If more than one batch meets your search criteria, more batches display in the list at the top of the page. The list at the bottom of the page reflects the items in the selected batch. To see the folder details of an item in the list, click the item and choose the Folders (F4) option to display the folder details.
4. From here, you can manage the list of items for printing, consolidating, and deleting items you no longer need to print.
-
To delete an item in the batch, select the Delete check box in the row of the item you want to delete.
-
To delete a batch, choose the Delete check box beside the batch label at the top of the page.
-
If more than one batch displays and you want to consolidate the entries in the list into one batch, choose the Consolidate (F8) option. A prompt displays.
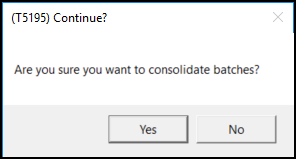
-
Choose Yes to Consolidate the batches or
-
Choose No to leave them separate.
The application makes this change and displays a confirmation message. If you select Cancel after consolidating batches, the application returns the batch items to the original batches.
5. When you are ready to process your changes, choose Process (F12). The application makes your changes in the list. You cannot retrieve deleted entries, but you can add them to another batch and consolidate them into the batch again.