Setup MicroSoft 365
The following will walk you through the required steps to allow users to use different MS365 email addresses, and will resolve the "SendAs Denied" error from the MS365 SMTP Server.
Please note that it can take up to 30 minutes for the Microsoft 365 authentication server to validate these settings.
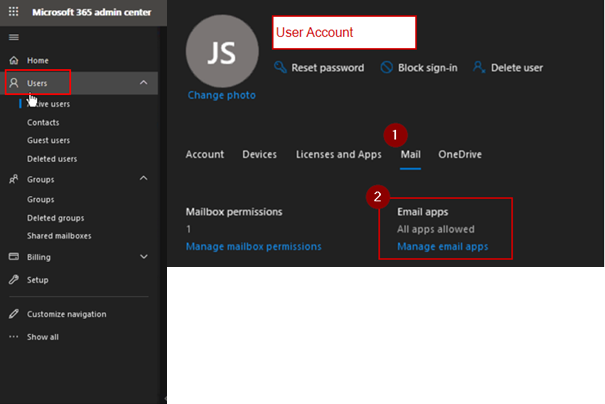
From the MS 365 Admin Center
Set the following for each user that will need to send email as the account. This will need to be performed by your site Admin.
-
Select the "Users" menu option
-
Select a user and the User menu will slide out
-
Select the "Mail" tab
-
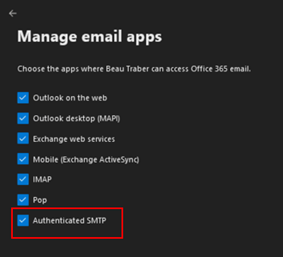
From "Manage email apps" ensure that "Authenticate SMTP" is selected
-
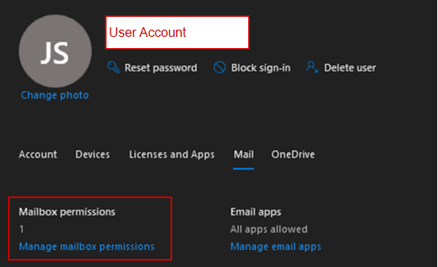
Select the option "Mailbox Permissions"
-
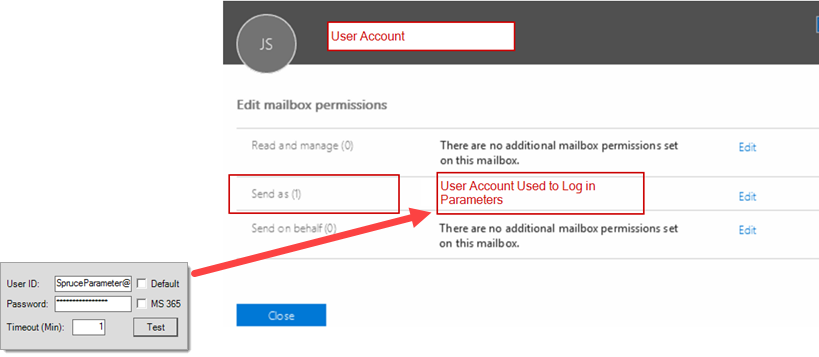
The account used to log in to MS365, from the application, should be the account defined as the "Send As" account. In this example, we will add "Parameters" to the account, under the "Send As" field.
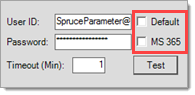
-
Once mail accounts are setup, uncheck the "Default" and "MS365" options in the application (Maintenance > Database > Parameters, Setup/System tab).
Return to Parameters