QuickScan™ Pro
QuickScan Pro was a product of EMC Corporation, and was one of a few software solutions available for desktop scanning and document capture. QuickScan Pro and EMC Corporation are not affiliated with ECI Software Solutions, Inc. We are unable to support third-party products. This documentation is provided as a convenience to our users and does not fully describe the capabilities, use, and/or limitations of the QuickScan Pro software.
|
Please note: QuickScan Pro is no longer being sold. We are suggesting Backbone Solution's ScanPro software as an alternative. This scanning automation solution allows easy barcode recognition and automatic attachment of bar-coded documents. To purchase the ScanPro software solution, contact Backbone: http://backbone.cc/OrderForm/ScanProOrderForm.html |
Purchase Information
Customers can no longer purchase the QuickScan Pro product.
|
Note: ECI does not provide any support for the QuickScan Pro or Backbone Solutions ScanPro software. All support calls related to the installation, setup, use, or troubleshooting of the QuickScan Pro or Backbone software will be billable based on our hourly rate. |
QuickScan Pro Setup
1. There are three pre-configured QuickScan Pro scanning profiles (QSP) which will scan and save documents properly in the format required for attaching to documents in the
|
Profile Name |
Description |
|---|---|
|
PDF.qsp |
If your company scans purchase orders and receipts (or other landscape format documents), you might want to consider using the following profile which works well with all orientations and handles multi-page scanning better |
|
Color JPEG.qsp |
The Color JPEG profile will do color scans as a JPEG image file. |
|
Binary TFF.qsp |
The Binary TIFF profile creates black and white scans. The TIFF format is used commonly for fax transmissions. |
All three profiles will do barcode recognition and file naming based on the barcode found on the scanned document. These profiles will exist when you install the QuickScan Pro software, but should be replaced with copies provided by ECI. We suggest renaming the original profiles first. The QSP extension files are XML (Extensible Markup Language) files that can be edited (if needed) using a text editor such as Windows® Notepad. You can edit profiles using QuickScan Pro rather than a text editor.
2. Either or both profiles must be downloaded and saved to the PC that will be using QuickScan Pro. We recommend saving these profiles in the "scan" directory:
C:\Program Files (x86)\EMC Captiva\QuickScan\Profiles\Scan
The installation path may be different on your computer.
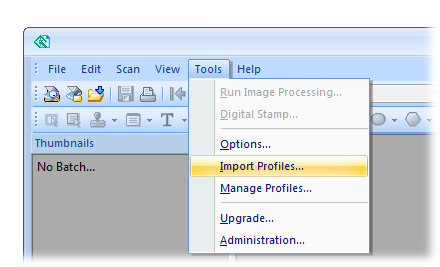
3. After the profile(s) are saved in the directory (above), they must be imported into the QuickScan Pro software. This is done by going to Tools, Import Profiles and selecting the QSP profile you want to use.
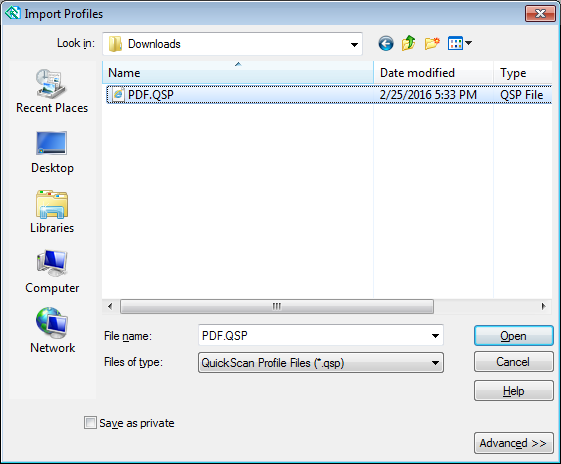
4. Browse to the directory where you downloaded the profile(s) you want to use. The PDF.qsp is the most commonly used at this point.
5. The next step is to configure QuickScan Pro to use your scanner. This is done by going to Scan – Select Scanner. Select the proper scanner model.
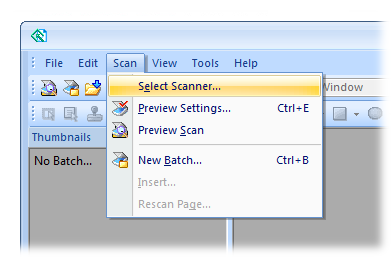
6. After QuickScan Pro is installed on a Windows PC, if necessary (and if the select scanner list doesn’t display the proper model), add your scanner to the QuickScan Pro software. This can be done by choosing Import and the Setup button. You will need to browse for the drivers for your scanner.
Scanning Documents
1. After the scanner is selected, users may begin scanning documents. To scan, select Scan, New Batch.
2. Select the proper profile from the listing by choosing either PDF, Binary TIFF or Color JPEG.
Users can change the path where scanned images save if desired.
3. When scanning, documents with multiple pages must be grouped together in the proper order. QuickScan Pro software links pages together that have matching barcodes -- or -- you can configure QuickScan Pro to use the previous barcode for pages without a barcode. Multi-page documents are saved as a single TIFF, JPEG, or PDF file with the file name format of [barcode].TIF, [barcode].JPG, or [barcode].PDF. If a document is scanned that either does not have a barcode or QuickScan is unable to find a barcode, QuickScan prompts the user to manually name the scanned file.
|
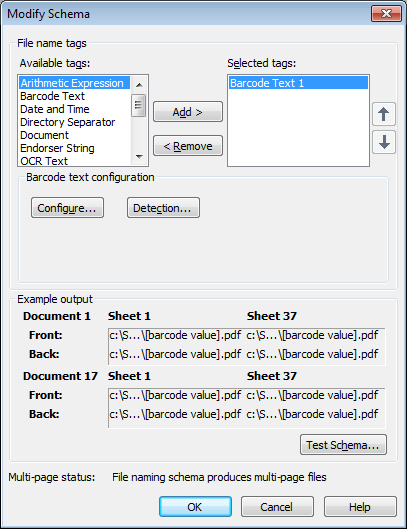
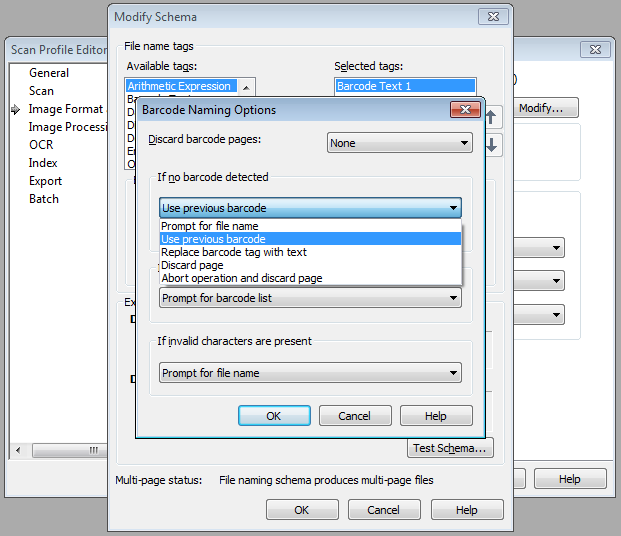
Associating Barcodes with Documents being Scanned To easily link scanned documents as attachments for existing application documents, there has to be some way of identifying which
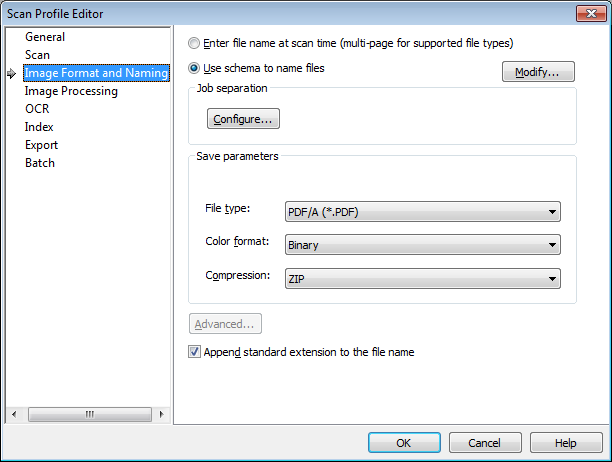
- Click Image Format and Naming from the panel on the left-hand side of the "Scan Profile Editor"
- Next to the radio button named, “Use schema to name files,” choose Modify.
- Click the Configure button.
- Under the “If no barcode detected" group box, change the setting from "Prompt for file name" to "Use previous barcode". |

4. Once all scanning is done, images are available to be attached. To attach the scanned files to an individual document, you can do so from the folders (“Document”) tab of a transaction. Otherwise, if you want to attach many files at one time, use the Maintenance – Utilities – Attachment Maintenance form. Once files are attached through the application, the file data is added to a database table on the server, so the original scanned image files can then be deleted if desired.
Attaching Scanned Images to Documents
The following instructions can also be found in the application Help and apply to all types of attachments, not necessarily QuickScan Pro. As stated previously, scanned images of documents can be attached either from a transaction, using the Document tab in the Folders, or as a group using the Attachment Maintenance option available from the Maintenance area’s Utilities menu.
Attaching a Document from a Transaction
The Document tab is used for document-based attachments and notes. With new transactions, there would not be any existing document attachments. This type of attachment is the only type that may be added from the folders while processing a transaction (other types must be associated with a customer, vendor, item, etc. in the corresponding maintenance forms). Possible uses for document attachments include a scanned copy a customer's purchase order for attachment to a Point of Sale document or a scanned copy of a written purchase order from a trade show on a new Purchase Order, for example.
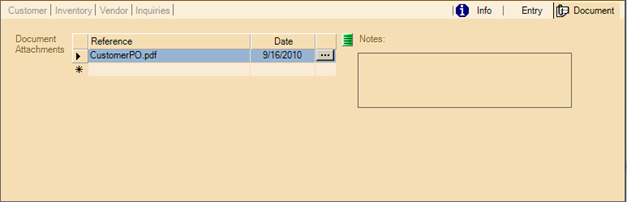
When a document has attachments, an icon (![]() ) appears on the tab. New document attachments may be added in two ways: drag & drop or file browsing.
) appears on the tab. New document attachments may be added in two ways: drag & drop or file browsing.
Drag & Drop
To use "Drag & Drop," both the file's location and the application folder's Document tab must be visible on your desktop at the same time. Files may be located either on a visible area of the desktop or with a visible area of an open folder. Drag the file from its location and drop it into the Document tab area.
How to "Drag & Drop"
1. Click on the desired file using your mouse's select button (this is the left-hand side button on a right-hand configured mouse).
2. While holding the select button down, move the mouse from the file's location to the Document folder area on your desktop. You should see a faint image of the file's icon move with the mouse as you do this (until you reach the folder area).
3. Once the file is over the folder area, the cursor changes and displays either the "no" icon or an arrow cursor with a "plus" image (see the next image).

4. When the arrow cursor (with the "+") displays, release the mouse button. The form will change.
The "reference" will list the file's name and the "attachment" text box will list the file's current location on your station (PC, server, etc.). Drag & Drop can only be used to add file based attachments. Map Links, Web Address (URL) links, and application documents must be manually specified.
Attachment via File Browsing
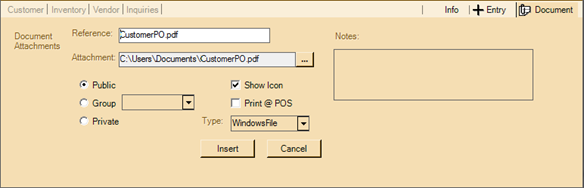
To specify an attachment without using "drag & drop," type any character(s) under the reference column in the attachments grid (typing enter or tab won't activate the form). Once the form is redisplayed (see below), complete the form. Use the Browse ( ) button to locate the file you want to attach to the document.
Options when Adding or Modifying Attachments
There are some choices that users can make when adding a new attachment. Here are some explanations.
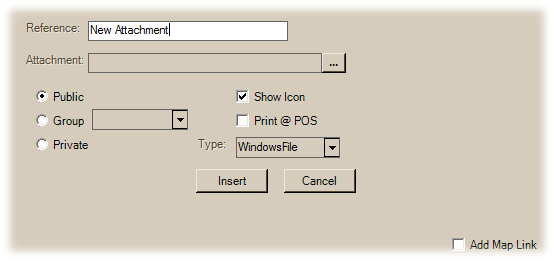
Reference
The Reference may be manually designated and is intended to be used as a description of the attachment. References are also used for identifying an attachment, so they should be unique. When using a "drag and drop" method to add attachments, the reference defaults to the file name and extension of a file based attachment. If the same reference already exists, a message window will ask you whether or not you want to associate the existing attachment with the document instead of creating a new one.
Attachment and Doc #
Attachment is the current path name (directory location) of the file on the user's computer or the URL address of the map link or a web site. For file based attachments, a copy of the attachment file will be made in a database table that is maintained by the server. Files are not kept individually; they are saved as image data within a SQL table.
URL addresses are saved as text. The "Add Map Link" check box will automatically create the URL for a Google Maps™ link based upon the current customer, job, or vendor address. You need to manually copy any web site address into the Attachment text box, however.
When choosing a type of "Document," the attachment field is replaced with a different control for selecting documents (labeled "Doc #").
Public, Group, and Private Selection
Attachments can be designated for access by all users (public), users in a specific user group, or just the current user (private). User groups may be created and maintained from the Message form available on the Office drop down menu. Attachments are visible to only those users who have permission to access the attachment.
File Types
Users can choose either windows file, map link, web site address, or document as the file type using the drop down:
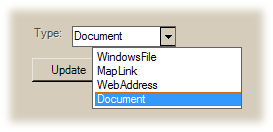
"Windows File" refers to any Microsoft® Windows®-compatible file type. Usually, these types of files require some other software that may or may not be provided with your Microsoft Windows operating system. These types of attachments are stored in a separate SQL database and table as "image" data, not as individual files in a directory. The same attachment may be used with many different records.
"Map Link" refers to a URL (web site address) that initiates a Google Maps™ mapping service search for a specific address (http://maps.google.com). Users may use this site to generate a map to a specific address then click on "link to this page" to create a link address which may then be copied and used as an attachment to a document. Internet access is required to view the Google Maps™ web site.
"Web Address" refers to a normal web site address which may be either typed in or copied from a web browser's address bar. This option requires Internet access.
"Document" refers to an existing application document ID. This allows you to enter/select any document ID and save it as an attachment. No data is saved with this attachment, just the document's identifier (1306-C12345, for example).
Show Icon
The "show icon" check box defaults to yes (checked) and determines whether or not the (document attachment), (customer, job, or vendor attachment), or È (item attachment) icon is to be shown when this particular attachment is present.
When multiple attachments are present, if any of the attachments are set to "show icon," the icon will display.
Print @ POS
This check box is intended to be used to set whether a particular attachment should be made available for printing from the Attachments tab on a transaction's Process (F12) form. It does not cause an attachment to automatically print during processing. In addition, this setting does not prevent a user from being able to open and subsequently print any attachments listed on the Info or Entry folders during a Point of Sale transaction.
As stated, even with this setting enabled, printing attachments remains a somewhat manual process. On process forms with an "attachment" tab, you can select one or more attachments and then click the Print button. Only those attachments designated as "Print @ POS" are included.
Attaching Multiple Scanned Images to Documents
This section explains how to associate a group of scanned images with their relevant documents. Typically, this would be done if you were using document labels (a separately available option). These labels are printed during processing (F12) from the “Print” tab from applicable transactions (see the example below).
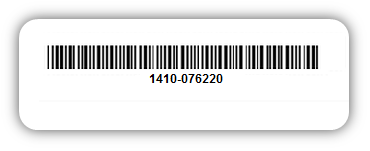
To print a barcode document label, you must have a supported label printer (DYMO LabelWriter) and there is some minimal software setup required. There are no additional support charges beyond the costs of purchasing the required hardware (unless you require support assistance, which would be billable in this case). Documentation is available on our web site and in the application's Help file (TOC > Special Topics > Hardware & Peripherals > DYMO Label Printers).
Bar-coded labels are affixed to each external document you plan on scanning (or the first document in a series depending upon your QuickScan Pro settings). Documents are scanned using the QuickScan Pro software. The file names of the scanned documents are then set to match the application document (based on the barcode label you affixed to the original document prior to scanning). These file names are ultimately used to automatically associate the images with their corresponding documents.
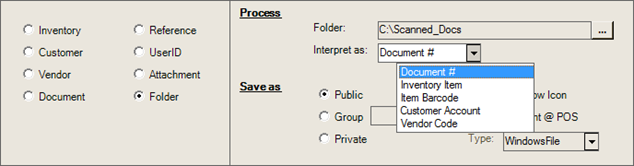
Once documents have been scanned, go to the Maintenance area in the application and choose “Attachment Maintenance” from the Utilities drop down menu. Click the “Folder” radio button.
The Folder radio button allows you to quickly add files as attachments using files that are all located in the same folder. The file names must match actual records for your selected record type (document, item, bar code, account, or vendor code). Processing adds the files as attachments if records matching the file names are located.
Here is a specific and step-by-step explanation of how you would add a group of scanned documents as attachments:
1. Create or designate an existing folder on the PC or a network share location for saving scanned documents.
2. Add scanned images of documents to the folder if they don’t already exist. The file names must match with an existing application document ID (see the examples below):
1501-C40152.JPG
1412-015842.TIF
1506-P56221.PDF
File extensions can be any valid Windows® file type (images, documents, etc.).
Note: Remember. to access attachments locally (on their PC, station, etc.), your device must have the software required to open the particular file type. For example, users who don't have Microsoft® Excel® software installed may not be able to open an Excel spreadsheet.
3. After adding some files to the folder, go to Maintenance, choose Utilities and select Attachment Maintenance.
4. Click the ![]() Folder radio button.
Folder radio button.
5. Use the browse button (...) to choose the Folder on your PC or network share containing the scanned images.
6. Make sure that "Document #" appears in the "Interpret as" drop down control (document is the default).
7. Choose whether the attachments should be public, assigned to a group, or private (same user only).
8. If desired, modify the Show Icon or Print @ POS check boxes.
9. The "Type" should be left as WindowsFile.
10. Choose Process (F12) to populate the grid with any files that match an existing document.
11. To add the files as attachments, check the check boxes for each row you want to add as a new attachment. The menu marker may be used to "select all."
12. Press the Insert button.
13. The files should now appear as attachments for the related documents.
Some Points about Folder Attachments
✓Attachments are maintained as image data in a separate SQL database... not the folder you designate. The folder location is neither saved nor is it used to retrieve the attachments once they've been added.
✓Adding the same file as an attachment does not replace any prior attachment (even if the file name matches), it creates a new one. Any given document (or other record) may have an unlimited number of attachments... the folder option is not capable of distinguishing between new vs. existing attachments.
✓Files are not removed from the designated folder location (you may want to either remove or move the files elsewhere after attaching to avoid future duplicates in case the folder location is used again).
✓References (attachment descriptions) default to the reference associated with the document (or description of the item, customer, etc. when linking folder-based files to other types of records), but can be modified before adding the attachments.