Office > Notify
Notifications are optional messages generated automatically by specific actions in the application. For example, it's possible for a user to be notified each time a specific item is sold. Notifications are delivered the same way that messages are. When messages (or notifications) have been sent to your user ID, an icon appears at the bottom of the menu navigation panel. Some notifications can be sent without ever using this form. Additional notification settings are found on the Parameters, Notify Tab.

It's possible to designate that a user receive notifications and messages via Email instead of the built-in notification queue. This is setting is found on the User ID Maintenance form.

Office: Notify
Action
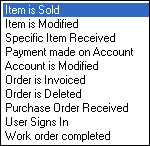
Begin by choosing an Action. The "action" is the activity that triggers the message. Note: there are additional notifications which are controlled by User ID parameters. A number of choices are available (and subject to change):
Target
Next, choose the Target for the action. Targets change based on the type of action. For example, the "target" for the action "Item is Sold" would be an item, but the target on the action "payment is made on account" would be a customer.
Frequency
Frequency can be used to determine how often a notification should remain in effect. For example, if the selected action is "User Signs In," you would choose "Once" if you only want a notice the next time the action occurs or "Until Canceled" to keep the notify rule in place until you choose to cancel it (using this same form).
Saving & Processing
Before choosing Process (F12), but after designating the action, target, and frequency, choose Insert (F5). The insert function adds the notification rule to the grid. Only notifications in the grid will be saved. Many different notifications may be added to the grid at the same time. Existing notifications can be modified by highlighting the notice's row in the grid then choosing Modify (F6), or deleted by checking the check box ![]() next to the item in the grid. Additions, changes, and deletions won't be retained unless the user chooses Process (F12) to complete the notification session.
next to the item in the grid. Additions, changes, and deletions won't be retained unless the user chooses Process (F12) to complete the notification session.
Choose Cancel (F9) to clear the form prior to processing. The Exit (F10) function can be used to both cancel and close the form window.