Point of Sale > Utilities > Invoice Tickets
"Tickets" refers to transactions created from the "Open Tickets" or "Advice Notes" (UK) option found in the Point of Sale area. Open Tickets (a.k.a. Advice Notes) affect on-hand quantities immediately but remain available for modification and later invoicing. You can use this feature to invoice a group of open tickets by displaying them in the data grid and choosing which ones to invoice. You can also invoice them individually in the Open Tickets form.
To invoice multiple tickets at once:
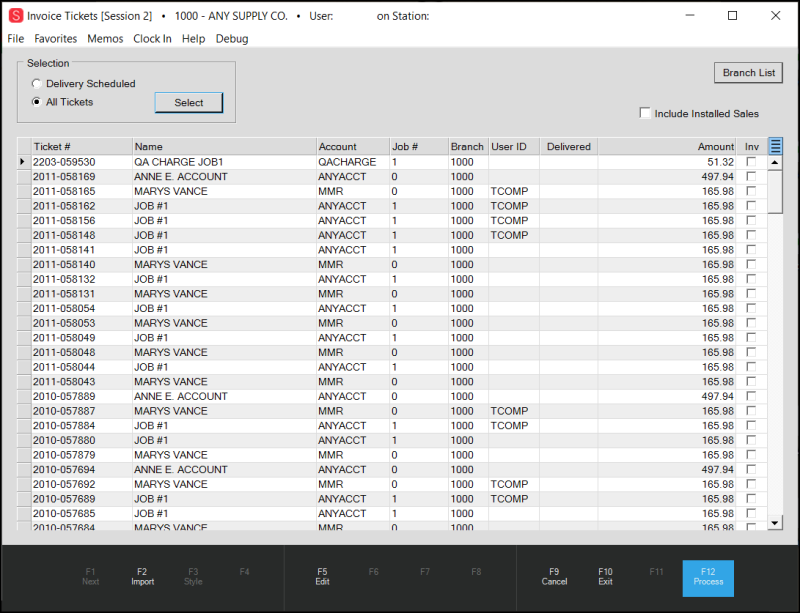
1. From the Main Menu, choose Point of Sale > Utilities > Invoice Tickets to display the Invoice Tickets form.
![]()
2. Select the Branch List button to choose the branches you want to include in the search.
Note: If you want to include the Installed Sales tickets in this search process, choose the Include Installed Sales check box.
3. Do one of the following to collect the tickets you want to invoice and display them in the data grid:
-
Select Delivery Scheduled to add the tickets that are scheduled for delivery in the data grid.
-
Select All Tickets to collect all of the open tickets.
4. Choose the Select button.
The Customer Ticket Selection dialog box displays with additional selection tools.

5. Use the By Account, Date Range, by User ID options to further narrow the search for open tickets.
Each selection method has its own criteria form options.
For example, the Date Range function can be used to select a date range based on the entry date of the order (order), delivery date, or the order's expiration date.
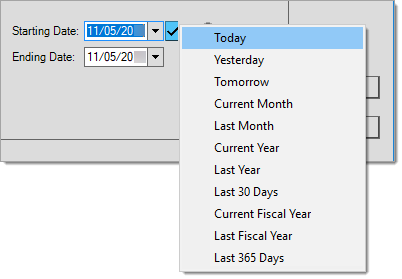
The blue box with a check ![]() has date presets that users can use to quickly choose a date range for the following choices:
has date presets that users can use to quickly choose a date range for the following choices:
6. When you have selected the search options, choose Accept (ALT-A) to complete the selection process and fill the data grid with tickets that match your search criteria.
You can click or select Cancel (ALT-C) to abort selection and return to the form for changes.
7. In the Inv column, choose the check box ![]() for each ticket you want to invoice or use the Menu Marker
for each ticket you want to invoice or use the Menu Marker  (if available) to select or deselect all orders displayed in the grid.
Your security settings may affect your ability to view and use the Menu Marker. You can check or clear the boxes if you can prefer, even after you use the Menu Marker option.
8. Choose Process (F12) to generate the invoices.
The application generates an invoice document for each ticket you processed as an invoice. The process form contains print and transmit options and you can disable printing if you need to.
Using the OPC Pump Integration Feature to Invoice Fuel Costs
If you use the Delivery feature and you want to apply the fuel costs to the account receiving the delivery, this feature can give you a way to import this information into Spruce using the Invoice Tickets utility. This feature was initially created for a single customer but any business that wants to make use of this utility can follow these directions.
Setting up the OPC Pump Integration Feature
After this feature is enabled by the Implementation or Support team, create fuel item types for the vehicles you serve and give them to your Support team so they can add them to the parameters. There are two possible fuel Item Types :
-
Gas Item Type (Type 1)
-
Diesel Item Type (Type 5)
Don't forget to create the appropriate GL accounts to keep track of this business.
Using the OPC Pump Integration in the Invoice Tickets Utility
Keep track of the fuel costs in an OPC file (a spreadsheet you save in comma-delimited .csv format), which contains information about the fuel transactions, including the purchase date and time, the type of fuel, the quantity of fuel (in liters), the unit price of the transaction, and the Account ID of the customer for whom the delivery is for. This data should be organized in to the following columns in the OPC file spreadsheet:
| Column | Description | Validation | Sample Entry |
|---|---|---|---|
| 1 | Credit Card ID | Last six digits of the card | 166645 |
| 3 | Purchase Date | Valid Date in this format:
• YYYYMMDD |
20240123 |
| 4 | Purchase Time | Valid Time in this format:
• HH:mm |
11:13 |
| 9 | Fuel Type | Enumeration indicating the fuel type:
• 1 = Gas • 5 = Diesel |
1 |
| 10 | Quantity (in Liters) | Decimal Value (2-Decimal Places) | 34.56 |
| 11 | Unit Price (four decimal places) | Decimal Value (4-Decimal Places) | 3.9012 |
| 14 | Account ID | Valid Charge Account | A12345 |
| 16 | Name of Purchaser | Up to 8 letters/numbers | JEAN GUY |
This file should have no header information.
When you create the OPC file spreadsheet, it looks like this:
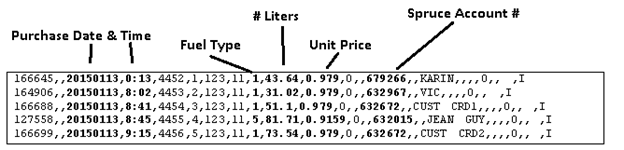
When you are ready to import the data into the application, you the data as open tickets/advice notes.
To add this data to the Spruce system:
1. From the Main Menu, choose Point of Sale > Utilities > Invoice Tickets. The Invoice Tickets form displays.
2. From the Ticket # list, choose New. The Import (F2) key enables.
3. Click the Import (F2) key and select OPC Pump Integration from the menu. The Open dialog box displays.
4. Navigate to the folder that contains the OPC file and select the file from the list. Choose Open.
The application reviews the data in the file and validates the information in it. One of three results occur:
-
The application cannot find valid rows in the file to import and shows an Invalid File message.
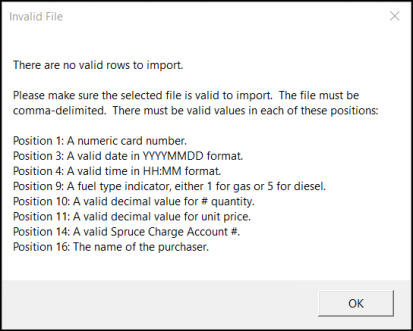
Note: Here, the message provides guidance on repairing the file entries. We recommend that you fix these entries and try importing the file again. -
The application finds the format valid but there were errors in the data. The Errors in Import File message displays.
Note: If there are valid entries in the file, you can import the entries that are correct or you can cancel and fix the entries that need it and start again. -
A confirmation message displays showing the results of the import scan. Continue to the next step.
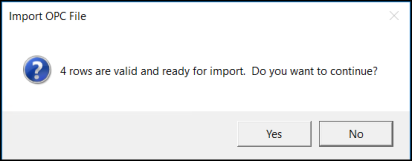
5. When the data is valid, choose Yes to begin the import process.
When you choose Yes, the application generates individual tickets for each row of data in the file. As ticket documents are created, the data grid updates to show the number of tickets created and a progress bar shows the applications progress through the file.
When the import is complete, a dialog box displays to report the overall results of the import process. The number of rows processed should match the number of rows imported.
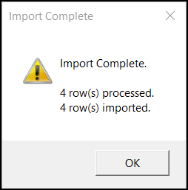
6. Click OK to continue. 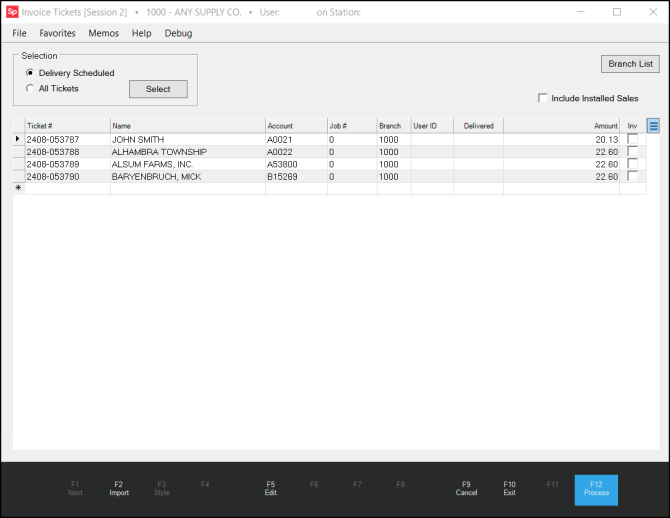
At this point, the newly created ticket documents exist.
7. To produce the invoices for these tickets, select the Inv check box beside each entry and choose Process (F12).
The process documents box displays.
You can also choose Cancel (F9) and invoice them later or individually. Canceling does not undo the ticket creation process.
8. Choose the print and transmit options you want and choose Finish (F12) to create the invoices.
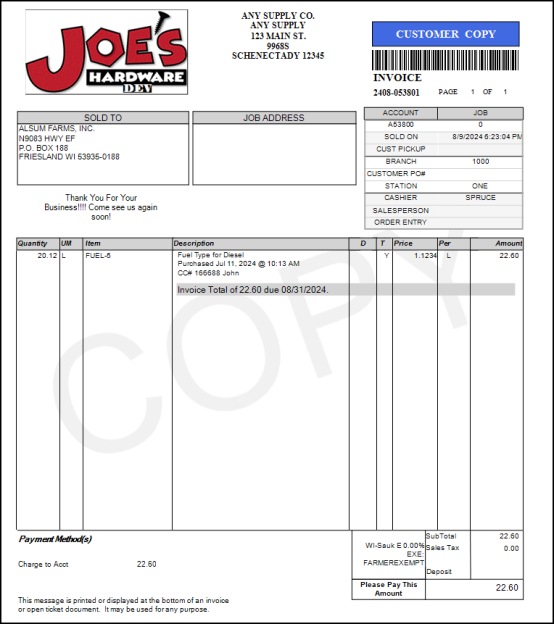
After you complete this process, you can go to the Documents option (top menu) and see the imported customer ticket:
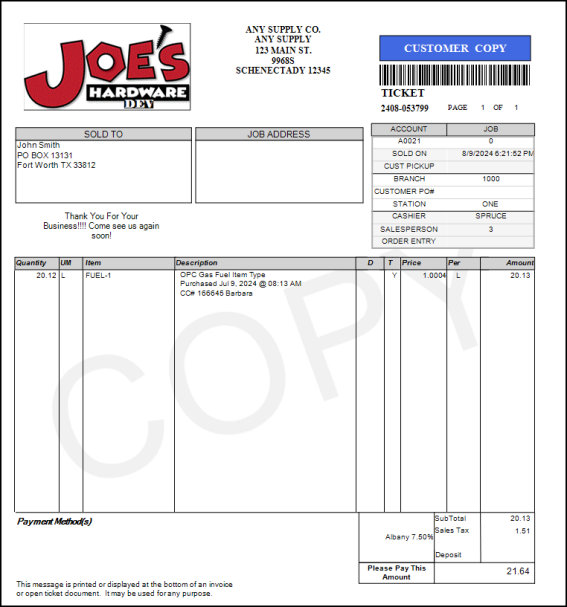
And the invoice: