Using Cayan at Point of Sale
Card processing with TSYS Cayan™ Genius® MX devices provides a modern and easy to use way to process account payments. Your customers can insert or swipe cards in the Cayan device after items are entered. Cashiers can process True Value Quick Credit Card applications for the account before item entry. Features described in this section are currently available.
Cashier Experience
The Cashier indicates that a customer is paying by card from the remittance tab of the Process (F12) form of the Point of Sale transaction. This tab is typically named after the transaction, such as "Invoice" or "Order," for example, and generally is the right-most tab of the form. Please note, no entry of card information is permitted through the application. All card entry is limited to the device.
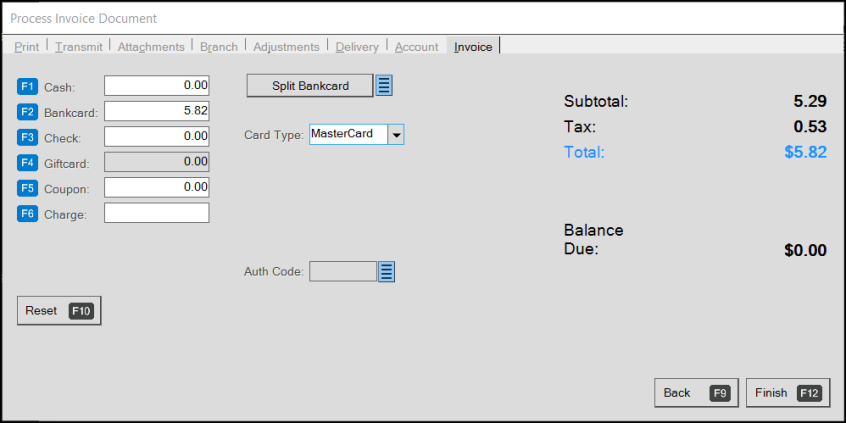
Process Invoice Document
In the case of a Sale transaction, when the Cashier chooses the Bankcard (F2) option, the application updates the Bankcard field with the transaction amount. If the account is a Charge type, the application displays the transaction amount in the Charge (F6) field instead. The Card Type field prefills with the default card type in the process form and the Cashier can choose another card type from the list, as appropriate to the transaction. Then the Cashier chooses Finish (F12) to complete the transaction.
Processing a Transaction using More than one Card (Split Bankcard)
Use this button when the customer wants to pay with more than one type of card (such as Mastercard and Visa). In this case, enter the first card amount in the Bankcard field, press Enter (not TAB), and then click the Split Bankcard button. The Cayan device prompts the customer for their card (to insert or swipe). The application processes the first card amount. After the first card is processed, the Balance Due field updates to show the remaining amount. Enter the second amount in the Bankcard field.
-
If the customer wants to use a third card, choose Split Bankcard again and the process repeats (the Cayan device prompts the user for their card/the application processes the card amount/enter the next amount in the Bankcard field).
-
When the final amount is tendered, choose Finish (F12) on the Process form.
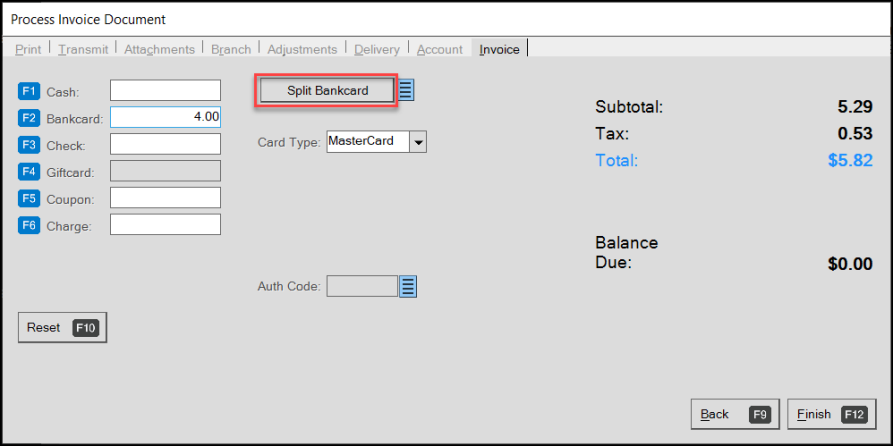
Process Invoice Document (Split Bankcard)
Signature (F9)
Use the Signature (F9) button when an "on-demand" signature is required from the card device. This is not necessary for card processing when a signature is required.
Only one signature per transaction is saved. Any transaction can be associated with a signature; however, signatures aren't printed or displayed on all document types and styles.
Reset (F10)
Use the Reset (F10) button clears all the remittance amounts (less any paid amount) and resets the card device. In the event that the card device becomes unresponsive, this may correct the issue; however, you should use this option carefully and avoid using it mid-transaction. In the event that the customer's interaction with the card device has started, it's often best to instruct the customer to cancel on the card device when needed.
Card Type
The Device uses the Card Type list to specify which credit card to use when it processes the transaction. If your store processes transactions that your card processing device does not accept, you can select an ACH or "Other" from the Card Type list and process the transaction outside of the device.
Selecting a card type that is not enabled for use with card processing device bypasses the signature pad device. In cases where the list of valid Point of Sale card types match those used with the card processing device, no drop down list displays.
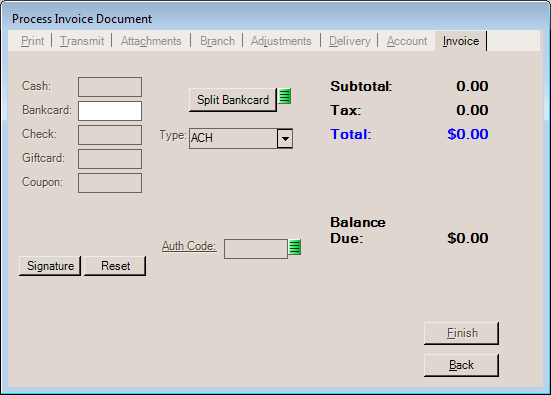
The application uses parameters to determine which card types your card interface accepts vs. which card types you want available at Point of Sale. Card types enabled for card processing must also be enabled for Point of Sale; however, you can have card types enabled for Point of Sale that are not handled by the card interface device.
Note: Card types for your card interface are enabled on the Software tab in the Maintenance > Database > Parameters Settings form and can only be modified by ECI Support personnel.
Authorization (Auth) Code
The authorization code field is used when processing a bankcard type payment method and you want to bypass any integrated or device-based card processing. Entry of the authorization is disabled unless you enable the option using the context menu. Direct manual card entry is not permitted directly from the Spruce application. When an authorization code is specified, there is absolutely no further card processing without additional steps taken by your company. The authorization code is just for your own reference for cases where an authorization for a card was received independently and does not trigger any type of later processing of the card.
When the processor has processed a card but the authorization returns a decline or times out, you may be prompted to enter an authorization of ACCEPT or FORCE when you attempt to pre-process the card. These messages appear as follows:
"Accepting the Duplicate will allow processing this transaction by the application even though it has only been approved by the bank once. Type ACCEPT in the box to confirm you understand and wish to continue."
(Above: if you follow the directions to ACCEPT, the transaction will process but not charge the card again.)
"Forcing the duplicate will cause this transaction to be charged to the account even though the same amount has been charged previously. Type FORCE in the box to indicate you understand and wish to continue."
(Above: if you follow the directions to FORCE the transaction, the customer's card will be charged again for the same amount.)
Additional Options for Processing Transactions using TSYS Cayan
Additional options for card transactions are located on the context menu associated with the menu marker icon (![]() ). These options are described below and may not be available to all users.
). These options are described below and may not be available to all users.
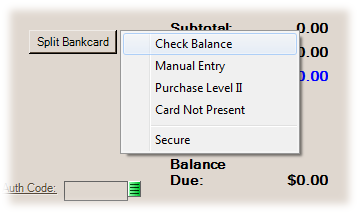
Check Balance
This option is used with gift cards only and allows the Cashier to check the balance of an existing gift card.
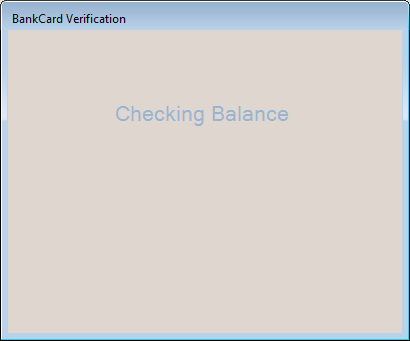
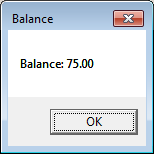
Both the card device and a dialog will display the card's balance.
Manual Entry
When selected, the card device will ask the customer to enter their card information on the card device. This would be used in cases where the customer's card is present, but can't be read for some reason (damaged card, etc.).
To be clear, this process does not involve any sort of entry of the customer's card information through the software. Card entry is done on and requires a TSYS Cayan device. It is possible to create a transaction entering the card information from the TSYS Cayan web portal; however, that would be done independently of the software and there would be no automatic link to any application transaction or document (you can use the "authorization" field to record the portal's authorization code).
To indicate "manual card entry," you must choose the option from the menu marker ![]() context menu in the Bankcard remittance panel. Card entry on the device does not begin immediately. The Cashier must choose "Finish" before the card entry process begins on the card device. Manual entry for credit refunds are permitted. You will need to contact your TSYS Cayan representative to enable the manual entry credit refund option.
context menu in the Bankcard remittance panel. Card entry on the device does not begin immediately. The Cashier must choose "Finish" before the card entry process begins on the card device. Manual entry for credit refunds are permitted. You will need to contact your TSYS Cayan representative to enable the manual entry credit refund option.
A user's ability to do manual card entry can be prohibited by user-security settings. Please note: the "Card Not Present" option, see below, should be used in cases where a customer's card isn't presented such as for phone or Internet orders. The only difference between "card not present" and "manual entry" is that we automatically cancel the signature request; otherwise, the options are identical.
Manual entry requires selection of a card type (necessary to permit manual transactions to a gift card), the card number, expiration, CVV2 code, ZIP/Postal Code of the billing address, and a signature at the end of the card entry process. If you are a True Value member, and process Quick Credit Applications, the manual entry method is also used for performing a Sale using the customer's temporary shopping pass.
For details regarding how manual card entry works on the device, click here.
Purchase Level II
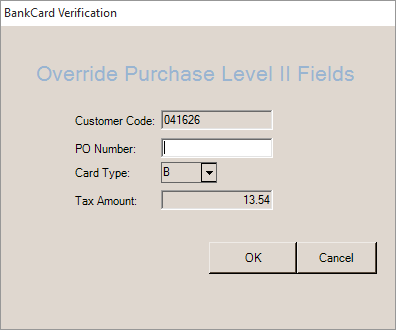
This option permits the Cashier to override the purchase level II data that will be used for card processing. Supplying this information may qualify your company for a lower transaction fee in some cases. Purchase Level II data can be optionally enabled for your TSYS Cayan merchant account.
Card Not Present
This option, if selected (checked), permits card entry on the card device for cases where the customer's card is not present (MOTO - Mail Order, Phone Order). Extreme caution should be used when taking any card information when the customer and their card is not present. Any handling of card information by your company, however temporary that may be, still puts your company in scope for PCI compliance and potential auditing requirements. In the event that your company accepts card information that is lost or stolen, or that the card holder declines, your company will likely be responsible for any charge backs. Approval of the card transaction is not a guarantee that the card is valid. Processors may charge a higher transaction fee for transactions where a card isn't present or manual entry is involved. Again, this does not protect your company from charge backs. For your protection, we would suggest that companies only accept phone orders from known parties who have an established business relationship with your company.
Functionally, the process involving entry of the card information on the card device is the same as the manual entry (described above and later in this topic) process except that the signature is canceled at the end of the transaction.
In the event of an approval, the following message will appear.
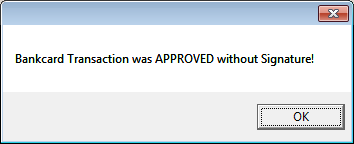
The transaction is considered a manual entry without signature as far as the data being transmitted through TSYS Cayan to the processor. Access to the "card not present" menu item can be restricted by changing users' application security codes. The permission setting "restrict bank card not present" can be enabled (checked) for any application security codes assigned to users who should not be permitted access to this feature.
During Processing
While the card device is busy processing or interacting with the customer, the "Bankcard Verification" dialog is shown. This indicates the status of processing and will report any errors or returned information once processing completes. After a timed delay, a "Cancel" button is shown. The button should only be used in the event of a problem. In most cases, it is best to have the customer cancel from the card device instead.
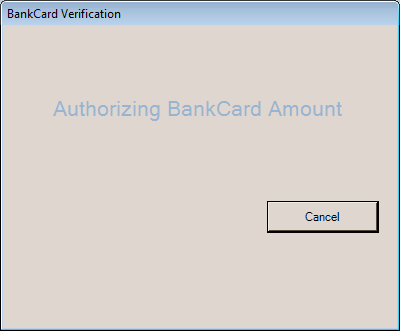
Bankcard Verification
Canceled Transactions
In the event that a transaction is canceled after one or more cards are processed, the application will attempt to void those transactions automatically for you. In the event that this cannot be done, a dialog will appear explaining that there was a problem voiding the card transactions. Further action must be taken by your company in these cases.

Cannot void card.
Declined Transactions
Should a customer's card be declined, the "Bankcard Verification" dialog will display a message along with the error received from the device (the message originates with the processor). Messages will vary based on the reason.
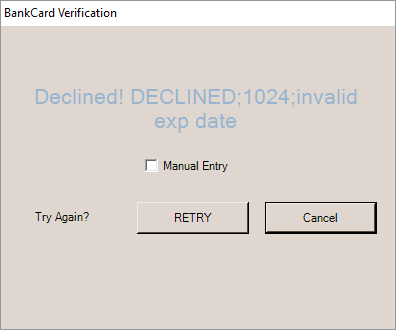
Bankcard Verification (Decline)
Options are provided for manual entry (check box), retry (button), and cancel. Retry attempts to reprocess. Manual Entry would be used if the customer's card couldn't be read due to damage, etc. Choose "Cancel" to accept other payment methods or cards. Some types of transactions, such as credits to gift cards or by manual entry aren't permitted using the card device, but may be accomplished from the TSYS Cayan portal (https://portal.merchantware.net).
AVS Information
Credit card readers use the Address Verification System (AVS) as a safeguard against fraud. AVS prompts a Cashier to request a zip code from a customer, and validates that it matches with the billing address tied to the account used. If the entered zip code does not match the one on record, the Cashier will be presented with options to proceed with the zip code provided, change the zip code on file or void the transaction.
By supplying the zip code information, your company may receive a better rate from your card processor, so it is in your best interest to load valid zip codes for cards on file whenever possible.
This feature will need to be setup by a Spruce Anyware Implementation or Support Specialist. For more information on AVS/CVV, click here.
Processing the Card on File Transactions when the Zip Code is on File:
1. When the Cashier processes a transaction and the account has a card on file, a prompt displays.
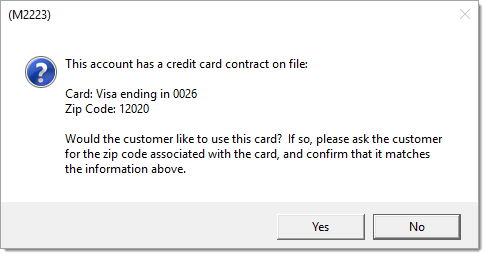
2. Depending on the customer's preference, proceed as follows:
-
If the customer does not want to apply the transaction amount to the card on file, press No, and proceed with the transaction using a different tender.
-
If the customer does want to apply the transaction amount to the card on file, ask them to verbally confirm the zip code.
If the correct zip code is offered press Yes and proceed with the transaction.
If the zip code offered does not match what is on file, press No. A BankCard Verification dialog box will appear. For a list of possible AVS Mismatches, click here.
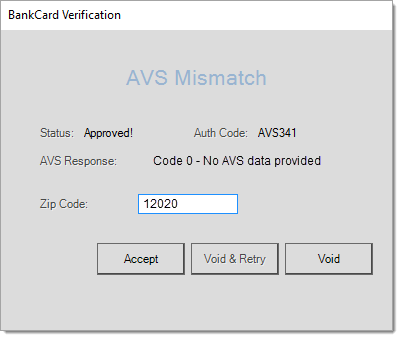
3. From this dialog box, the Cashier may proceed one of three ways:
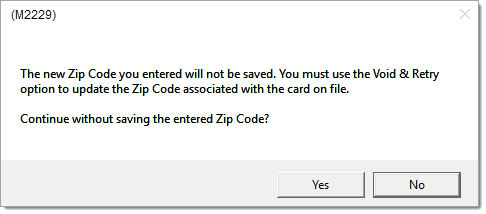
a. If the customer made a mistake or it was entered incorrectly, the Cashier may re-enter the zip code (provided by customer) and press Accept. Pressing accept will not save the zip code to the database, but will allow the transaction to proceed. The Cashier will be presented with the following dialog box.
b. If the customer wishes to change the zip code on file for the credit card on file, enter the new zip code and press Void and Retry. The transaction will void transaction and you will need to process it again with the new zip code. This option will be grayed out unless a different zip code is entered.
c. The transaction may be voided from this point and the customer can offer a different form of payment.
Processing a Card on File Transaction when there is no Zip Code on File:
If there is no zip code on file for a Card on File token, the Cashier will be presented with the following dialog box after accepting to use the card on file or after completing a payment and accepting the prompt to save the card on file.
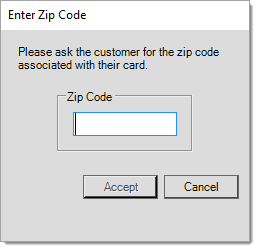
Enter the Zip code provided and click Accept.
Returns
Sales returns involve entry of negative quantities for items in the Sales data grid.
By default, TSYS Cayan assumes that returns would be handled using the original transaction ID (token) associated with the sale as opposed to the customer's card being involved. They only enable "swipe" return processing to a customer's credit card upon request. Manual entry for credit refunds are permitted. You will need to contact your TSYS Cayan representative to enable the manual entry credit refund option.
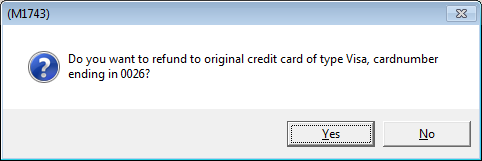
Refund to Card
In this case, the card device should not activate or request any card entry. The original card will be credited for the transaction upon processing (when the Cashier chooses Finish (F12) on the Process form).
Tokenized (Card on File) Transactions
Note: For a Cashier (or any user) to add a card on file, the Restrict Tokenized Bank Card must be unchecked in their User ID Maintenance form (Maintenance > Database > User ID > Application Security Permissions list).
-
When this setting is unchecked, the user can add a bankcard at Point of Sale and use any tokenized bank card.
-
When this setting is checked, the user cannot add a card on file or use a tokenized card. This two-way setting is important to keep in mind.
With TSYS Cayan, you have the option of saving a token with a customer's account. This capability is provided for card transactions involving customer-specific cash-only and charge accounts, but not system-type accounts such as the general-use CASH account. Cashiers can save a card on file by using any of the following methods: swipe, insert, contactless (CNP), and manual keyed entry mode if they have the appropriate security permissions described in the Note above. If you do not want Cashiers to have this capability, disable access to this feature as described in the Note above. In the future, we will be moving this prompt to the card device rather than displaying it to the Cashier.
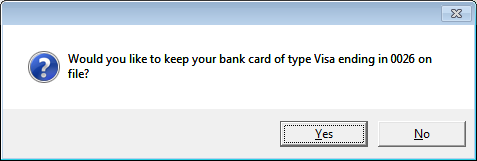
If the prompt above displays, and the Cashier selects Yes, the application saves the token for the current card with the account and job record.
This token can then be used for future purchases. The intention of this option is to provide an easier way for the customer to pay in the future. If the selected account (and job) has a token saved, the following prompt appears at Point of Sale when the Cashier chooses Process (F12) during the transaction.
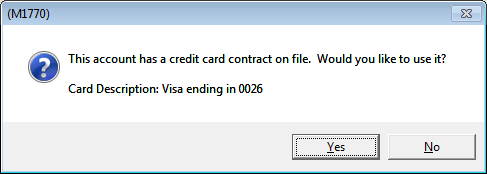
When the Cashier responds Yes, the application uses the card on file for the transaction. In this case, a label is shown.
If an account has one or more job tokens saved, the text "Bankcard(s) on file" appears in the Account Maintenance and Account Inquiry forms. A maintenance form is provided where saved tokens can be reviewed and deleted if needed. This form allows the card to be associated as the default for the account or deleted. A card associated with job #0, the master job, will be used as the default for any job without another card contract.
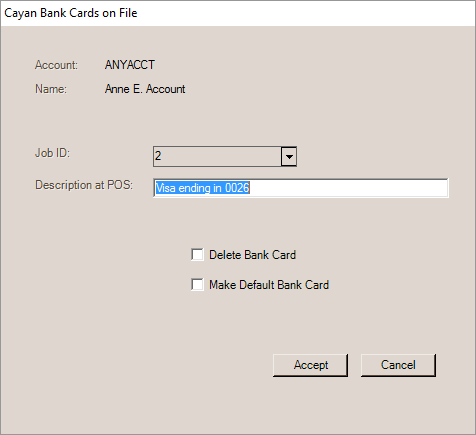
Cayan Bank Cards on File
The Delete Bank Card check box, when checked, removes the saved card information from the selected job. If removed from the master job (0), the card contract (token) is removed as the default for all jobs.
The Make Default Bank Card changes the job ID on the selected token to the master job (0). This becomes the default for any jobs without their own card contract token.
Tokens eventually expire, and the card account linked to the token may also expire, be closed, etc.
To replace an existing card token, process a new bankcard transaction for the customer (account-job), answer No to the "use card on file" prompt. Then use the replacement card for the card transaction. After the card transaction is completed, an additional prompt displays asking the Cashier (or customer) if they want to replace their "card on file" with the new card.
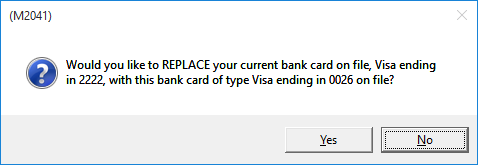
M2041 - Replace Card on File
For multi-branch companies, contact TSYS Cayan to establish a "chain" between your merchant accounts if you want to be able to use "card on file" across branch locations.
Typically, each branch location has its own merchant account.
Gift Card Activation
You can use the TSYS Cayan Genius device to activate True Value Gift Cards. At least one gift card item should be added for this purpose. The item's type needs to be "stored value" and the primary vendor should be your True Value vendor code. Assuming that the True Value gift cards have no preset amounts, the price would be set to zero. The cost can be the cost of the cards to your company. The item should be non-taxable (taxable=No). Often, gift cards are set to be non-discountable (net). Since gift cards are not inventory and are excluded from sales totals, we strongly suggest that you assign gift cards (stored value) to a special product group dedicated to non-inventory.
When selling a stored-value (gift) card, the application displays a dialog box to ask the Cashier whether they want to Activate the card or Add Value to the card.
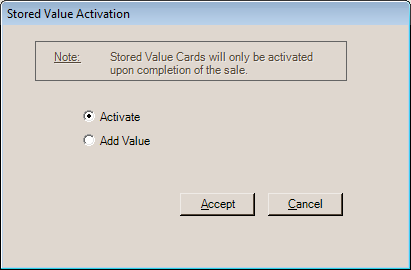
Once payment has been tendered, the application activates the card using the TSYS Cayan card device. The value added and total remaining on the card display on the card device.
The remittance panel for the bankcard tender method on the Process form offers a Check Balance option that can be used to get the balance from an existing gift (stored-value) card.
Customer Experience
When the TSYS Cayan Genius device is idle (not in use), the screen displays the Genius logo.

If item display is enabled for the station, the entry of the first item in any Point of Sale transaction involving item entry (except Q14uotes) activates the Item Display feature of the device.
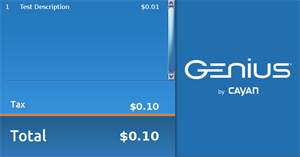
Changes to quantities, pricing, tax, and adjustments are reflected on the device immediately while the item display is active.
Swipe/Insert Ahead
After entry of the first item, the customer can swipe, insert, or tap their card or payment device. If they do so, the message "Please Wait for Cashier" will display above the Item Display. When a customer swipes or inserts their card ahead of time, the device will automatically identify the card type (credit, debit, etc.) and will not prompt later unless the type of card can't be identified.
Choosing a Card Type
Unless the card type is already identified (swipe/insert ahead), the device will prompt the customer at time of processing to select a card type. Options may vary, and may include Apple Pay® mobile payments solution and Android Pay™ payment service in addition to the options shown below.
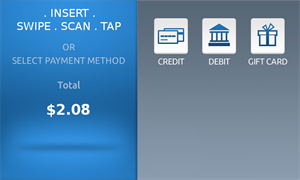
After choosing a type (and before swiping, inserting, scanning, or tapping), another form is displayed. This screen would not be shown in cases where the customer has already inputted their card or device.
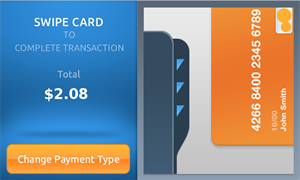
Processing the Transaction using a Credit Card
While the device is authorizing the transaction, the display will show a progress/pulse animation. For chip cards (EMV), the message "don't remove card" is displayed; otherwise, the image is somewhat different (just the circles are displayed with the word "Processing."
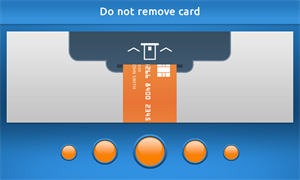
Processing a Transaction using Debit Cards
If the customer's card is a debit card, the card device will request PIN (Personal Identification Number) entry.
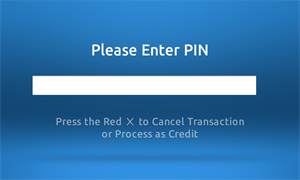
Signature Request
For transactions where a signature is required or requested, the following form appears:
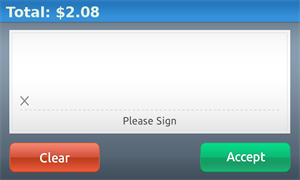
For card transactions, a signature is only requested after the card is authorized.
Transaction Results
A result of either "Approved!" or "Declined" is presented at the end of the transaction.

Please note, in the event of a declined transaction, we are required to either always print or offer to print a special "decline" receipt in certain cases. This is a requirement of the card providers (VISA, American Express, etc.). These are always and only printed in a "ticket" (cash ticket) format to the station's assigned Cash Ticket Printer.

Manual Entry
The manual entry process, when selected, involves entry of the card information on the card device itself. For processing a Sale using a temporary shopping pass (provided when True Value Quick Credit Applications are approved), enter the account number printed on the customer's approval receipt.
Customers may be prompted to select a card type (debit, credit, or gift) initially. Their selection should match the type of card being used.

Next, the customer will enter their card number and choose Next.
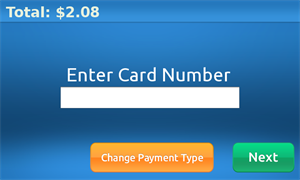
Next, the card device prompts for the card's expiration month and year (MM/YY). For processing temporary shopping passes resulting from True Value Quick Credit Applications, enter 1248 as the expiration date.
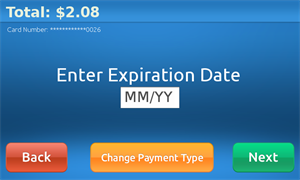
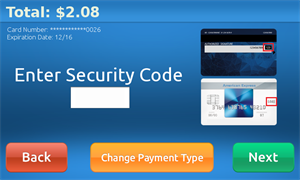
The next step involves entry of the card's security code (3 or 4-digit code located on the front or back of the card). When processing a temporary shopping pass from True Value Quick Credit Applications, enter 000 (3-zeroes) as the security code.
The last step before approval is the entry of the cardholder's ZIP or postal code for their billing address.
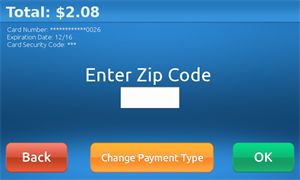
When using the Manual Entry method, a signature will be requested only after the card is approved. For "card not present" manual entry, we cancel the signature automatically.
Cash Ticket Receipts and Invoices
Information about each card transaction is printed on cash ticket receipts and invoices. The amount of information varies based on whether the transaction involved a chip embedded (EMV) card or not. EMV (chip) card transactions include additional details required by the card industry; other types typically include less information such as the payment entry method, card type, amount, and approval code. Below are some examples:
Cash Ticket Receipts involving an EMV chip read card would print information similar to the following:
PAYMENT METHOD[S]:
SALE-MasterCard 33.76
ACCT:###9049 APPROVED:400309
AL: US Maestro
Entry Mode: CHIP
AID: A0000000042203
PS: PIN Verified
Cash Ticket Receipts involving a card swipe on the device would print the following information:
PAYMENT METHOD[S]:
SALE-Visa 33.10
ACCT:###0026 APPROVED:OK9999
Entry Mode: SWIPE
Cash Ticket Receipts involving a "card on file" would print information similar to the following:
PAYMENT METHOD[S]:
SALE-Visa 33.76
APPROVED:OK125C
Entry Mode: Card on File
Cash Ticket Receipts involving an Original Invoice "token" and using the "Void" option (check box), would print the following information:
PAYMENT METHOD[S]:
VOID-Visa -33.76
APPROVED:VOID
Entry Mode: Orig. Sale Reference
Cash Ticket Receipts involving an Original Invoice "token" but not using the "Void" option, would print the following information:
PAYMENT METHOD[S]:
REFUND-Visa -33.10
APPROVED:OK9999
Entry Mode: Orig. Sale Reference
Invoice style documents print similar information; however, in those cases, card information is printed in two different areas of the invoice (below items and in the footer where the remittance information prints).