AnyWare Inventory Receiving
You can use this feature to create a mobile receipt for incoming inventory. Mobile Receipts must be finalized in the application and will not affect on-hand quantities immediately. It will not update the purchase order associated with the incoming inventory. You can modify AnyWare receipts until the mobile receipt is imported into the Receiving area of the application.
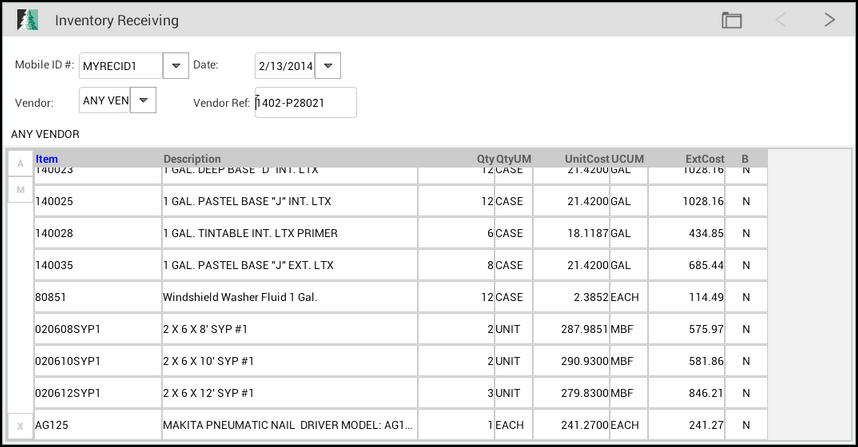
The Inventory Receiving data grid contains a column at the end (B) to indicate back ordered items.
Inventory Receiving
Receiving Incoming Inventory Items
Adding a Mobile ID
As with Purchase Order Entry, the mobile receipt begins with the Mobile ID assignment. This can be anything you like, but must be unique for each mobile receipt that is currently active. After a mobile receipt has been saved, any AnyWare user can modify it until the Mobile Receipt is imported and processed using the application.
To add a new mobile ID, type the identifier that you want to use into the text area. Next, long press on the text area and choose New.
To modify an existing mobile receipt, enter the ID, if known, or short press on the "arrow" button to produce a full listing (or a partial listing if you typed part of an identifier matching one or more existing identifiers).
Adding a Vendor
You can add a vendor to the mobile receipt a couple of ways.
-
If your receipt involves a purchase order, you can use the "receiving" option (menu) to scan or select an existing purchase order. This will populate both the vendor and AP reference fields for you.
-
Alternately, type the vendor's code, if you know it, and short press on the arrow button associated with the field.
The field also offers alternate selection by the vendors name (in this case, type the vendor's name in the text area, long press, and choose Vendor Name).
Adding a Vendor Ref
This field corresponds to the AP (Payables) Reference in the application's receiving feature. This is typically either going to match your purchase order or be something the vendor provided such as a packing slip. If you use the Receiving option (from the menu) to select an existing purchase order, the Vendor Reference (Ref) and Vendor fields will be set for you if you haven't already specified or selected a value.
Date
This defaults to the current date and will be the default receipt (posted) date when this mobile receipt is eventually imported into the application. The alternate (long press) menu offers preset values for the current day or next day (tomorrow).
Adding Received Items to the Grid
You can display the item entry fields using the Arrow > button or by swiping from right to left.
Inventory Receiving > Item Entry
Selecting an Item
You can scan an item's UPC (barcode) or you can type in some or all of the item's SKU in the Item Text area to narrow the search.
If you have a Motorola Enterprise ET1 tablet with a bolt on scanner, you can use the paddle buttons on the back of the device to activate the scanner. You can also use other supported wireless BlueTooth™ scanners. If your mobile device has a camera with the necessary software, you can use the Scan option from the Menu. In all these cases, the cursor or active field must be the Item control.

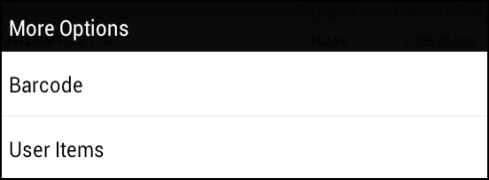
Alternate selection options include barcode and user items.
You can also use alternate selection options such as the Barcode and User Items. To see more options, in the Items text field, enter a full or partial barcode and long press on the item control until the "More Options" menu appears.
-
Choose Barcode from the list and the matching items (if any) display.
It is far easier to use your device's bolt-on scanner or a wireless handheld scanner than this method. -
Choose User Items to display a list of items that are linked to a specific user.
These items can be defined in the Spruce application and are often short lists of commonly needed or used items. Partial entries in the Item text area before choosing the alternate menu can help narrow down the results returned.
Entering the Item Details (Unit of Measure)
Entering the UM, or Unit of Measure, describes the relative measurement for either quantities or pricing. Items may have one or more measures defined. Each item has a BASE unit of measure that is used for the item's quantities (on-hand, on-order, committed, min, max, etc.). All other measurements have a numeric relationship with the BASE measurement. For example, an item with a "base" measure of EACH might have another measure for a CASE which is equivalent to 12 EACH.
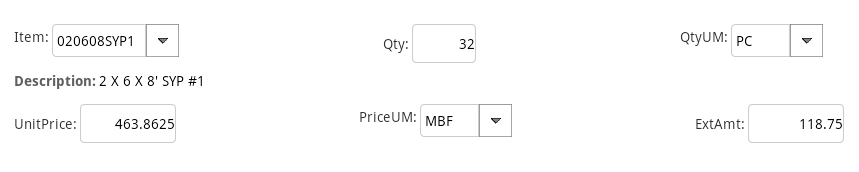
When you enter quantities or pricing (including costs), the values have a corresponding measure. The value you enter must correspond with the measure (or you must change to the appropriate measure). For example, if you had a lumber item that is normally priced using thousand board feet (MBF) and MBF is shown as the UM for the price, the price entered should be the price per MBF, not some other measure such as PC (per piece). Either quantities and pricing entered should be made to correspond with the measure shown -or- the measures should be changed to correspond with the quantity or price entered.
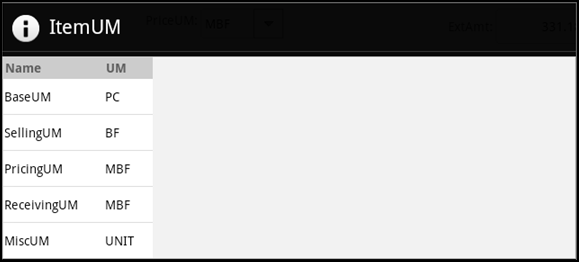
Sometimes, items have alternate SKUs or barcodes which are mapped to specific units of measure. These can change the default measures shown for the item. Additionally, different pricing may be provided depending upon the unit of measure selected. For example, a customer may receive a lower price for purchasing an entire box and a higher price when buying individual pieces.
There are currently no alternate selection methods provided for the unit of measure (UM) control.
Displaying Items in the Data Grid
A data grid provides a listing of the items currently associated with the mobile receipt. You can add, change, and delete items from the mobile receipt.
Minimally, a data grid lists items by SKU (item number) with a description, the quantity, the units of measure, and extended amounts. The exact information presented in the data grid vary based on the type of work completed in the data grid; for example, a purchase order would display cost information whereas an order or mobile invoice would involve pricing. The controls provided for item entry can also vary in this regard since some "entry" fields will only apply to certain types of work and not others.
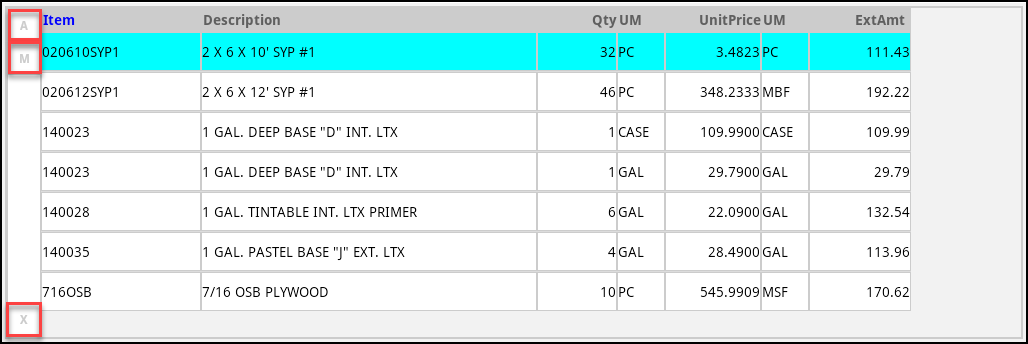
Items in a Data Grid
Along the left side of the data grid, you can find these buttons to perform these actions:
-
Add (A),
-
Modify (M), and
-
Delete (X)
To change an existing item in the data grid, choose the row with the item information. It displays in the upper area of the form.
Then, to make changes to the entry, choose (M) to modify and return the item to the grid or, to delete the item, choose delete (X) to remove the row (item) from the grid and the mobile receipt.
As an alternative to using these buttons, you can also long press in the grid area. Doing this produces a menu offering the same add, modify, and delete options that the buttons provide. The long press may work better on smaller display screens (if you have difficulty pressing the appropriate buttons).
Depending upon your device's display size and number of items, some of the grid columns and/or rows may be hidden from view. You can scroll the grid control up and down and right and left to view additional details. Scrolling is done by using a swiping action on your touch display.
Processing the Mobile Receipt
When you have completed your mobile receipt, choose the Process option using the Menu button or icon.
Receiving Inventory in AnyWare and Processing it in the Application
To receive inventory using the AnyWare app and import the received items into Spruce or RockSolid MAX:
1. From the AnyWare Main Menu, select Purchasing > Inventory Receiving. The Inventory Receiving dialog box displays.
2. Enter a Mobile ID or choose New and in the Vendor list enter/select the vendor record.
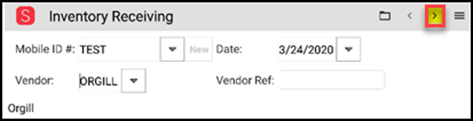
AnyWare Inventory Receiving
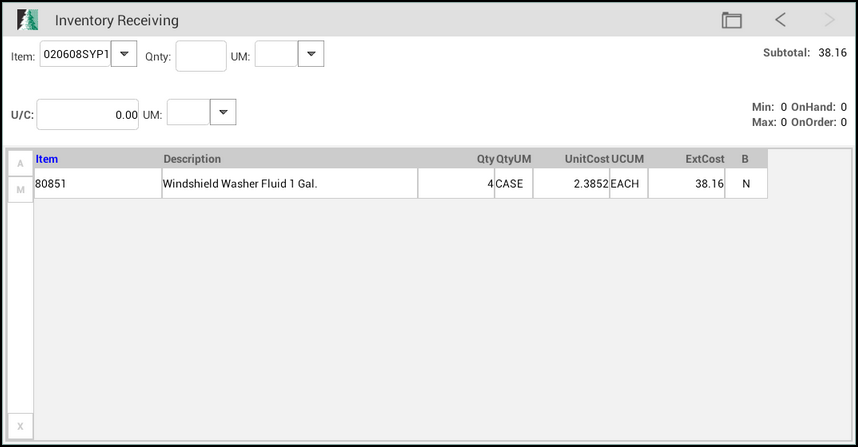
3. Select the > icon to begin entering the incoming inventory items.
4. Scan or enter the items into the data grid as follows:
-
To enter items manually, in the Item field, tap to display the keyboard and enter the first few Item ID characters and tap the down arrow to see matching items.
Click the item that matches in the list to add it to the data grid. -
To scan an item into the data grid, use the scanner feature in the device. The item displays in the data grid.
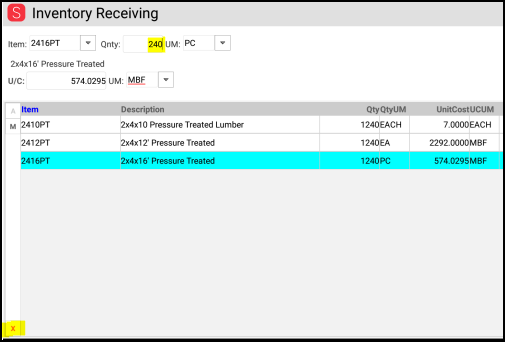
5. Update the Quantity field with the number of items of this type that you are receiving.
6. Update the UM field with the measurement of the items you are receiving, if necessary.
7. When your happy with the item entry information, tap A (for Add) in the left column to add the item to the data grid.

AnyWare Inventory Receiving with Add Option Highlighted
8. To modify an item in the data grid, tap it to highlight it and make your changes in the entry fields. Then tap M (for Modify) to update the entries in the data grid.
9. To delete an item from the data grid, tap the item in the grid and click the red X (for Delete) and the app deletes the item from the data grid.
AnyWare Inventory Receiving with Delete Option Highlighted
10. When you have completed your entries, go to the upper right corner and choose the Menu ![]() icon to display the options.
icon to display the options.

11. Choose Process and save the Receipt.
12. Open the application (Spruce).
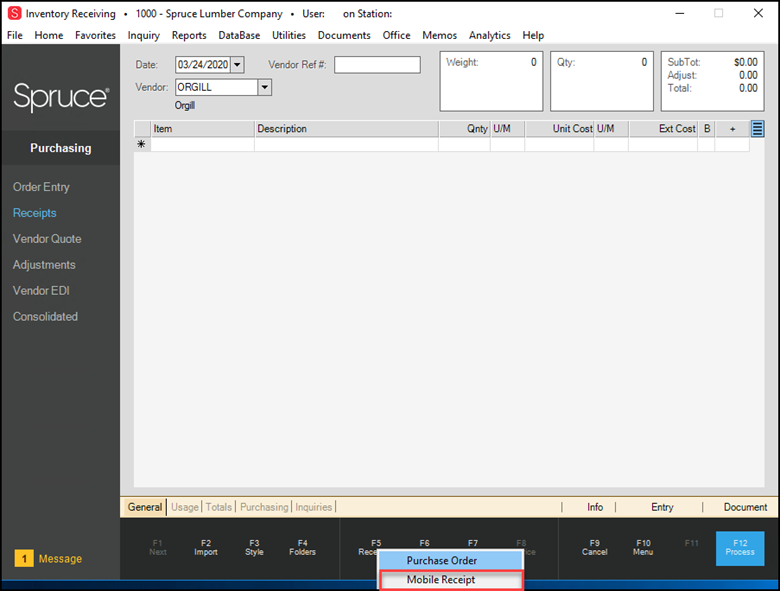
13. From the Main Menu go to Purchasing > Receipts to display the Inventory Receiving form.
14. In the Vendor field, choose the vendor for the receipt you created.
15. Choose Receiving (F5) and choose Mobile Receipt from the context menu.
The PO Inventory Receipts box displays.
16. Choose the inventory receipt you saved in step 11 and click Accept.
The AnyWare items list loads into the data grid. You can add or change items if necessary.
17. If you have made changes, choose Reconcile (F7). A prompt displays.
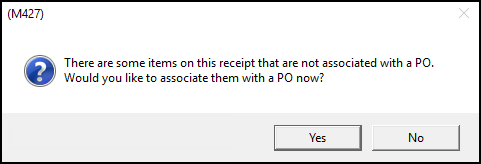
18. Choose Yes to associate the receipt with the PO and then select the EDI Updated PO. The Reconcile Grid displays.
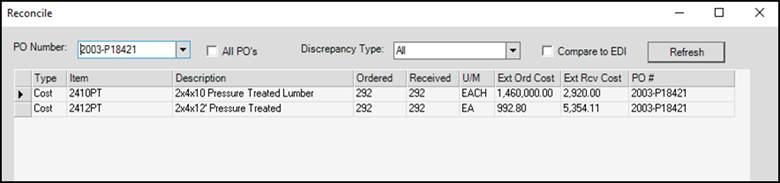
Reconcile Grid Form
The Reconcile grid lists any variances between Receipt and PO. You can right-click an item in the data grid to Print Preview and Print or right-click Select All, then right-click to Copy and Paste in Excel. This is not required.
19. Decide what you want to receive based on your internal receiving process and choose one of the following:
-
Option 1- Use the Scanned Mobile Receipt – which reflects the received quantities logged in AnyWare. Process the original receipt.
-
If the Backorder flag is set to N, selecting his option closes the EDI Updated PO.
Note: You can also close the PO if you need to using the Close PO check box in the Reconcile data grid or using the Close PO option in the Order Entry Menu Marker. -
If the Backorder Flag is set to Y, selecting this option will only close the PO if all of the items were received from the vendor.
-
-
Option 2- Use the EDI Updated PO – which reflects what the vendor says they sent to you. To select this option:
-
Choose Cancel (F9) out of the Mobile Receipt.
-
Choose Receiving (F5) and choose the EDI Updated PO.
-
Process the receipt.
-
Process the claims with vendor and create negative/positive PO’s to record the discrepancies.
-