AnyWare Document Viewer
The Spruce AnyWare app has a built-in Document Viewer so you can view more or more application-related documents. If you know the document ID, or have a document with a barcode you can scan, you can enter or scan it from the Document field to immediately view the document. Otherwise, choose criteria and then populate the data grid (by using the "Select" option on the Menu). You can view, print or send the document via email from this area.
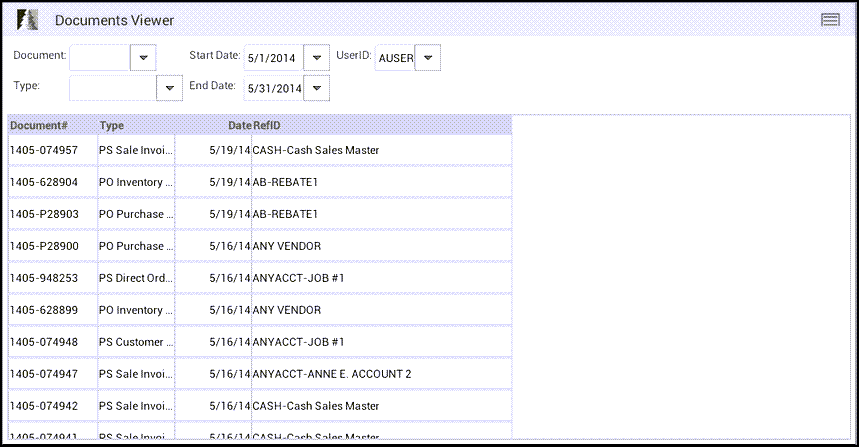
Document Viewer List with Entries
You can search for documents by Document ID #, type (Document Type), start date, end date, and user ID. You can set a date range to look at documents created within a certain time, although we find that it is best if you also search for a particular document type in these cases to limit the number of documents that return.
Tap in the appropriate fields and then either press the down-arrow button or use the Search button to select a document type, date range, or user. Once all your selection criteria are specified, press the Menu button and choose Select.
Document
To view a list of recent documents, tap in the Document text area then short press the down-arrow button or use your device’s Search button (if any) to view a listing of documents (with the most recent appearing first). The selection list includes the document ID, type, date, and reference (reference content varies by document).
Type
All application documents are assigned a type, which indicates the source and use of the document ("Purchase Order" or "Sale Invoice," for example). To filter the documents based on their type, use the arrow button to select a document type. When documents are selected based on the criteria specified, only documents matching the selected "type" and other criteria will be included.
Date Selection
Date selection may involve either one or two linked date controls. When two (2) date controls are present, they are usually provided for entry of a range of dates. In this case, one control is used to indicate the start date and the other the end date for the range. Soft keyboard (manual) entry for dates is disabled for date picker controls.
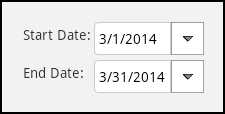
Date Controls
Short press on the button portion of the field (right) provides a calendar control that allows you select a date using the month, day, and year. Tap the "+" button above the date part to increase its value (ascending) or the "-" to decrease the value (descending). After the date matches the desired day, press the "Set" button.
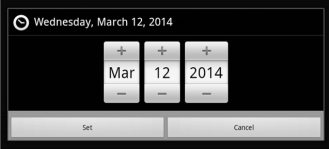
Date Picker
Where a date range is allowed, a long press on either date field produces a menu listing preset date options that may be used to quickly set a range of dates.
Choices for ranges include: clear date, today, tomorrow, current month, last month, current year, and last year.
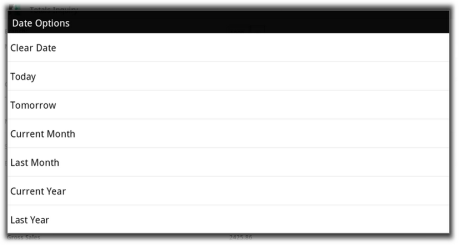
Date Options for Selecting Date Ranges
UserID
Use this filter to limit selected documents to those involving a particular user. Some documents may have more than one user associated with them.
Viewing a Document
After a list of documents displays, tap on a row, and then choose View from the Menu ![]() to view that document.
to view that document.
Use the Back/Undo button to close the document view and return to the selection form.
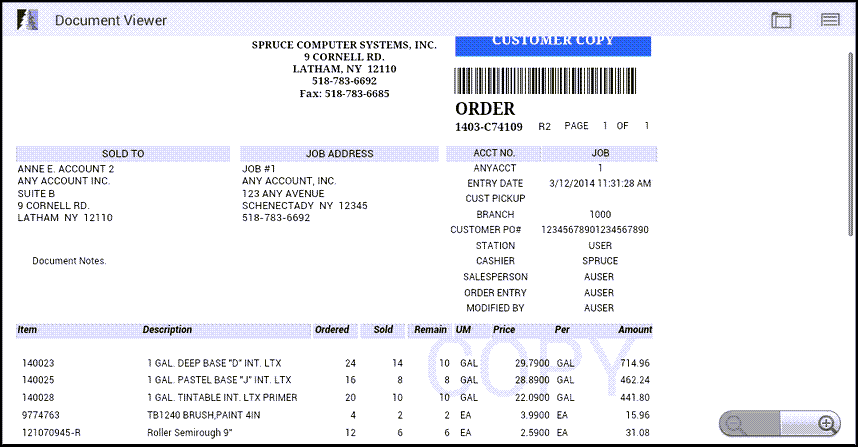
Document Viewer with Document Displaying
While a document is displayed, an image of the document is presented sized to fit your device display. Use a sliding motion to move the document up and down as needed. Scrolling the document also displays zoom in/out options.
To view notes, attachments, and links for the document, press the Folder icon ![]() .
.
Printing and Emailing a Document
Beyond viewing documents, you can also print and email them. Print and email processing is done from your local server, and does not use your device directly. Printers must be configured through the server and the application (Maintenance > Database > Devices) to ensure that printing works successfully.
An automated procedure then checks for newly added server devices... this typically occurs between business days. Once this procedure has found a new printer, it is then made available to AnyWare and app users. Email requires that your SMTP server connection information be configured properly through the Spruce application. Email setup is optional although it is almost always implemented.

To print or email:
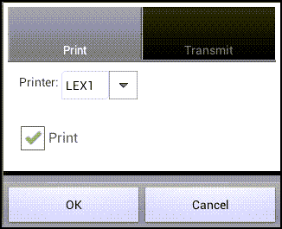
1. From the Menu ![]() , choose the Print-Email button either after selecting a document in the grid area or while viewing a document. This displays a control similar to what you would find in the application for printing or transmitting (email).
, choose the Print-Email button either after selecting a document in the grid area or while viewing a document. This displays a control similar to what you would find in the application for printing or transmitting (email).
2. Continue based on how you want to process the document:
-
To print the selected document, check the Print check box and select a valid printer.
-
To email the selected document, check the Email Document check box and enter the "to" and "from" addresses designated.
Depending upon the requirements of your Email (SMTP) server, the "from" address may change when the Email is submitted (this can happen if authentication is required).
In this case, the "from" Email address you specified (or the default) will be set as the "reply-to" address instead. The "Subject" is set automatically based on the type of document, but you can change it. The notes become the body or "message" of the Email. Documents are always sent as PDF (Portable Document Format) files. These files can be opened using free Acrobat Reader software available from Adobe Systems Incorporated.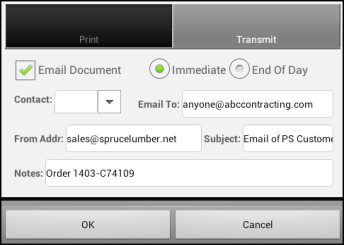
3. When you have completed your selections and entries, click OK to complete the process.