Inventory > Removing "Dead Items" from Inventory
When you sell out of items you no longer need, you cannot remove the item records from inventory because you need to see those records’ history when you look them up in the future. We call these item records you no longer need dead items. To manage dead item records, you can merge them into a dummy record, and name it something like DELETED or DEADITEMS to store historical sales information in one place. We describe the process below. You use the Inventory Dog Report to create a spreadsheet that contains the dead items and then merge the records into a dummy ID. The process is the same for Spruce as for RockSolid MAX, but the Merge/Rename form is slightly different.
Do It Best BOPIS Note: If you are merging, deleting, or renaming items that have the Ecommerce tab Buy Online Pickup In-Store enabled, disable this check box for these items first and wait (five or 10 minutes) for the EDI update to complete before you follow these instructions. If you do not take these steps, errors result. After the update is complete, re-enable the Buy Online Pickup In-Store check box for the item(s) you are going to change and return here to begin this process. The application will update the Do It Best BOPIS records you modify through the normal EDI process after this merge is complete.
Note: See Deleting the "Dead Items" Item for more information.
To merge no longer needed inventory records:
1. Create a spreadsheet that includes the items you consider dead items. We recommend you use the Inventory DOG report to collect these records.
a. From the Main Menu, choose Inventory > Reports > Custom Report Library. The ActiveReports tab displays by default.
b. From the list that displays click the IN_DOG_REPORT or IN_DOG_REPORT_NEW entry.
Note: If you do not have this report, you can download it for free from the Customer Portal. Provide your work email to log into this portal and search for the Inventory Dog Report. The Help System provides more detailed instructions for downloading inventory reports.
c. Choose Preview (F7) to display the report settings and options.
![]()
d. In this table, enter the criteria you want the report to use to collect the inventory items you want to merge. All entries are required.
-
Enter Branch ID
Enter the branch you want to collect the item data for. -
Exclude Items Added Since (Date)
In the Value column, click the field to reveal a date list. Choose the down arrow and select the date in the calendar you want the report to use. Choose the date you added the last of the items you want to include. -
Last Sold Over # Days
Since you are collecting records of items you haven’t sold in a long time, enter the number of days since you sold the items from inventory. The default is 365, but you can type over this entry to choose something else. -
Only Include Items with Onhand <> 0
Use this field to specify that you want to collect items that you no longer have on hand. This entry defaults to False or No.
e. When you have completed your entries and selections, choose OK. The application collects the items from inventory that match your criteria and displays the results.

f. Review the list to ensure all the data you want to include is present in the report. You can go back and change the search criteria if items you need to include are missing or you can enter the Item ID in the first column manually.
g. When you are ready to create the spreadsheet, choose Print (F8). The Document Print options display.
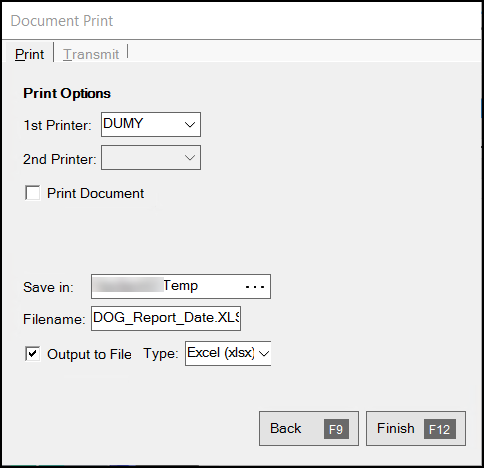
h. Uncheck the Print Document check box.
i. Complete the Output to File options to save the content of the report as a file.
-
Save in
Choose the Ellipsis icon and navigate to the folder you want to save the spreadsheet to.
 -
Filename
Enter the filename for the spreadsheet. -
Output to File
Select this check box. -
Type
Select the spreadsheet format you want to export the report data to; typically, Excel (xls) or Excel (xslx).
j. Choose Finish (F12) to save the file.
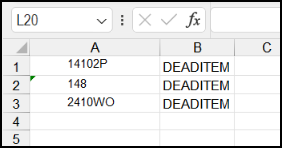
2. Open the spreadsheet, delete the headers, keep the Item ID column, and delete the rest of the entries from the spreadsheet.
3. In the second column for each item in the list, add the ID name you intend to merge the list of items to. Then save the file. Enter an ID name that is meaningful to your team.
4. In the application, choose Inventory > Utilities > Management > Merge/Rename Item. The Merge/Rename Item form displays.
5. Choose the Lists tab and click the Update Requests button. The Import (F2) key enables.
6. Choose the Import (F2) key and click Wizard from the list. The Import Wizard form displays.
7. Choose the Windows File button and click the Ellipsis icon to navigate to the folder with your saved spreadsheet. Click the file and click Open to import it into the application. The application displays a preview of the entries.
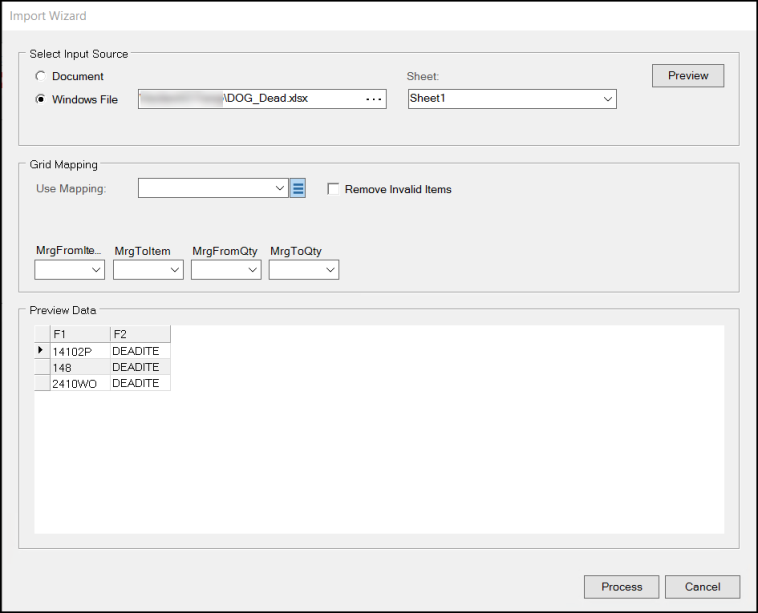
8. In the Grid Mapping section, in the MrgFromItem list, choose F1.
9. In the MrgToItem list, choose F2 and choose Process.
The Lists data grid updates with the entries from the spreadsheet. The Items Added message displays.
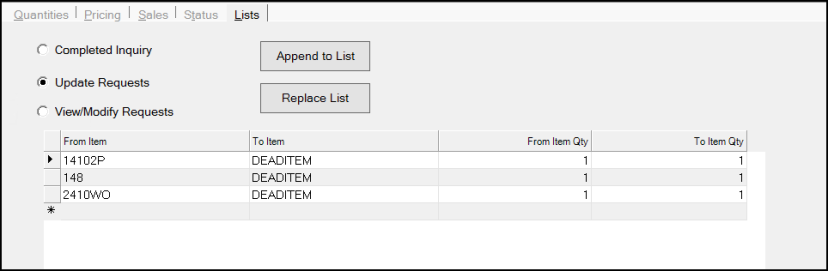
10. Choose the Replace List button to save the list. The Quantities tab displays and you are ready to set the time to schedule the merge process.
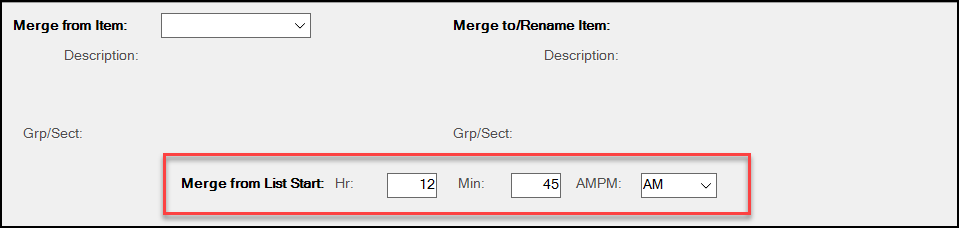
When this time arrives, the application will start running through the list and merge the items you specified. We recommend that you set a time outside of normal business hours, when there are no other tasks scheduled, as this will occupy the station’s time. The longer the list, the longer the merge process will take.
11. In the Merge from List Start fields, enter the time in hours and minutes that you want the merge to occur. Select the AM or PM entry as needed.
12. After you set the time, choose the Merge (F5) key.
13. The next day, we recommend you return to this form and check the Status tab to see if any of the items were not merged. This might happen if any of the selected items had an open order or PO record associated with it.
Deleting the "Dead Items" Item
When you merge many items into one pseudo-item, you may not be able to delete it in the future, particularly if it contains historical sales data from the merged items. If you want to try to remove the barcodes from it, you can remove all barcodes associated with the pseudo-item using the Delete Barcodes Utility, which works the same way in Spruce as in RockSolid MAX.
Note: If the merged pseudo-item does not contain significant historical sales information, you can delete it by displaying it in the Item Maintenance form and using the Menu Marker. Performing this action will also delete any barcodes associated with the pseudo-item.
To run the Delete Barcodes Utility on the merged pseudo-item:
1. From the Main Menu, choose Point of Sale > Utilities > Barcode Entry. The Barcode Entry form displays.
2. Choose the Item Maintenance button.
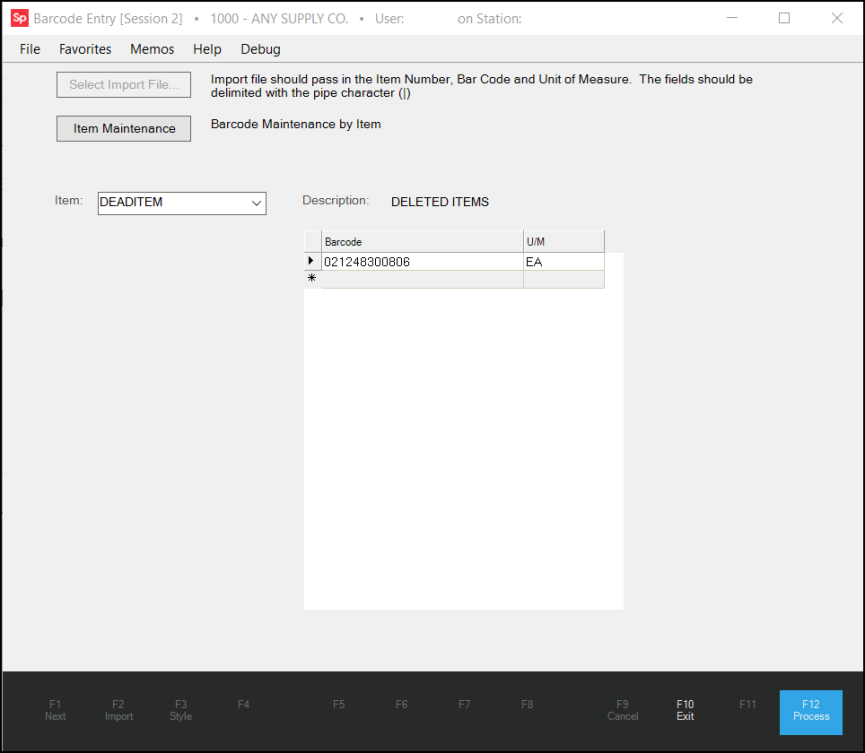
3. From the Item list, choose the name of the pseudo-item. If found, the Barcodes list displays the list of barcodes associated with this item.
4. To delete the barcode(s) from the item, click the row to highlight it and right-click it to display the context menu.
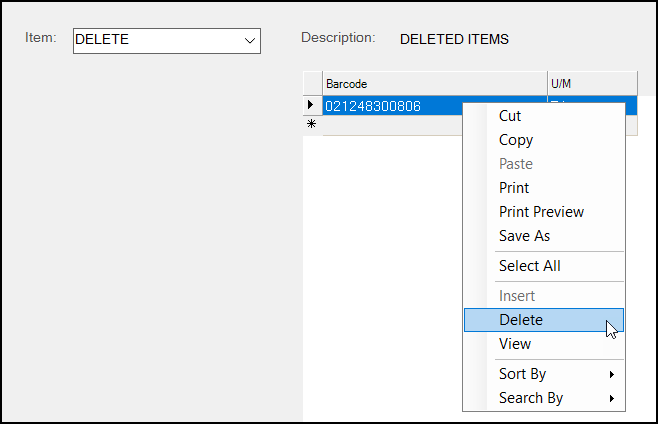
5. Choose Delete from this list to delete the barcode from the item.
6. Choose Process (F12) to save this change.