ScanPro
ScanPro is a product of Backbone Solutions, Inc. and is one recommendation as a replacement for QuickScan Pro which is no longer being sold or supported. Backbone Solutions licenses their software by workstation. To purchase one or more licenses, please contact Backbone Solutions directly or visit their web site. Trial versions of their software are also available.
http://backbone.cc/index.html
When scanning a batch of documents, the ScanPro application checks for a barcode on each document page. For multi-page documents, a barcode should be placed on the first page only. Subsequent pages, with no barcode, will be added to the same output file. Each page scanned with a barcode will be considered the beginning of a new document. Barcodes can be overridden or manually assigned when necessary.
Requirements
ScanPro can work with a variety of scanners; however, to function, your scanner's manufacturer must provide an ISIS driver which you must install prior to scanning.
Setup
Complete the following steps to configure ScanPro to work with application and external labeled documents:
1.Open (run) the ScanPro application.
2.Select "Tools" and "Profile Editor" from the toolbar along the top of the application window.
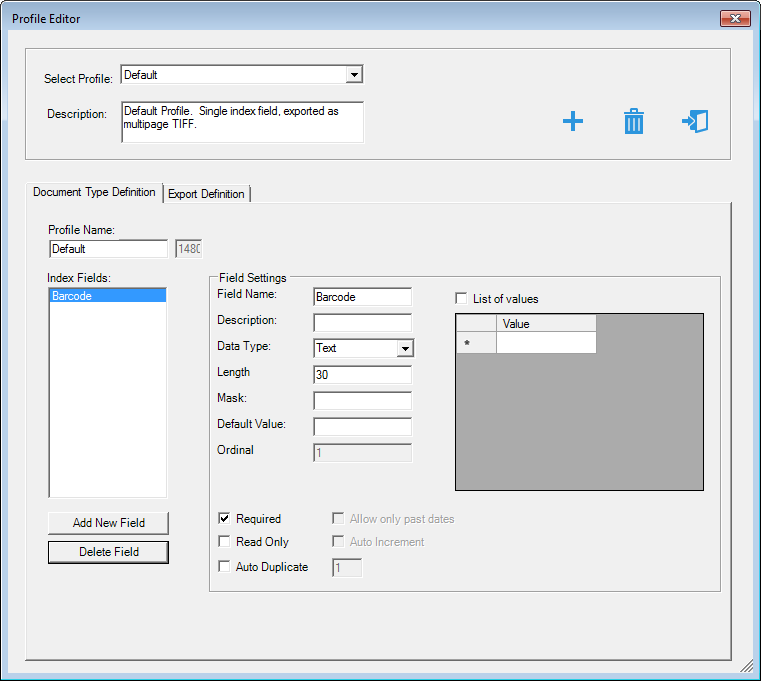
3.Under "Field Settings" enter a field name of "Barcode," make sure the "Required" check box is checked, and click "Add New Field."
4.If the "Index Fields" listing contains an item named "Field1," click the item (highlight) and choose "Delete Field."
5.After completing the prior two (2) steps, the Profile Editor should match the example shown below:
6.Next, click the "Export Definition" tab.
7.Select the "PDF" radio button.
8.Make sure that the "Join pages into Multipage files" option is checked.
9.Check the "Use first index field for file name." This setting will cause scanned pages with no barcode to be associated with the most recent prior barcode that was scanned (combining the pages into one (1) output file).
10.Set the "Export Path" to the output location where scanned files should be saved. If you are a cloud-hosted customer, you should set this to your mapped share drive; otherwise, the path can be a local path or shared network location.
11.Click the "Save and Exit" icon (image button) ![]() .
.
12.Click the ![]() icon to scan a new batch.
icon to scan a new batch.
13.The "Batch Scanner" window will open.
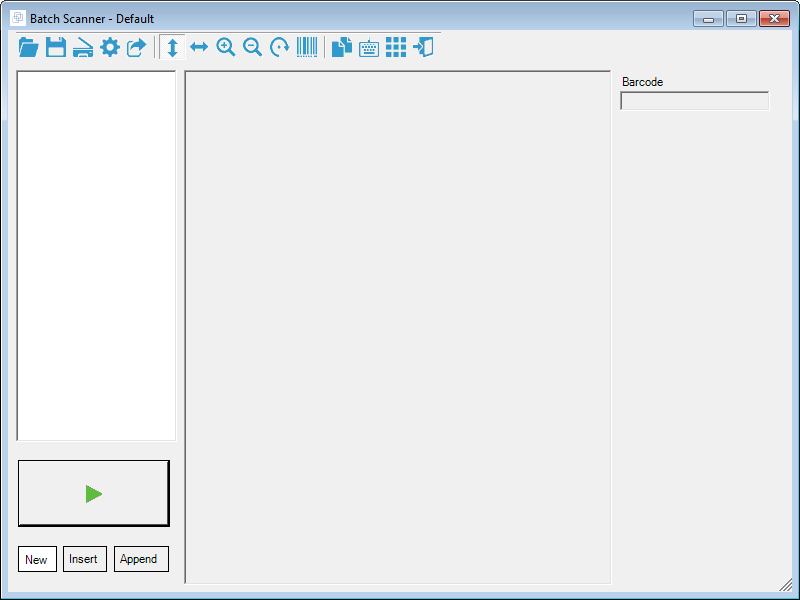
14.Click the green arrow button (bottom left-hand corner).
15.Choose your scanner from the list provided.
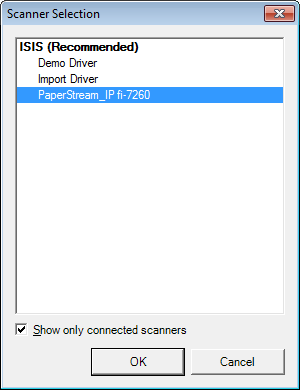
16.Make sure your documents are loaded in the tray (face down is the default) then click OK to begin scanning.
17.Once scanning has completed, the documents will be listed in the tree view on the left-hand side. A preview image of each document along with the barcode scanned will be listed in the middle and right-hand panels.
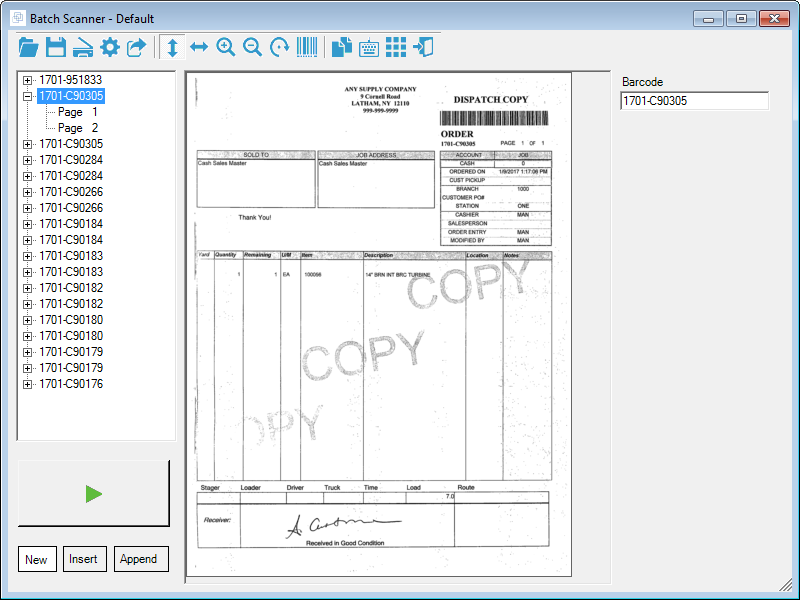
18.If necessary, you can merge documents (right-click on a document in the tree).
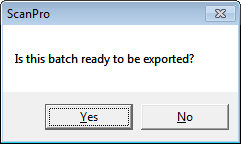
19.Choose "Save and Exit" ![]() once you are satisfied with the results. A confirmation dialog will be shown.
once you are satisfied with the results. A confirmation dialog will be shown.
20.Next, choose "Auto Export" from the ScanPro "Scanned Batches" window.
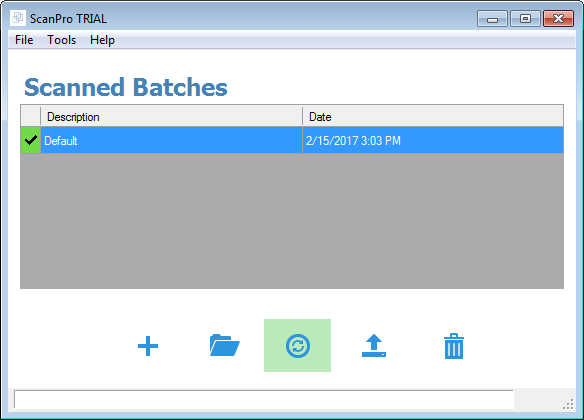
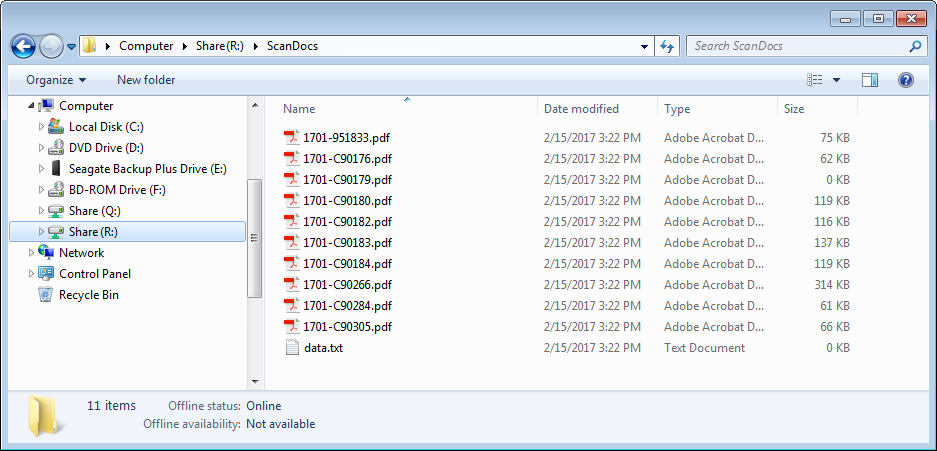
At this time, the output folder should populate with the scanned image files (PDF). A data file is also generated with details regarding the batch and processing.