Parameters > Receivables Tab
Use these parameters to choose posting payments and producing statement document settings. The application creates statement documents automatically by a scheduled service that runs on the date specified in the Task Scheduler. Changes to these parameters after statement documents create won't affect statement format or calculations even if you change them prior to those documents being delivered (by "delivery," we mean printing, emailing, or faxing of the statements).
Parameter changes don't retroactively change the results of any previous activity such as posted payments or previously generated statements. Those settings labeled "default" are used when adding new customer accounts only; therefore, any changes to defaults don't affect existing accounts. Global modify can be used for making changes to existing accounts in many cases.
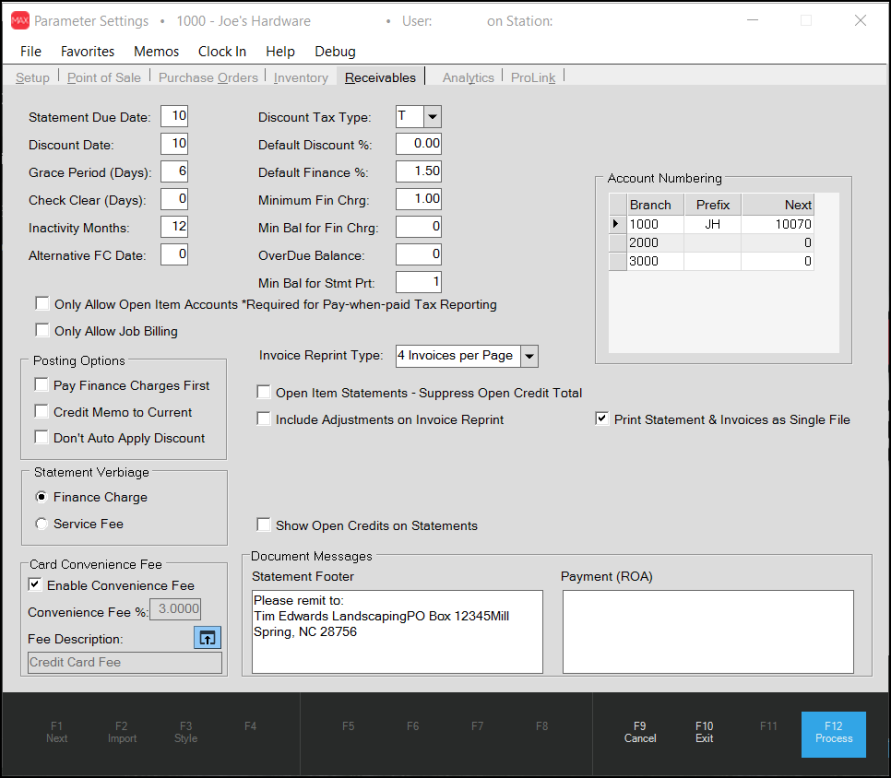
Parameters Form - Receivables Tab
Timing and Dates
These settings determine various dates and periods used with receivables.
Statement Due Date
This setting is the day of the month (25th, for example) used to determine the due date set on invoice records and printed on statement documents (where applicable). Valid values include a number between 1 and 31. The due date on statements is calculated by taking the statement date, adding one month, and then setting the day of the month to match this figure. A different but similar calculation is used for invoices; however, the due date isn't generally used. If your billing runs mid-month and your "due day" is set to a day after your billing cycle date (same month), the "due date" will be set to the following month. For the best results, we suggest matching the "statement due date" either to the same day as your statements are processed or just prior to that date.
Discount Date
This setting is the day of the month (0 - 31) that payments may be received up to in order to be eligible for statement discounts (if any). Statement documents set the discount date to the designated day of the month one month following the statement day (date). The discount date on invoices is set based on a separate but similar calculation; however, it considers the "statement due date" and makes assumptions that this matches the billing date, so if the statement due date is after your actual billing date, you can wind up with invoices from the same billing cycle with discount dates that are different (a month apart). Generally, the discount date is assumed to be prior to the statement due date. For example, statements billed on the last day of the month (28th-31st) might have a discount date of the tenth (10th). In this example, the customer's bill is delivered on or near the 1st of the month and they have until the tenth (10th) to pay their bill in order to receive the discount. Use of invoice terms will override this date.
Note: Setting the Discount Date to 0 disables the statement discount date on your monthly statements.
Statements will not show an If Paid By amount or a discounted net due for the prior billing period, and the statement discount counter for that cycle is zeroed at billing. Current discount (DiscountsCurrent), accumulated when charge invoices are processed, can still be applied when the customer pays the full balance (including current charges) during posting or auto-post. This is subject to normal posting-date rules for any remaining statement discount (which will be zero when this parameter is 0).
Grace Period (Days)
This setting allows your company to provide a Grace Period, an extra number of days after the account payment due date to apply the early payment discount. The Grace Period is only applied to accounts receivable-based payments, not adjustments or credit memos. The posting date of the payment is adjusted by the Grace period specified in the Grace Period (Days) field.
For example, if the posting (or entry date if no different post date was specified) is 5/7/2026 and the Grace Period field entry is seven (days), the new payment due date is 5/14/2026.
Note: As of Release 32.0, businesses that use the application-based ecommerce websites to process account payments can leave this setting in place for auto-processed account payments or disable it in the Ecommerce parameter settings. See Understanding the Use Grace Period Parameter to learn more about this setting.
Check Clear (Days)
This sets the number of days that personal checks clear a banking institution for verification of funds. If set, payments will not be posted until this period has passed (the post date on the checks will still be considered the date the payment was received for the purposes of discounts).
Inactivity Months
This setting determines how long an account must remain without activity before the status of that customer's account is changed to "inactive." Inactive is more of a classification than any kind of limit. Inactive customers can still use their account, but the "inactive" status can be helpful in either locating or eliminating "inactive" accounts from reporting or analysis, for example.
Understanding the Alternative Finance Charge Date (Please Read)This parameter ties to an optional feature. If set to a valid integer value, this parameter determines the day of the month that finance charges will be calculated on for all receivables accounts. In this case, regular billing cycle processing skips the assess finance charge step that normally would be done at that time. This allows for the assessment of finance charges on a different date from when the billing cycle processes. This feature is enabled by setting the parameter value to a valid day of the month. The default value, zero (0), indicates that the feature is not enabled and that finance charges are handled by the End of Month (EOM) billing process. Adding any other value specifies the day of the month you want the application to apply the finance charges to an overdue account. In this case, the date would not be the same date as your billing cycle is run; the assessment of the finance charge would occur on the day number specified in the Alternative FC Date field, before the next EOM run date. The date you enter in this field should exist for all months. For example, if you enter 30 in this field, in February, which has only 28 days, or 29 in a leap year, the application would not assess a finance charge for that month.* If you enter an alternate finance charge date, all account finance charges are calculated from their balances at that time. In this case, the new finance charge calculation is done in the early morning (after midnight) and before EOD (End of Day). For this reason, the date you choose actually would only include the prior day's business. For example, if you wanted to calculate finance charges after the close of business on the 15th of every month, you would need to set this date to the 16th, and not the 15th. One additional point, the regular billing cycle close normally runs a global posting for all open payments and credits to accounts. Typically, this affects balance forward accounts mostly, and sometimes open item accounts if the overall balance was fully paid. This same process is not automatically done on the date you assess finance charges when you use this setting. Payments and credits should be applied (posted) prior to the assessment of finance charges so that the application applies the correct finance charges for each account. This may be done globally; however, it must be processed by someone at your company. Assessing finance charges on a different date than your billing may cause confusion or questions regarding statements and charges from your customers. For example, if your company's billing cycle ends on the 25th but you assess finance charges on the 15th, an account could be assessed a finance charge even if they paid their entire balance before the end of the billing period (after the 15th but before the 25th). This can generate questions or worse from customers. We suggest that you explain or notify customers of any changes to your finance charge policy if and when you implement this option. A Note about Reviewing Accounts with this Setting in Receivables > Status InquiryIf you set the Alternative FC Date field parameter and look up an account record in the Receivables > Inquiry > Status form, the values in the Status tab reflect the finance charges assessed when the Alternate Date is reached and the charges have been assessed. These finance charge values will not display in the History tab until the End of Month process run is complete. In the past, this feature required functional changes to your database by Support, but this is no longer the case. Now, a valid day of the month is all that's needed. |
Posting Type & Billing Level Preference
These settings can be used to limit users to selection of a specific posting type and/or billing level preference when adding new customers. Enabling either parameter won't affect any previously added accounts assigned to the different types.
Only Allow Open Item Accounts
Open item accounts are intended for customers who pay by invoice not their overall bill. These accounts track more detailed information than the "balance forward" type and are required for any customer who chooses to participate in a "pay-when-paid" sales tax program. Enabling this option, prevents the addition or modification of an account to the balance forward posting type.
Only Allow Job Billing
Job billing treats jobs very similar to independent accounts except that some summary information is available. When job-level billing is used with a customer, aging, finance charges, discounts, and payment entry are done at the job level. In many cases, there are consolidated options should a job-level account pay their overall account balance or need to post across jobs. Checking this parameter and saving prevents customers from being added or modified to an "account" level billing in the future.
Discount and Fee Settings
These settings determine default discount preferences for new accounts as well as the minimum finance charge and overdue balance (used for determining whether a finance charge should be assessed).
Discount Tax Type
There are two discount tax type codes: including sales tax (T) and pretax (P). Statement discounts are calculated at time of invoicing and accumulated in the "current discount" counter for non-net purchases (sales). Credit memos reduce this figure. In addition, there are another two discount figures maintained. One is for the prior month's statement discount, and the other is the amount of that discount that's been applied so far. When billing is processed, "current" discounts are moved to the prior month's discount counter. Discounts not posted during the current month are cleared.
The discount appearing on a statement will rarely be a direct percentage of the customer's total due. The following reasons explain why this is the case:
•Selected items sold may be flagged as "net" (no discounts) thus changing the discount per invoice.
•Posting allows application of more or less discount than a customer is eligible for. Warnings appear when a user applies more discount than the eligible amount.
•Credit memos processed reduce the "current" discount.
•Discounts may or may not be based on the total including sales tax.
Another function of the discount code parameter is to determine how discount type adjustments are calculated for Point of Sale transactions. These types of adjustments also use this parameter in order to determine whether the adjustment discount is based on the total including sales tax or the pretax total.
Default Discount %
This percentage is the default statement discount used when adding new accounts to the database. It may be changed during entry.
Default Finance %
This percentage is the default finance charge used when adding new accounts to the database and may be changed during entry.
Minimum Finance Charge
This is the minimum amount of finance charge that will be assessed to an account if they carry a balance at time of billing. The overdue balance (see below) does not influence finance charge assessment.
Minimum Balance for Finance Charge
This parameter sets the minimum balance required for an account to be assessed finance charges. For example, you might choose to not assess finance charges on a customer with a balance lower than $25. If customer's balance is less than the minimum, they won't be assessed any finance charge.
Overdue Balance
This parameter sets the minimum dollar amount used to determine whether an account's past due balance is to be treated and recorded as an overdue balance. This affects the account's overdue counters available in the Status Inquiry form, which might be used for credit reporting or internal analysis. Overdue counters record the number of times an account carried a balance in each aging period (30, 60, 90, and 120) over the previous 12-month period.
Example: If the parameter is set to 50, an account with a 60-day overdue balance over $50 would be recorded as overdue for that particular period; however, if an account's 60-day balance was below $50, it would not be recorded.
Minimum Balance for Statement Print (Min Bal for Stmt Prt)
This parameter provides a way to prevent statement delivery when the customer's balance is below the dollar amount designated and the account's Print Zero Statement setting is also No. This doesn't determine whether or not a statement is generated; however, it does flag the statement that it should be skipped during delivery. Statement documents are created on a monthly basis by an external process (by the Billing "checklist" run via services) and this is the time when this parameter would be considered. The Skip flag is, therefore, always set prior to statement delivery using the Statements option on the Receivables menu.
When we refer to statement "delivery," we mean printing, faxing, or emailing of the statement document from the Statements option on the Receivables menu. The Skip flag won't prevent delivery should you manually choose to print, email, or fax the document from the Documents form. Later changes to the minimum amount won't change the "skip" status on previously generated statement documents.
Posting Options
The following three settings apply to the application of payments to open items or balances via manual or automated posting:
Pay Finance Charges First
If enabled (checked), this parameter requires that all payments and credits posted be applied to a customer's outstanding finance charges before being applied to their account balances. If your company uses the ProLink app and allows payments via the app, finance charges payment is required when the consumer (end-user) selects open invoices for payment. Balance forward accounts don't require invoice selection, so how the payment is applied is controlled by your company in that case.
Credit Memo to Current
If enabled (checked), this parameter posts selected credits ONLY to the current balance, even if other balances are available to post to. If nothing else is available to post to, then it will become a negative current balance.
Don't Auto Apply Discount
If enabled (checked), eligible statement discounts won't be applied when using an automatic posting function. For open item accounts and jobs, current and other discounts can prevent a payoff if the total credits exceeds the total due less those discounts. Enabling this parameter causes discounts to be ignored and not considered when determining the "payoff" amount.
Statement Verbiage
Preferences or requirements may influence your choice in how fees charged to receivables customers are described on statements. There are two options: Finance Charge and Service Fee. The selected description will print along with any charges assessed to the customer's account using the Finance Charge settings assigned to the customer (rather than a percentage, this could be a flat fee determined by the "minimum finance charge setting").
Card Convenience Fee
These settings give you a way to recoup finance charges for accounts that pay using a credit card. See Convenience Fees to learn how this works.
Document Messages : Statement Document Footer
Use this area to type a message for inclusion at the bottom (footer) of statement documents. There is a limit of 100 characters to the Statement Footer.
Document Messages : Payment (ROA)
Use this area to type a message for inclusion at the bottom (footer) of Received on Account payment documents .There is a limit of 100 characters to this footer.
Invoice Reprint Type
This parameter sets the default format for invoice reprints. There are three formats currently available: "1 Invoice Per Page," "2 Invoices Per Page," and "4 Invoices per page". The "1 Invoice Per Page" setting prints normal full page invoices. The "2 Invoices" option prints two reduced (re-sized) invoices on each page. These are printed side-by-side in a horizontal orientation. The "4 Invoices" option prints four reduced size invoices on each page. In this case, the application prints up to four invoices in portrait orientation, two side-by-side in the top half of the page and another two below in the bottom half.

2 Invoice Option

Four Invoice Option
This parameter only influences printed documents and does not currently apply to E-mail or faxed invoices.
The invoice reprint selection is used even if a particular customer has fewer invoices than the per page setting would allow. For example a customer with a single invoice to reprint would still be printed in either 1/2 the page or 1/4 of the page's available space when using either the "2" or "4" invoices per page options.
Open Item Statements - Suppress Open Credit Total
If checked, the "remit" page for open item statements will not print a total of the unapplied (open) credits. The default (not checked) does include a total for the open credits and is preferred by most users. The statement document generated when using this feature (checked) is different and may not support the latest features and changes. Canadian customers should not use this option as it will not include the tax summary on the "Statement Summary" pages (GST/HST/PST, etc.).
Include Adjustments on Invoice Reprint
Enabling this parameter causes "adjustment" documents for receivables customers to be included with invoice reprints for the customer. Invoices delivered via email and/or fax will also include both debit and credit adjustment documents if enabled. Note: finance charges are not associated with a document and are not considered an "adjustment" document, so they won't be included. Charge order deposits (or deposit refunds) are linked to payment and payout type documents and are also not included.
Show Open Credits on Statements
The "Show Open Credits" parameter, if enabled, will suppress the "beginning balance" on open item account statements in certain cases (consolidated or consolidated no summary/remit types). The format of these statements is not significantly different when the option is disabled (False) and the beginning balance is displayed. When this parameter is enabled, the following changes to statements and billing processing occur:
-
Statements for Balance Forward customer accounts will print an Ending Balance that is the "Net Due" rather than the total "Balance Due." Net due is the total due less any unapplied (open) credits. Balance due (default) is not reduced by credits that had not been applied (posted) to balances.
-
Messages printed on statements for "credit balance" (amount due is less than zero), "no payment due" (amount due is zero), and other situations are based on the "net due" instead of the "balance due."
-
Finance charges will be calculated at time of billing on the sum of the past due balances, plus any new debit adjustments flagged for assessing finance charges, less any disputed amounts, and less any open credits (not posted).
Finance charges don't consider open credits unless this parameter is enabled (checked), so companies who don't include use this feature would be expected to post their open credits prior to billing.
The "Show Open Credits on Statements" option will only display the open credits if the billing level is set to "Job". If the billing level is set to "Account", the open credit value will populate the totals box of the statement, but no credit details will be provided.
Print Statement & Invoices as a Single File
This parameter, if enabled (checked), sends the statement and associated invoice reprints as a single file to a printer. For companies who have issues with print spooling where jobs aren't always processed in the order of submission (or who run statements from different sessions concurrently), this may solve issues where statements and invoice reprints aren't always processed together. Scaled reprints for 2-up and 4-up are available for use with the single-file option. Job billed statements are still processed as separate print jobs (including invoices if the parameter is selected).
This setting has no effect on statements and invoices that are transmitted via email. Email will still send the invoices and statements as separate attachments.
When using a printer that prints duplex (on both sides of the paper) and printing using the "single file" option, there will be no break between the statement pages and invoices. A three (3) page statement would print the first invoice on the back of the third statement page, for example.
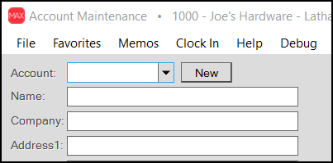
Account Numbering
Use this table to define the default account numbering convention when using the New button in Account Maintenance. Account numbering by branch assists you in managing the accounts and ensuring that there are no duplicate account numbers in the application.
For each location (branch), you can define up to a 2-character branch prefix and "next" (or starting) number. Once a prefix has been defined for a particular location (branch), a New button will be available in the Account Maintenance form. This button may be used to automatically assign the next sequential account number. Any "next" or starting number indicated (this is optional) will be appended to the prefix and padded with zeros (on the left) so that the entire account number is a length of 8-characters in total.
Note: If you have enabled/use ProLink, the account numbering table is created and used automatically, without regard to the parameter selected here.
For example, if your branch prefix is "C" and you specify a starting number of 30000, the first "new" account number generated would be "C0030000."
•Prefix characters should be uppercase letters, digits, or a combination of the two. Any lower case letters used in a prefix are automatically changed to uppercase when a new account identifier is generated.
•Special characters are not prevented; however, we suggest that characters not be used. Some characters are not allowed for account numbering and will produce warnings and/or errors if you attempt to create an account using them. If you do decide to use characters that are not letters or digits (again, not suggested), you should avoid using the following characters which are not allowed in account numbers:
|
' |
Single Quote |
|
[ |
Square Bracket (Left) |
|
] |
Square Bracket (Right) |
|
_ |
Underscore |
|
% |
Percentage |
•The same prefix cannot be assigned to multiple locations. Prefixes must be unique.
•Prefixes don't have to be assigned or used with all branch locations; however, the New button will only be provided in Account Maintenance when the user is currently signed into that branch.
•The maximum starting number is 999999 (regardless of the number of prefix characters).
•The "next" number is incremented each time you use the New button. This is done regardless of whether an account is actually saved or not using that number.
•The "next" number can be reset at any time manually and will roll over if once it reaches it's maximum value.
•If an existing account already uses the number generated, the software will increment the number until no match is located.
•The New button does not display when you are modifying an existing customer account.
In the Account Maintenance form and True Value Rewards sign-up dialog, the New button is only shown when a prefix has been defined for the current branch location.