F1- Next
The Next (F1) function automatically selects the next sequential entry from an active selection list as long as further matches exist for the range. This function only applies when working in a grid or maintenance form and after a selection list has been used previously (either by making a partial entry or using the alternate menu choices to produce a selection list). The Next (F2) function is only enabled when it is available for use (meaning a selection list has been invoked). Entry of any exact match disables the Next function (because there is no current selection list in this case).
Using the Next Function in Utility Forms
The Next (F1) function can be useful when making a series of file maintenance changes or when you want to perform inquiry on items in sequence. A "next" function isn't included on all forms, but it is provided on a few of the most commonly used forms specifically those used for maintenance and inquiry on items, customer accounts, and vendors. In addition to the next option, there are also "continue mode" options which retain the current folder selection when viewing additional records (normally, the form would reload and the folders would be reset). The maintenance utility forms for vendors, accounts, and items have static folders (always displayed). Keeping the current folder selection saves time when making a series of changes or doing inquiry.
Using the Next Function in Grids
The Next (F1) function is useful when it is necessary to select multiple records for entry in a data grid. In most cases, this will involve items, so we will focus on item entry.
Next (F1) may be used any time an item was previously selected from any type of listing populated for the drop down control. For example, if you previously selected by product group, pressing the F1 key will input the next item in the group listing (or group section). You can also build your own "custom" selection listing from items you select using the mouse and keyboard from another selection list.
|
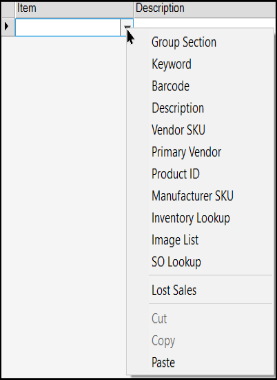
Example The following example can be done from any transaction involving item entry with a data grid. •Activate the Item drop down control on the grid. •Choose "Group Section" from the context menu associated with the down arrow button
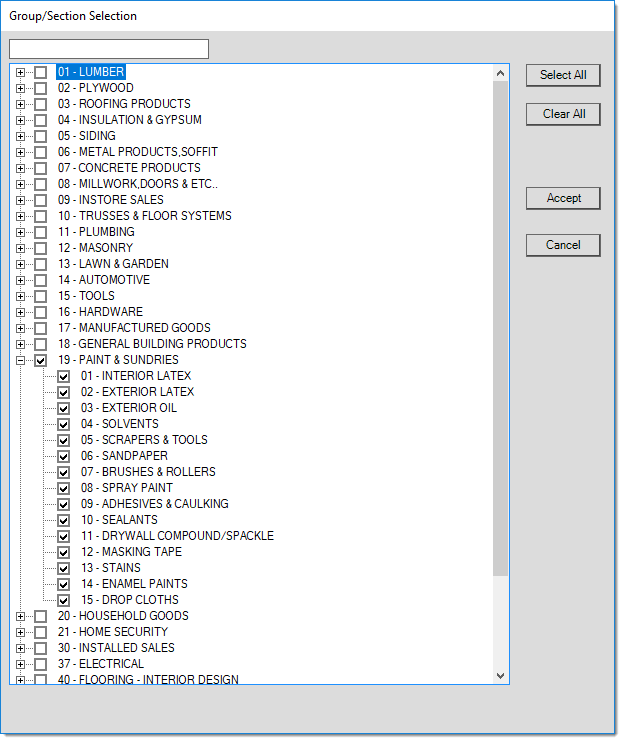
•When the Group/Section Selection dialog opens, choose a group and/or section you know has items. Check the box
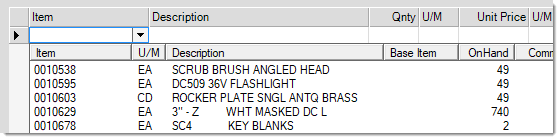
•Choose an item from the selection list (the selection marks the beginning of the selection).
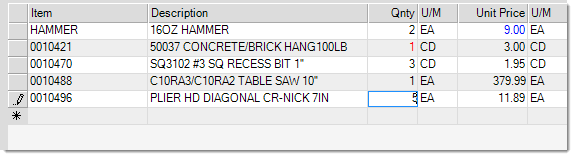
•After choosing an item from the selection list, press F1 (next) to continue selection from there quickly and easily. When the Next (F1) function is pressed from the quantity cell (prior to any other entry), the item's quantity will be set to one (1) automatically and the "next" item will added placed in a new row below. The "next" list is still retained even if you change the quantity and press TAB or use the Next (F1) function afterwards. Making any sort of entry in the item cell (drop down) will break the "next" selection, however, since this causes the selection listing to be rebuilt.
•Until the end of the current selection list has been reached, or something is typed in the item drop down, the Next (F1) function key will continue to add items sequentially from the list.
|